Welcome
To our Bathroom Remodel gallery page. All the bathroom remodel projects we have completed will be found here. Feel free to browse and if you have any questions, please don’t hesitate to contact us.
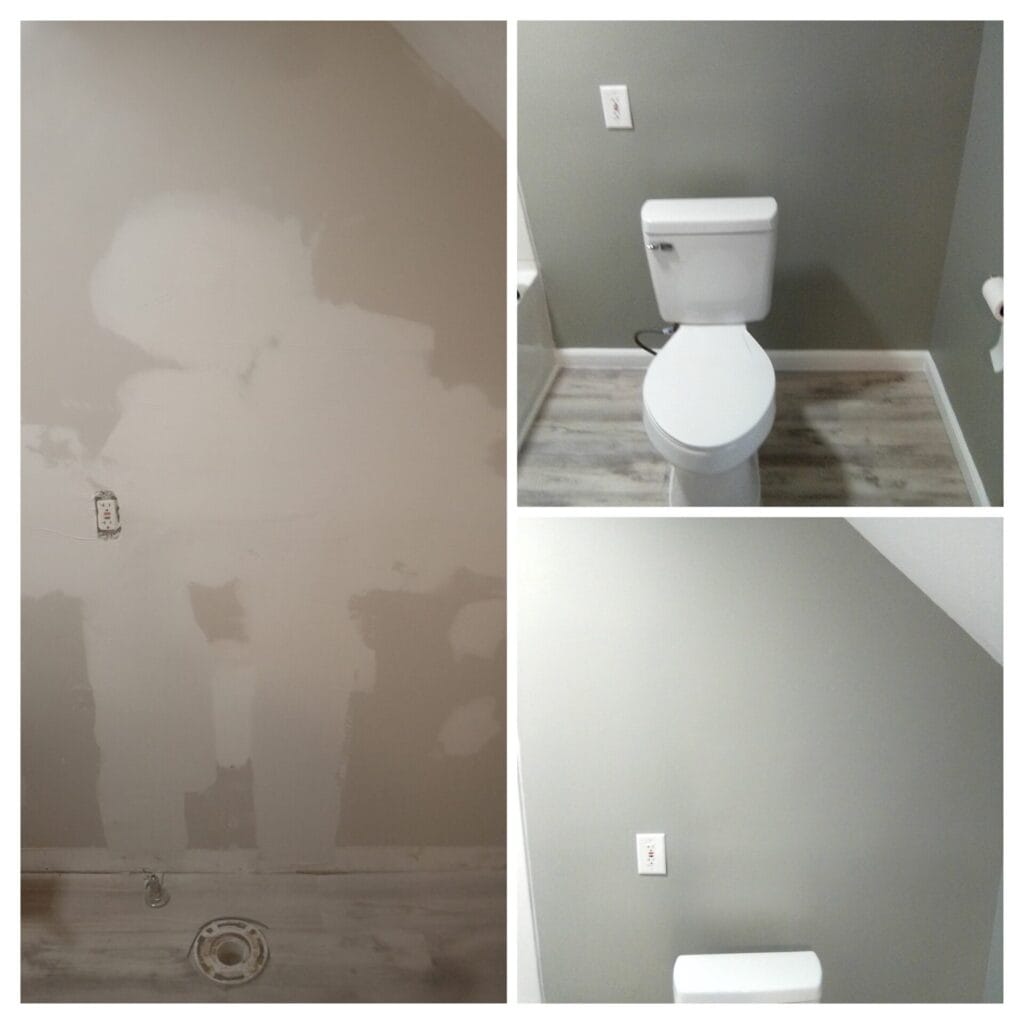
203 Buckingham Ave
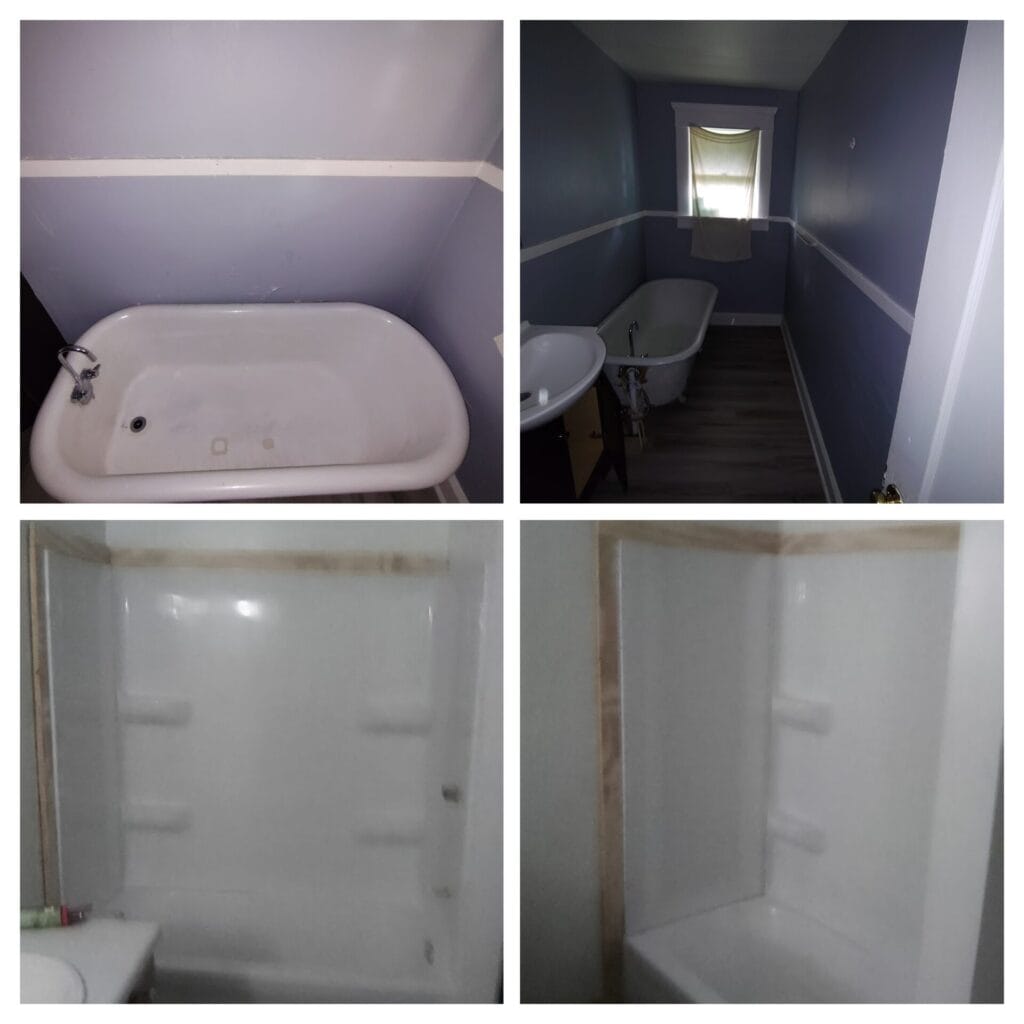
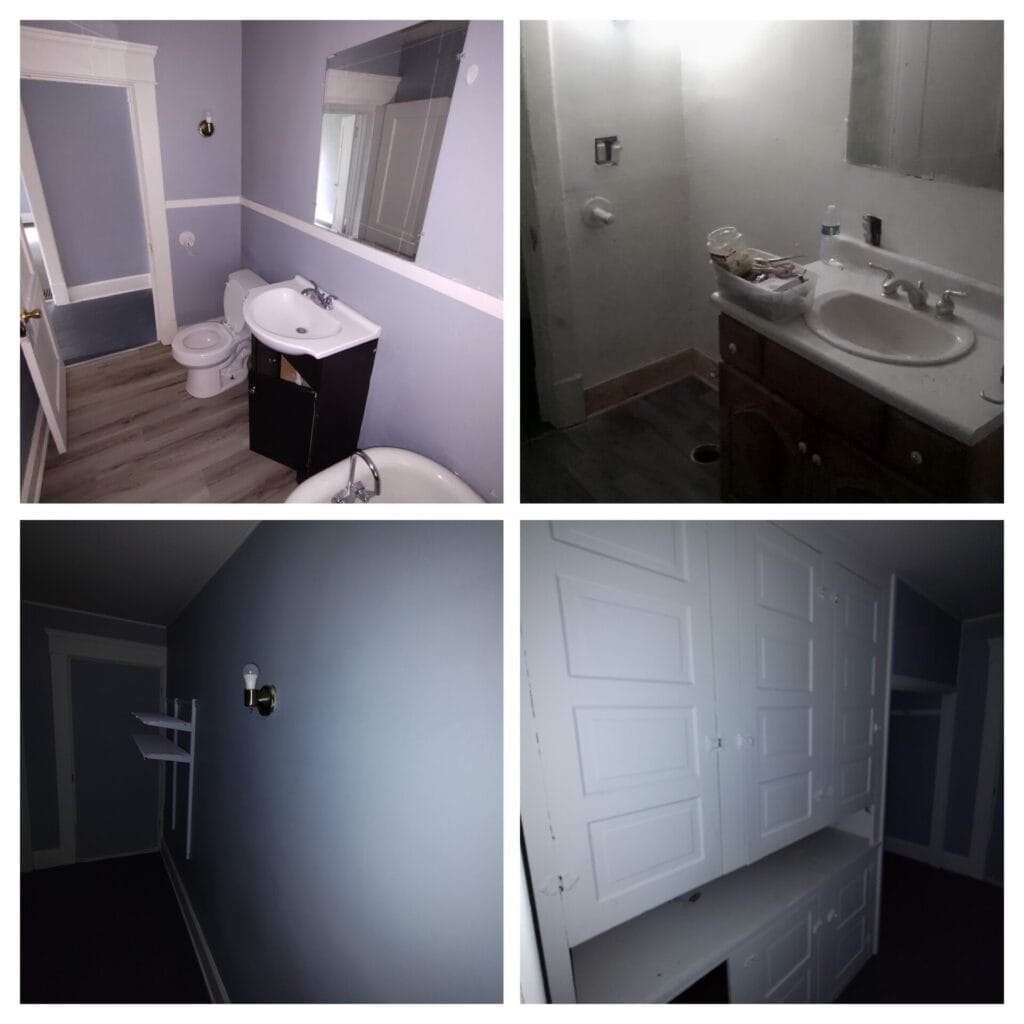
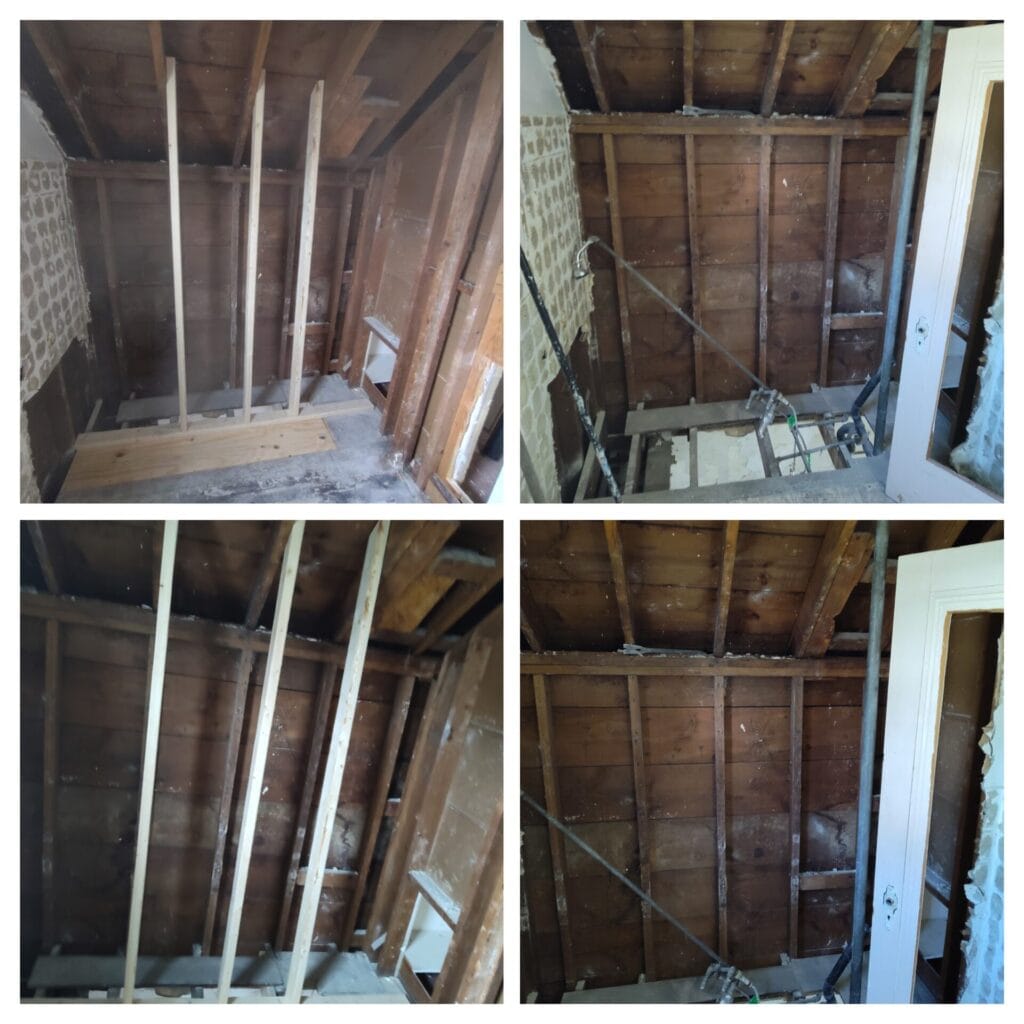
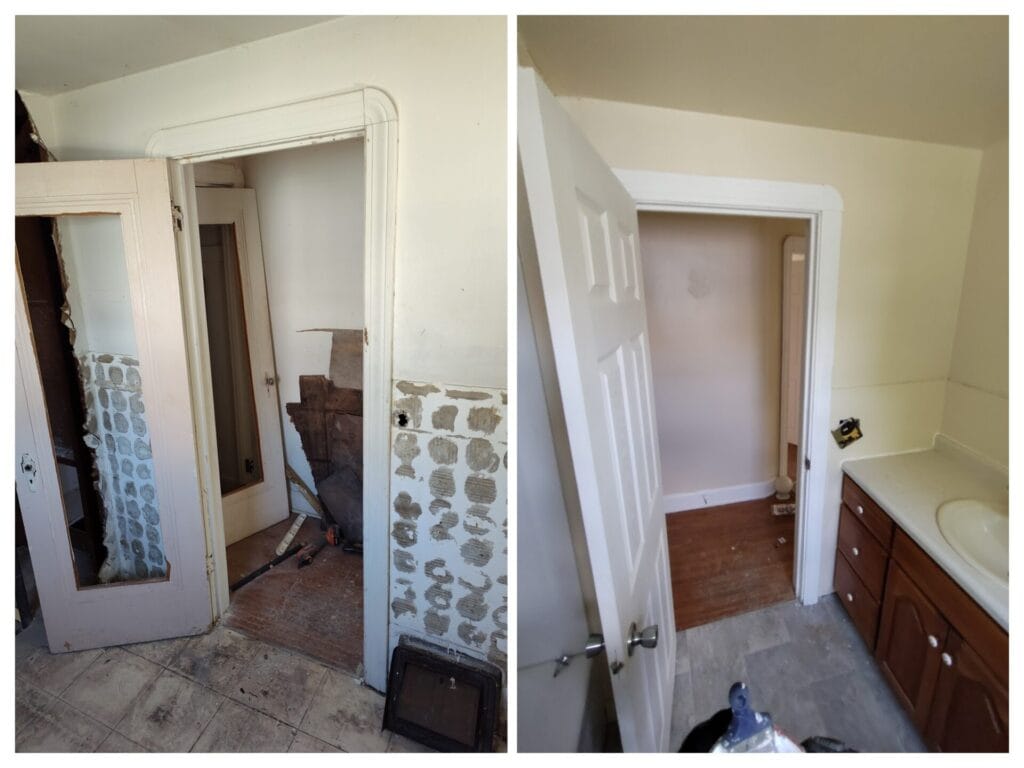
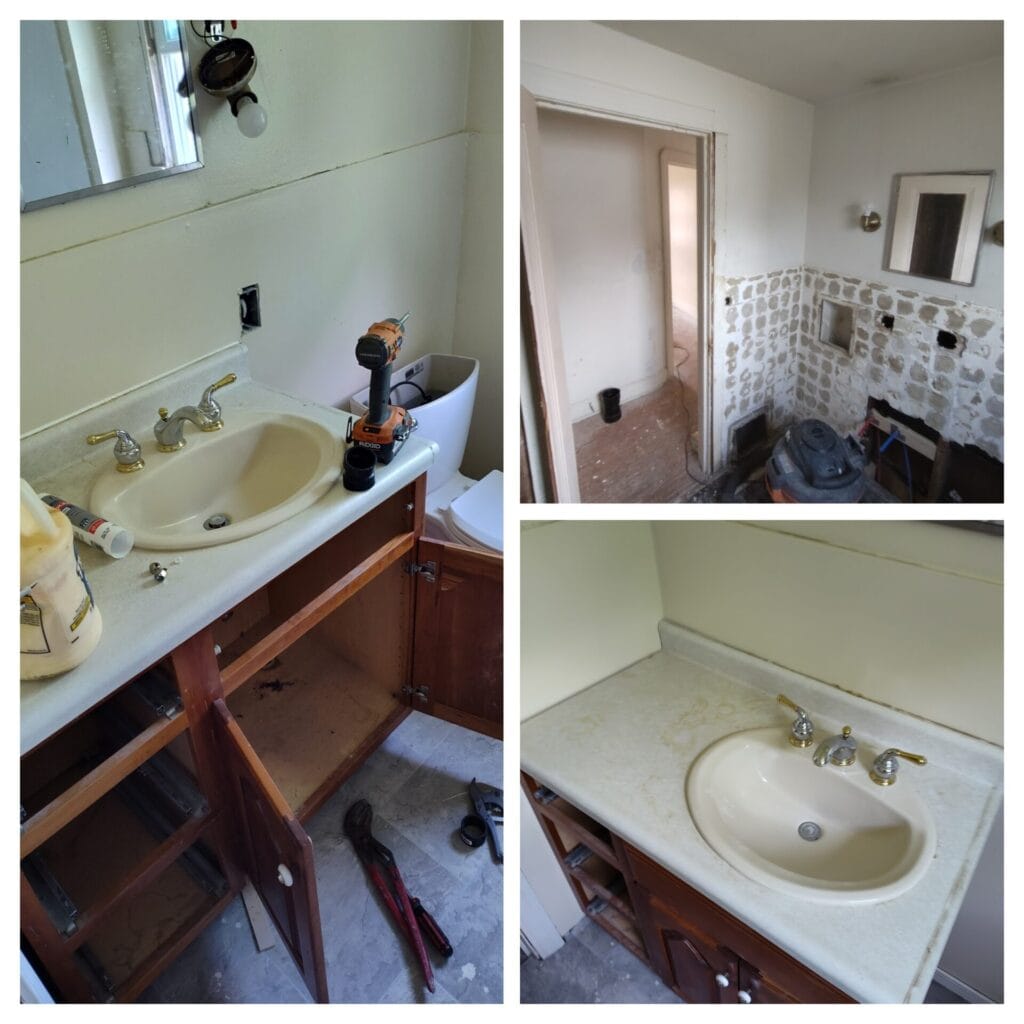
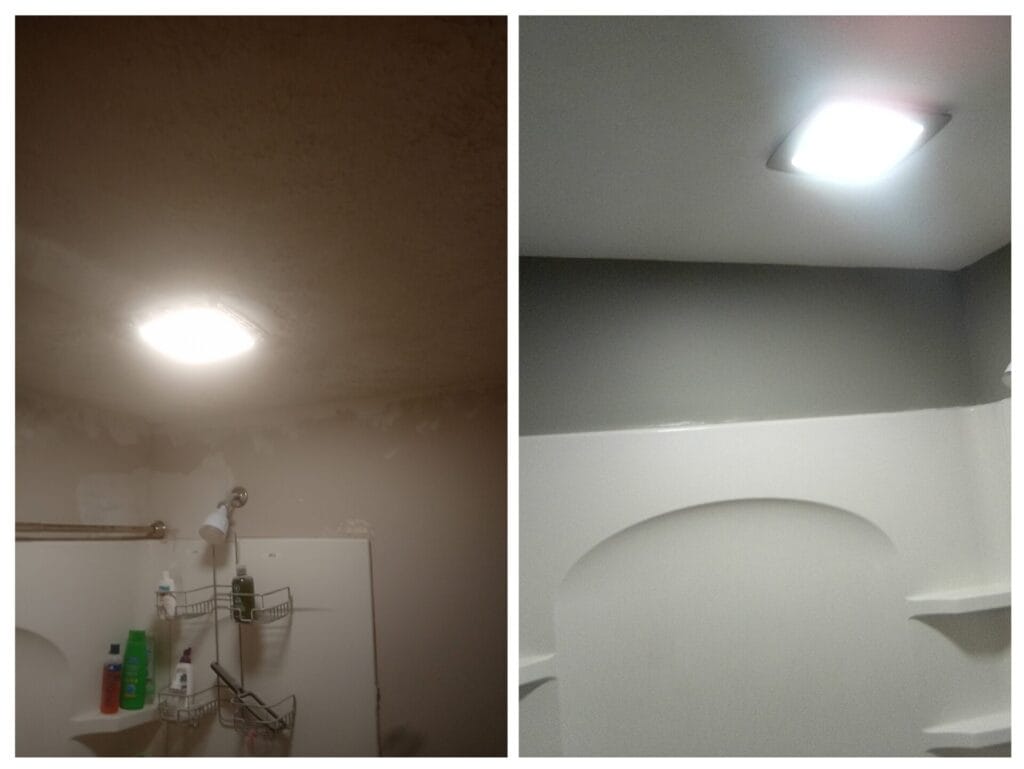
Here is one side to a duplex, the customer wanted to expand the bathroom so there would be more space and also to add washer and dryer hook ups in the bathroom. We took out a wall that separated the bathroom from another small roof doubling the size of the bathroom. We removed all the damaged plaster and old flooring. Removed the old bathtub and window that was above the tub and installed a whole new tub with shower surround walls and install a new shower, all new shower drain and water supply lines. Install a new vanity and sink with new drain and water supply lines, install new toilet, toilet mounting flange and drain and supply line. Hung new drywall on walls and ceiling where it was damaged and to cover up where we took the wall out and stomped it to match the existing pattern. Installed new water supply lines and drain for the washer and exhaust vent for the dryer. Ran new electrical wiring for the dryer and washer. Installed a new exhaust fan/light above shower and wired it in with the existing light. Laid new linoleum flooring and installed hand crafted wood trim around the entire base of the bathroom. Topped it off with fresh paint and bathroom accessories.
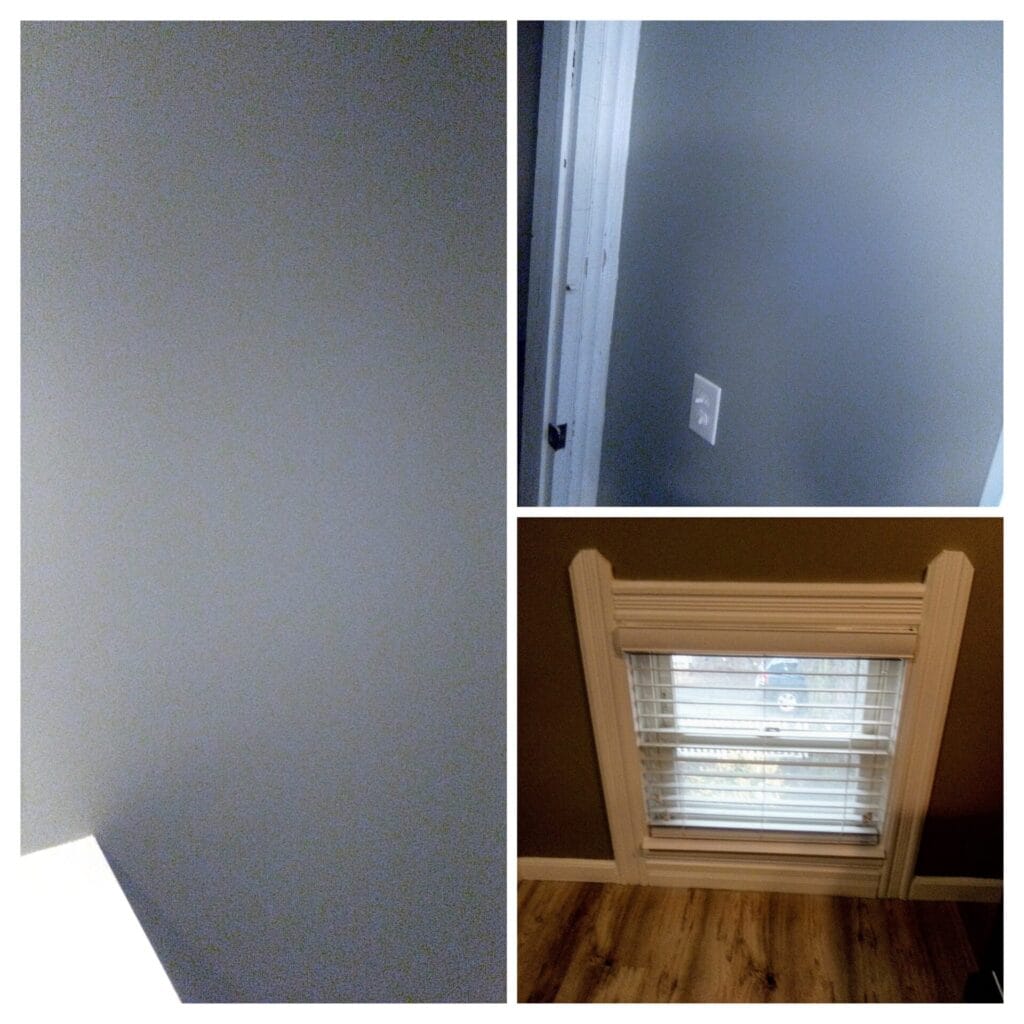
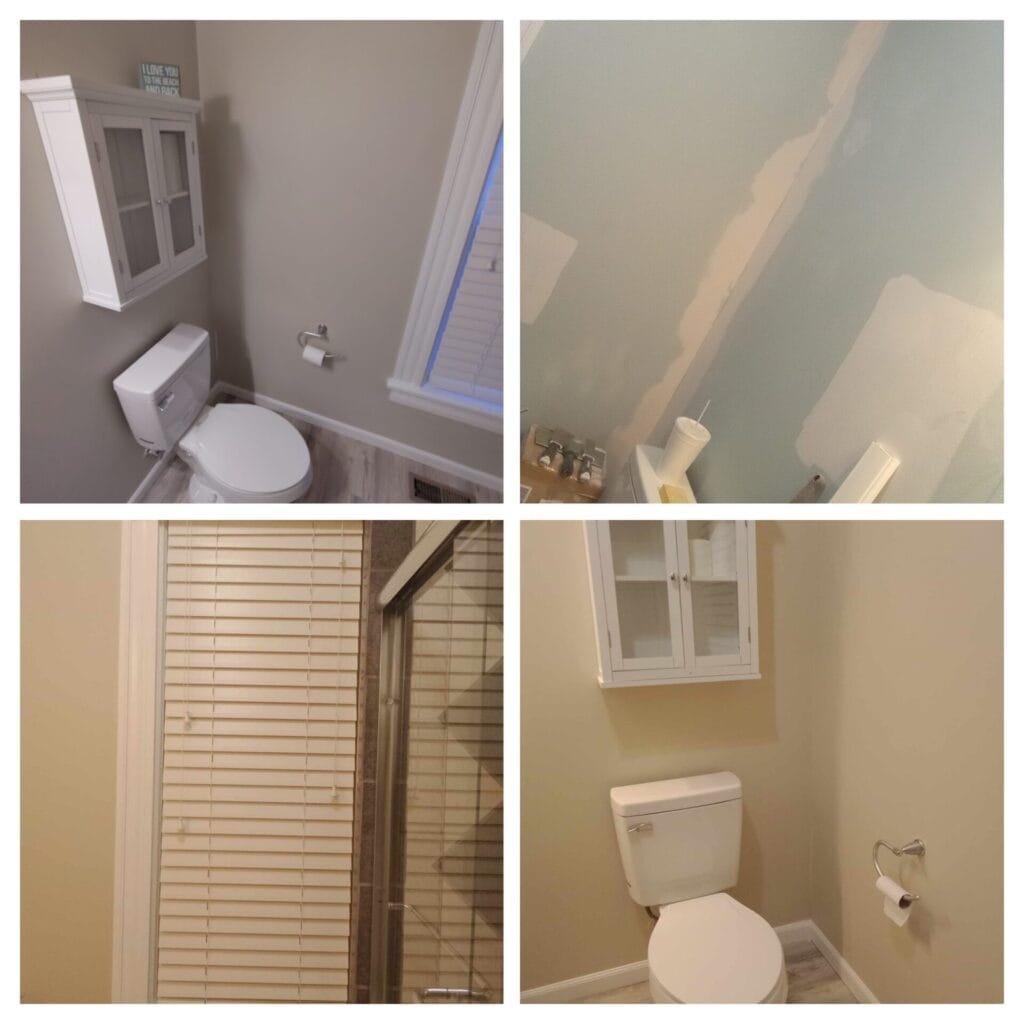
205 Buckingham Ave
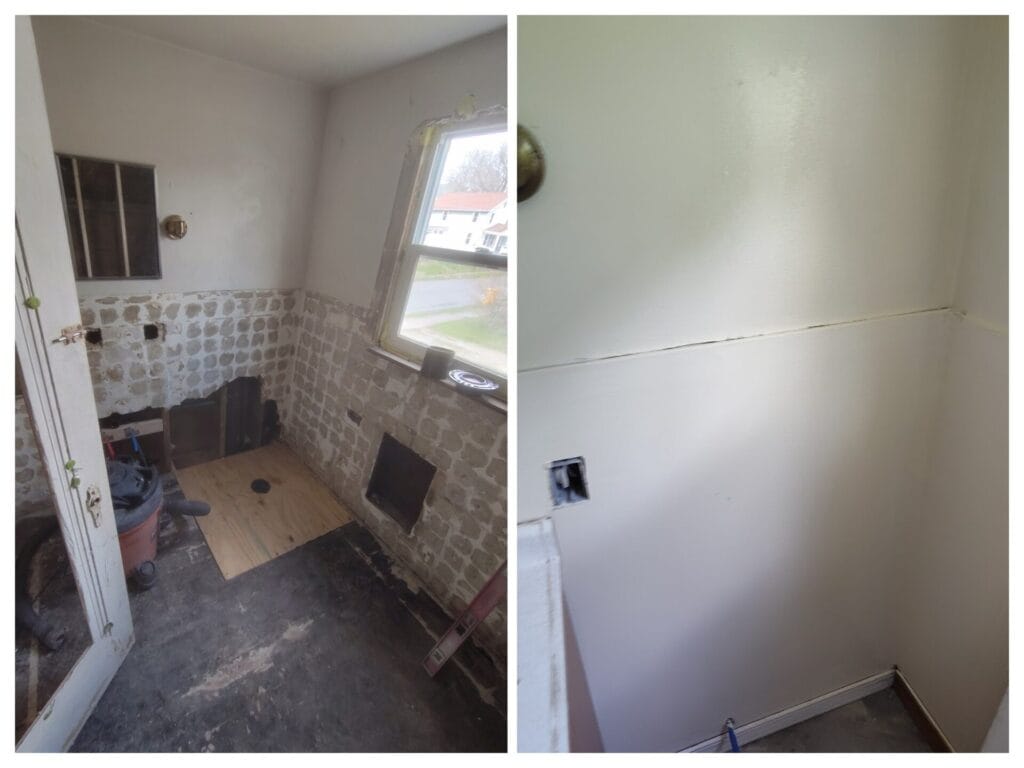
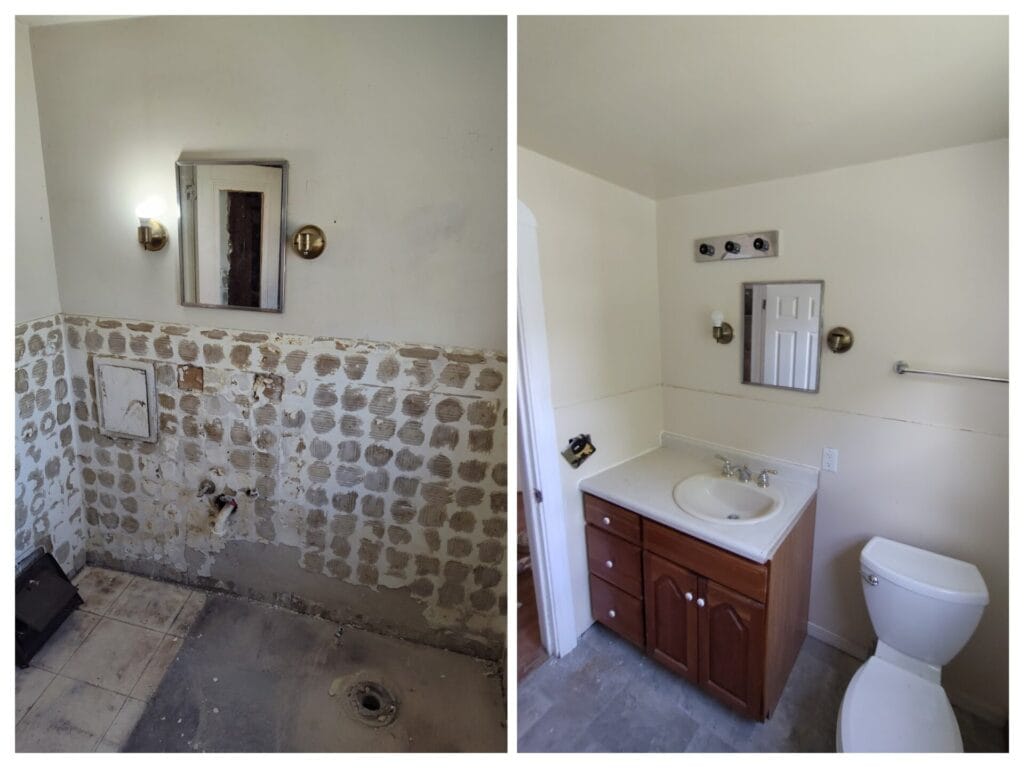
the customer wanted to expand the bathroom so there would be more space and also to add washer and dryer hook ups in the bathroom. We took out a wall that separated the bathroom from another small roof doubling the size of the bathroom. We removed all the damaged plaster and old flooring. Removed the old bathtub and window that was above the tub and installed a whole new tub with shower surround walls and install a new shower, all new shower drain and water supply lines. Install a new vanity and sink with new drain and water supply lines, install new toilet, toilet mounting flange and drain and supply line. Hung new drywall on walls and ceiling where it was damaged and to cover up where we took the wall out. Installed new water supply lines and drain for the washer and exhaust vent for the dryer. Ran new electrical wiring for the dryer and washer. Installed a new exhaust fan/light above shower and wired it in with the existing light. Laid new linoleum flooring and installed hand crafted wood trim around the entire base of the bathroom. Topped it off with fresh paint and bathroom accessories.

133 Arthur Ave
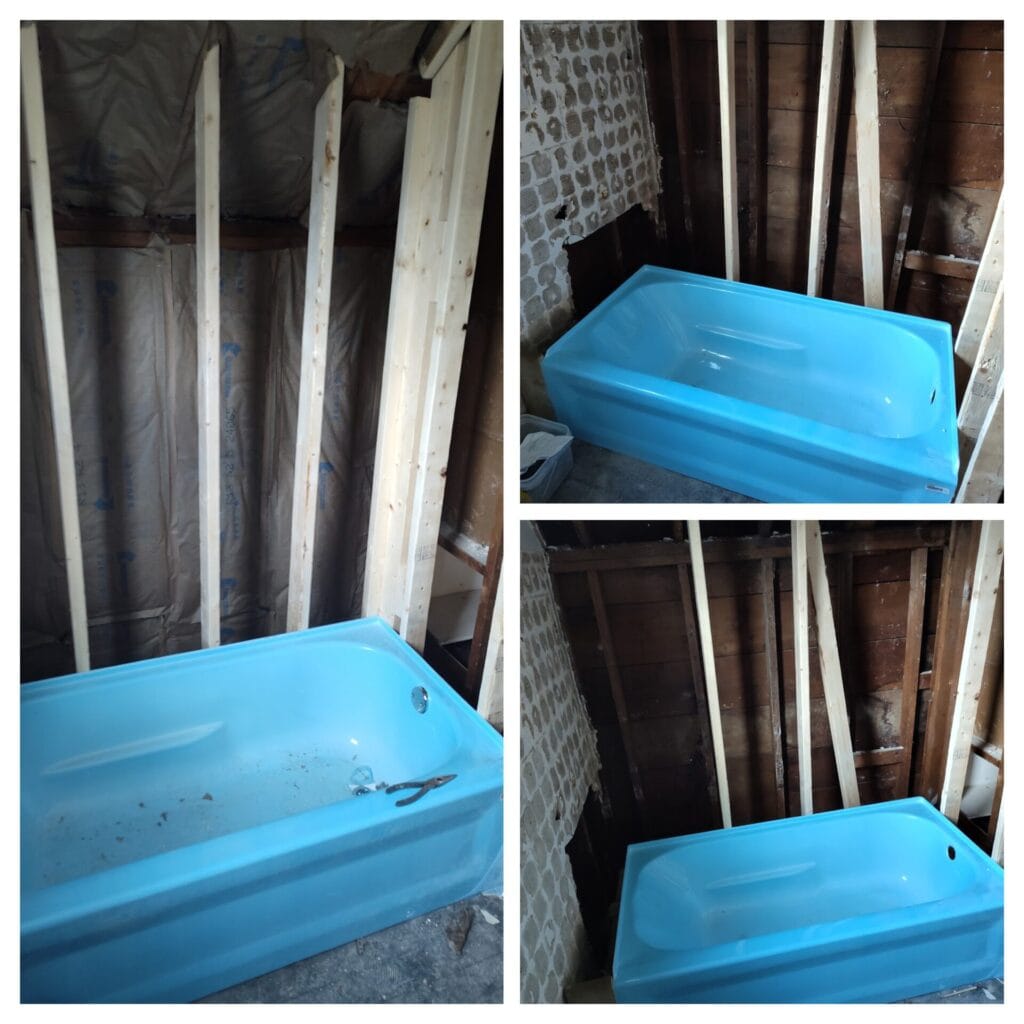
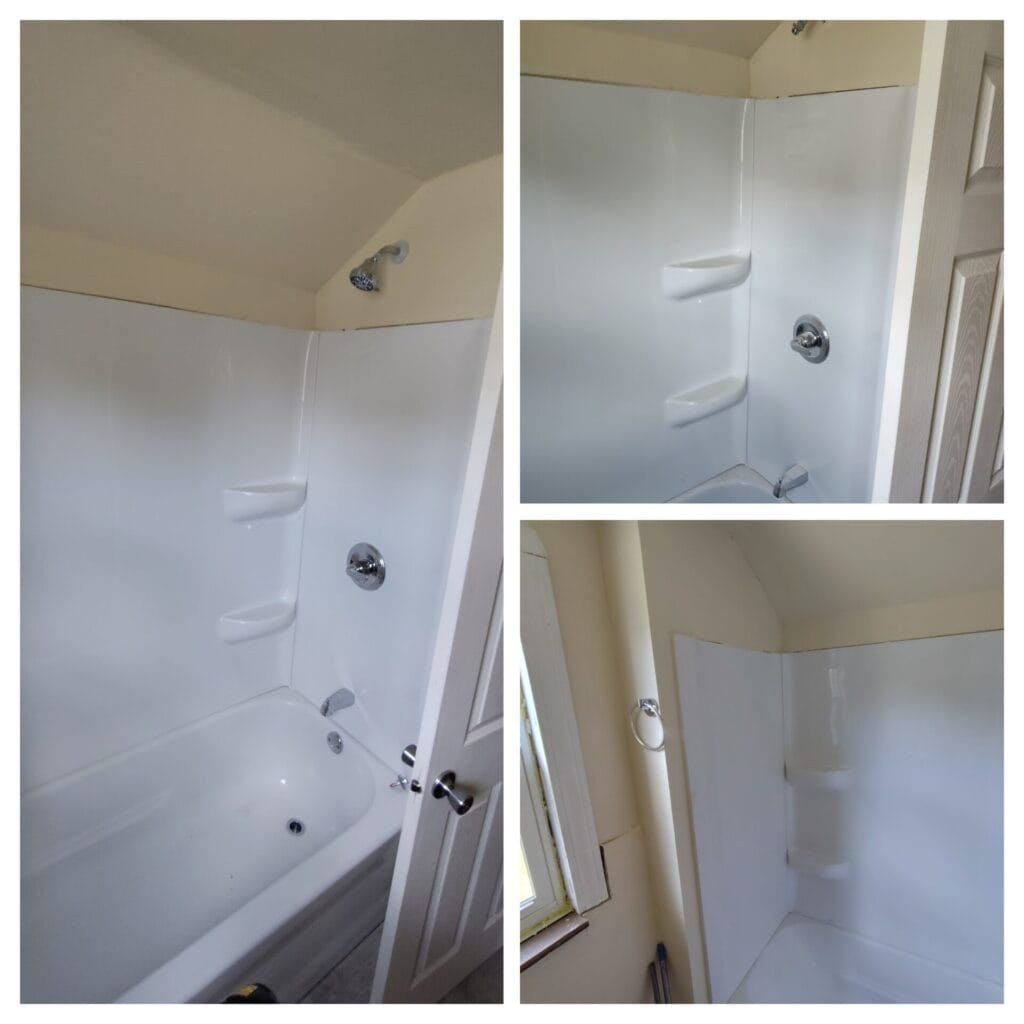
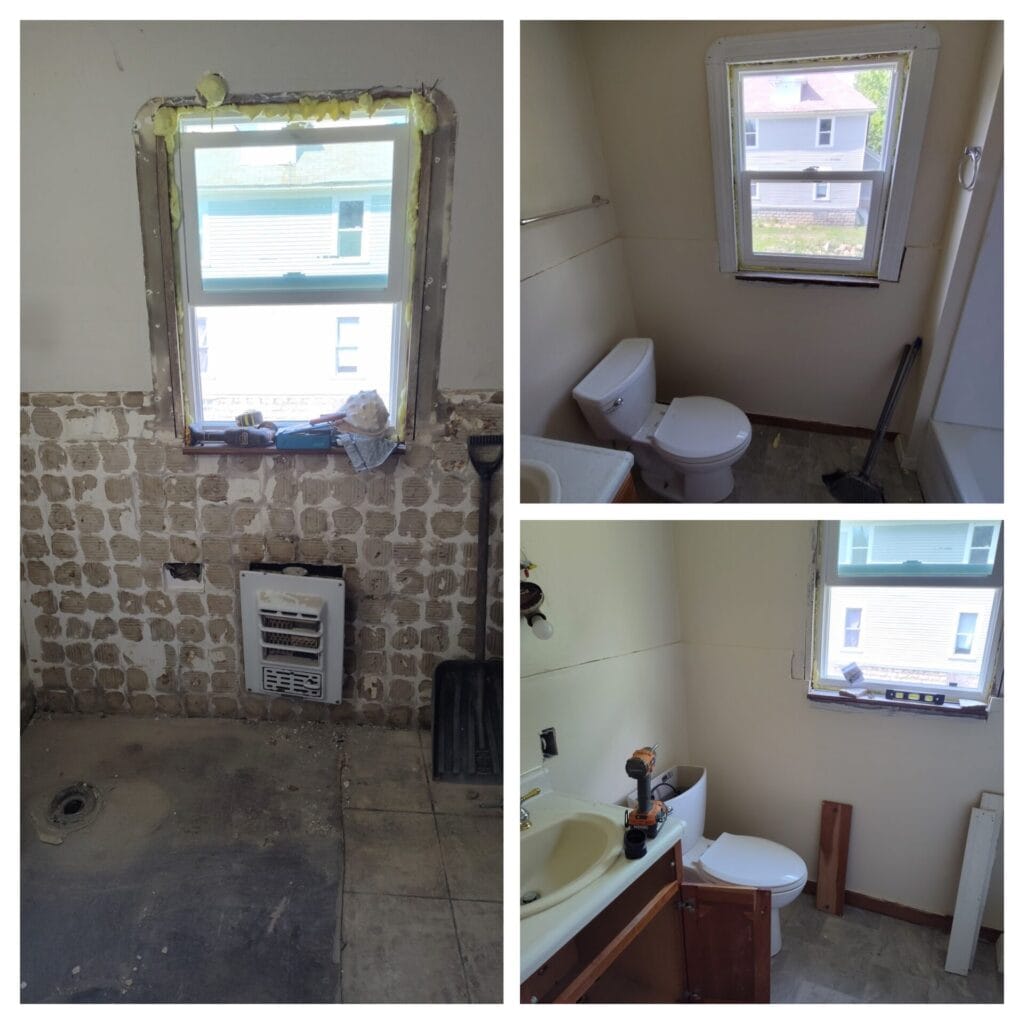
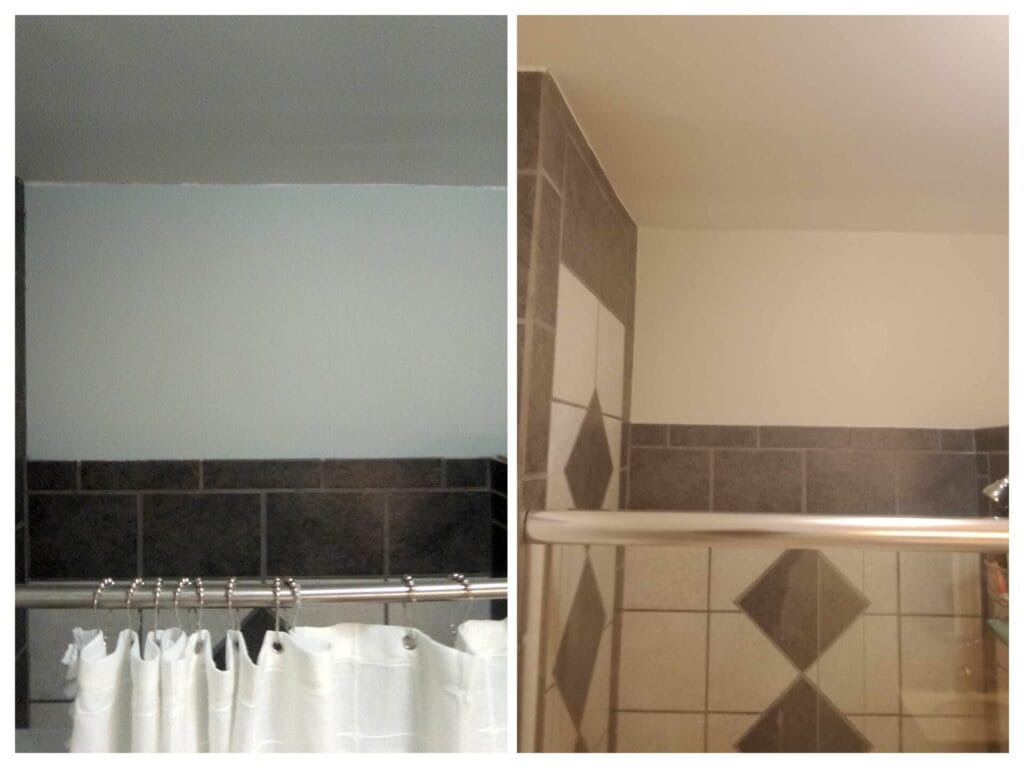
We removed the old bathtub and the tiling around the shower walls. removed all the bathtub plumbing, removed the toilet and all its plumbing, removed the old vanity and sink and all its plumbing. removed the old flooring removed old gas wall heater and removed the old wooden frame window and replaced it with a new vinyl double pane energy efficient window. We built a new wall frame for behind the bathtub and install new insulation then installed a brand-new fiberglass bathtub with matching shower surround walls and new shower head and new water supply lines and new bathtub drain. We hung new 1/2″ drywall on ceiling and on all the walls, installed a new 4″ toilet drain and flange mounting plate and new sub-flooring topped off with new linoleum flooring. Ran new electrical wiring for new light switches and outlets installed a new ceiling exhaust fan/light. Next, we fitted the new vanity and sink into its place and integrated the heating vent through the bottom of the vanity and installed new water supply lines right along with new drain. Painted the ceiling and walls with new paint and added new base mold trim and new window trim and new door casing trim. New vanity sink faucet light switches and covers. Put in a new toilet bigger toilet and topped the bathroom off with new bathroom accessories and door handles & hardware.
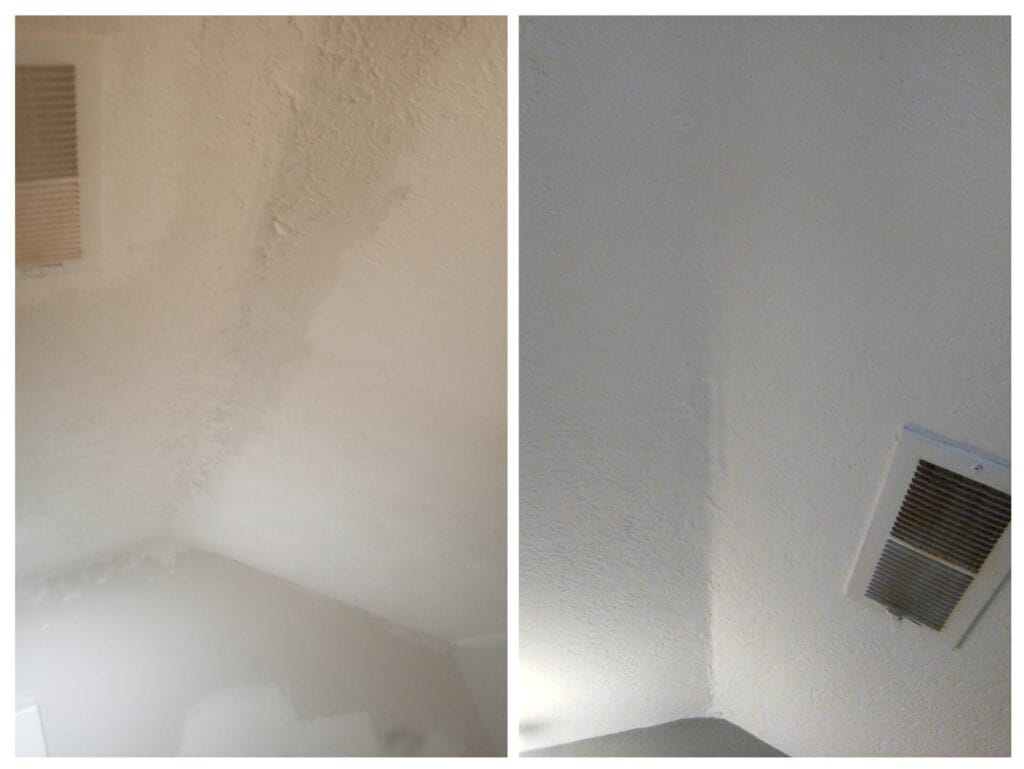
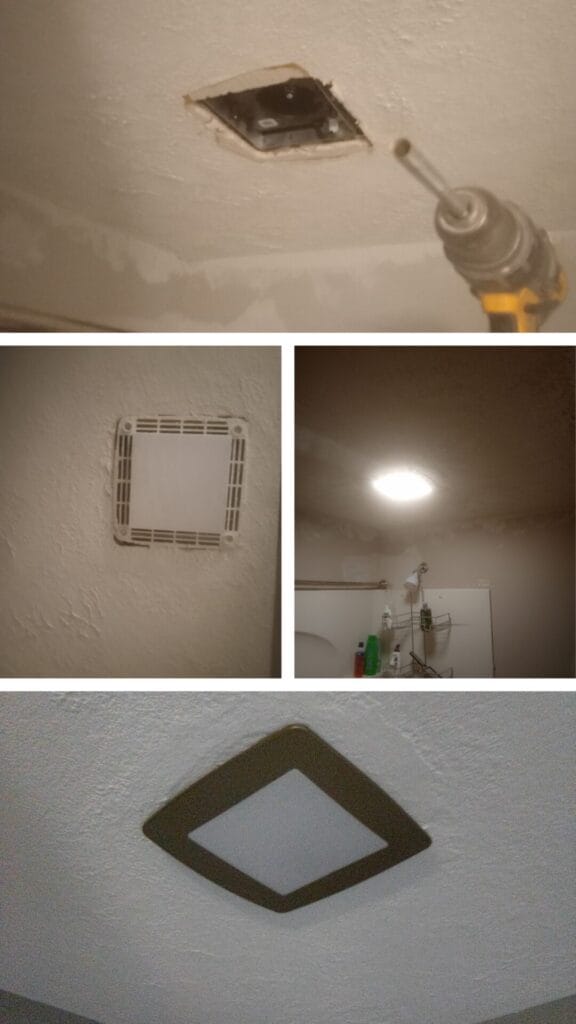
485 Church St
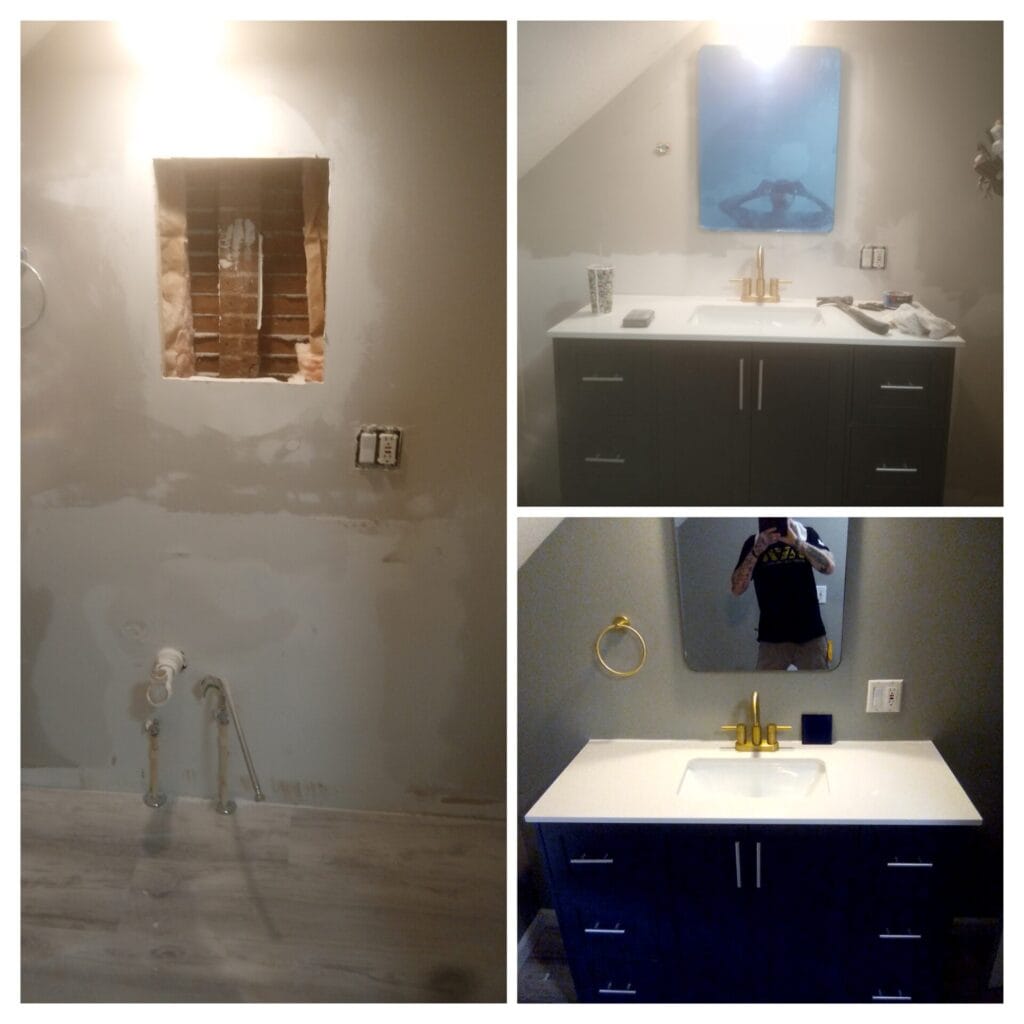
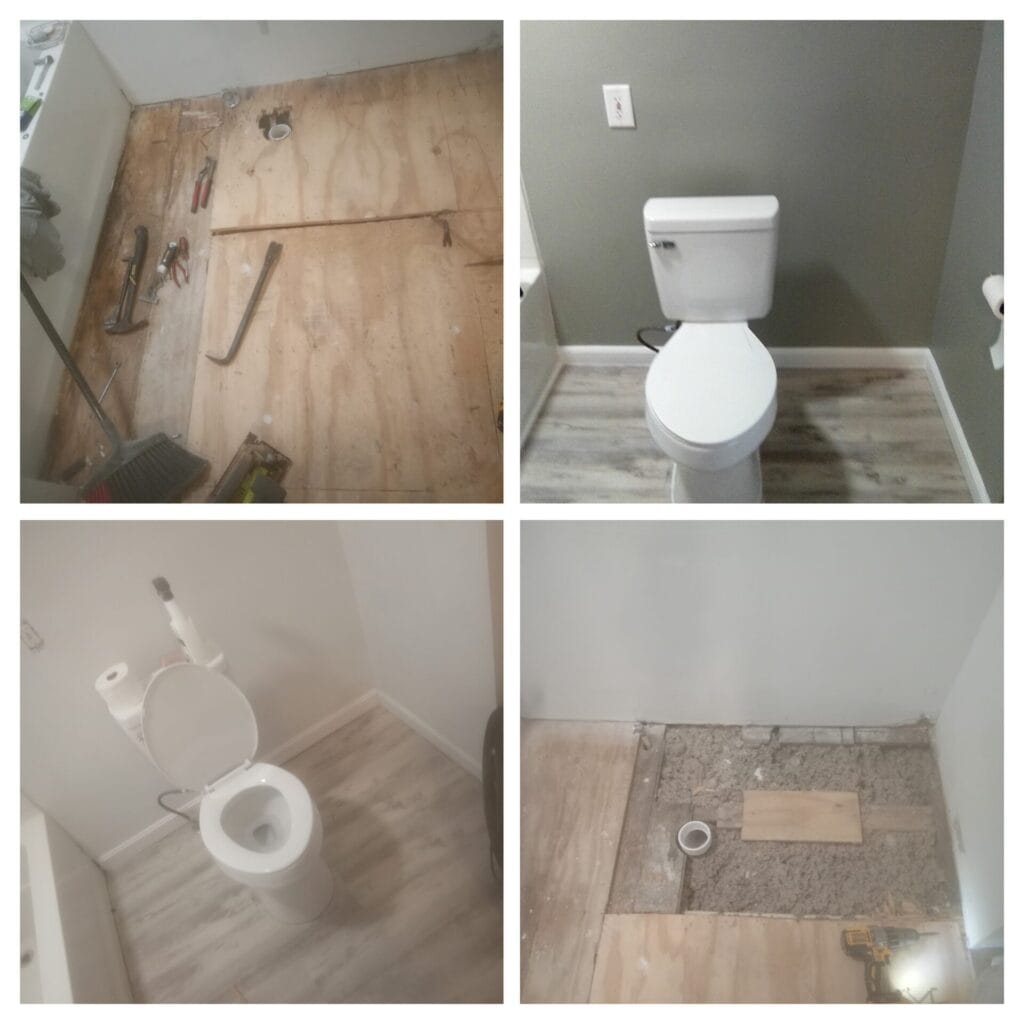
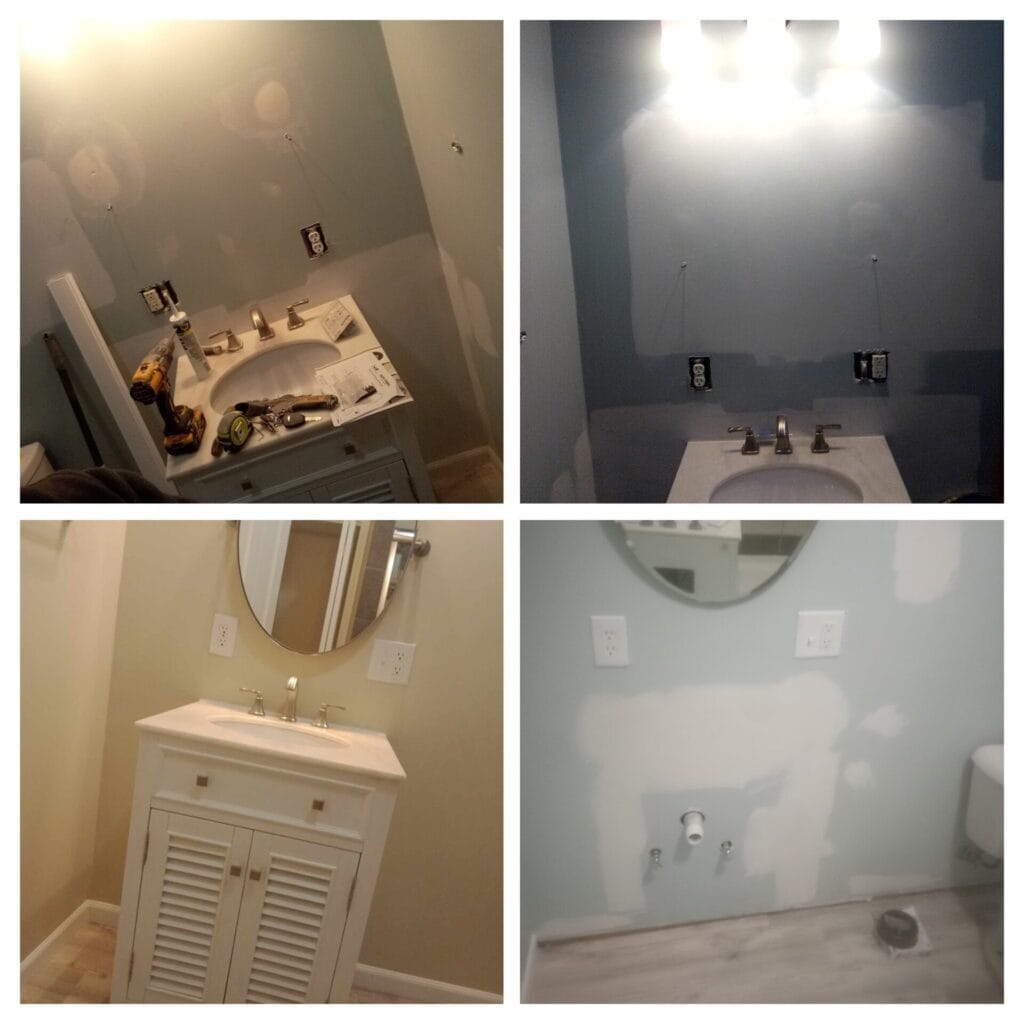
Second-Floor Bathroom – Customer had a leak inside the wall and under the floor of this bathroom that damaged the two rooms below it, also they had a few other contractors come and start doing some work, but they never came back to finish the job, so the customer reached out to us. This second story bathroom we had to remove the new flooring the previous contractor installed due to there was black mold under it so we removed the sub-flooring as well that was covered in black mold, we treated the black mold and waited to insure it was completely gone. then we had to move the toilet drain a little bit further away from the wall because the new toilet was not going to fit, once we finished installing the new toilet drain, we laid down new sub-flooring and started working on the drywall patch work that needed to be done on all the walls. we then removed the old vanity and fitted the new vanity into its place and added the new white marble sink/counter-top to set the vanity off nicely, above the vanity the customer wanted a recessed medicine cabinet with over-sized mirror. Built the framing for the new medicine cabinet inside the wall then installed the cabinet in the wall. The customer also wanted new exhaust fan/light installed in the ceiling and removed the existing exhaust fan that was already there. We attached the new exhaust fan/light to the pre-existing vent Shute and electrical, so it still turned on with the same light switch. The ceiling where the slope and flat part of the ceiling comes together was starting to crack and look bad, we patched and filled the cracks and when it was dry we mud stomped over the repaired areas to match the rest of the ceilings existing pattern. Painted the ceiling and walls with all new fresh paint and re-laid the new laminate flooring followed by installing the new colonial base trim around the base of the bathroom. install a new toilet and supply line and shut off valve. Install new water supply lines, shut off valves and drain for the vanity sink. Finished the bathroom off with gold bathroom accessories and vanity drawer/door handles and a gold faucet for the vanity sink.
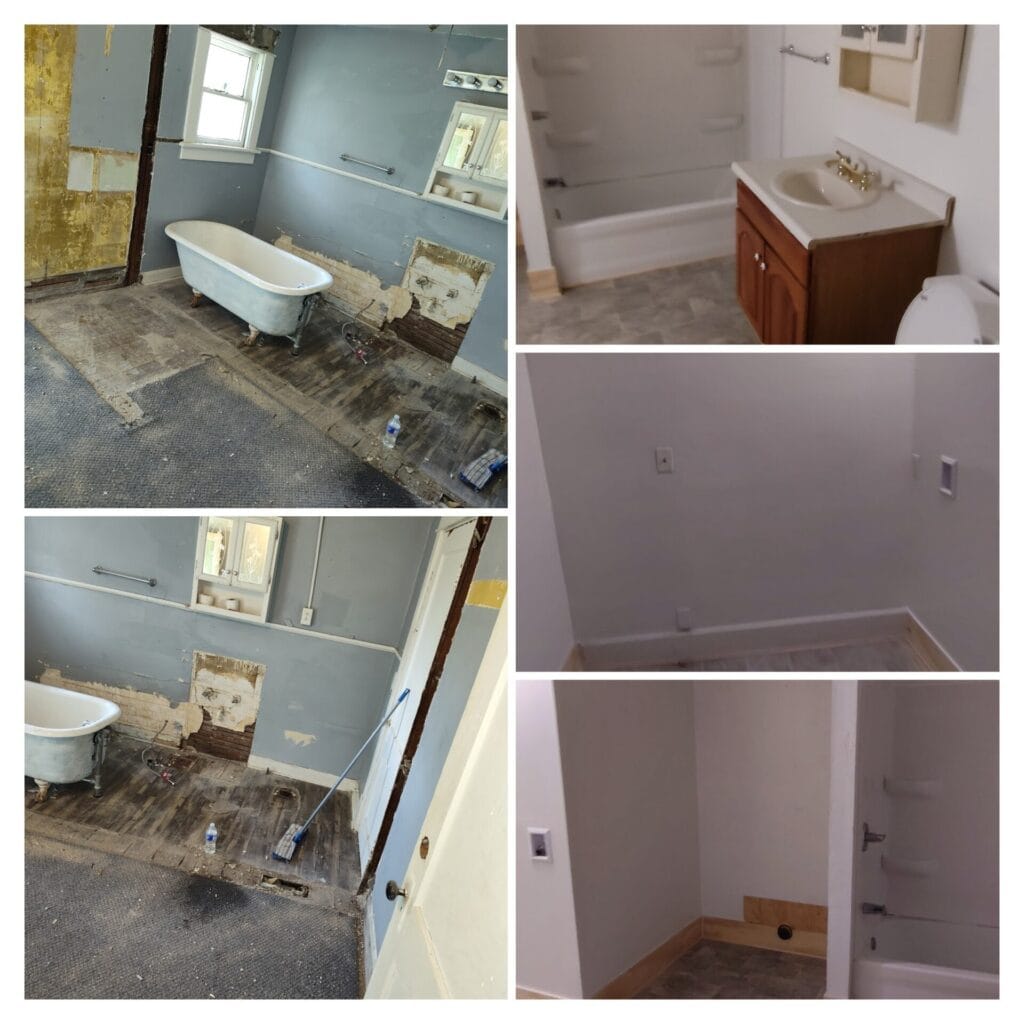
485 Church St
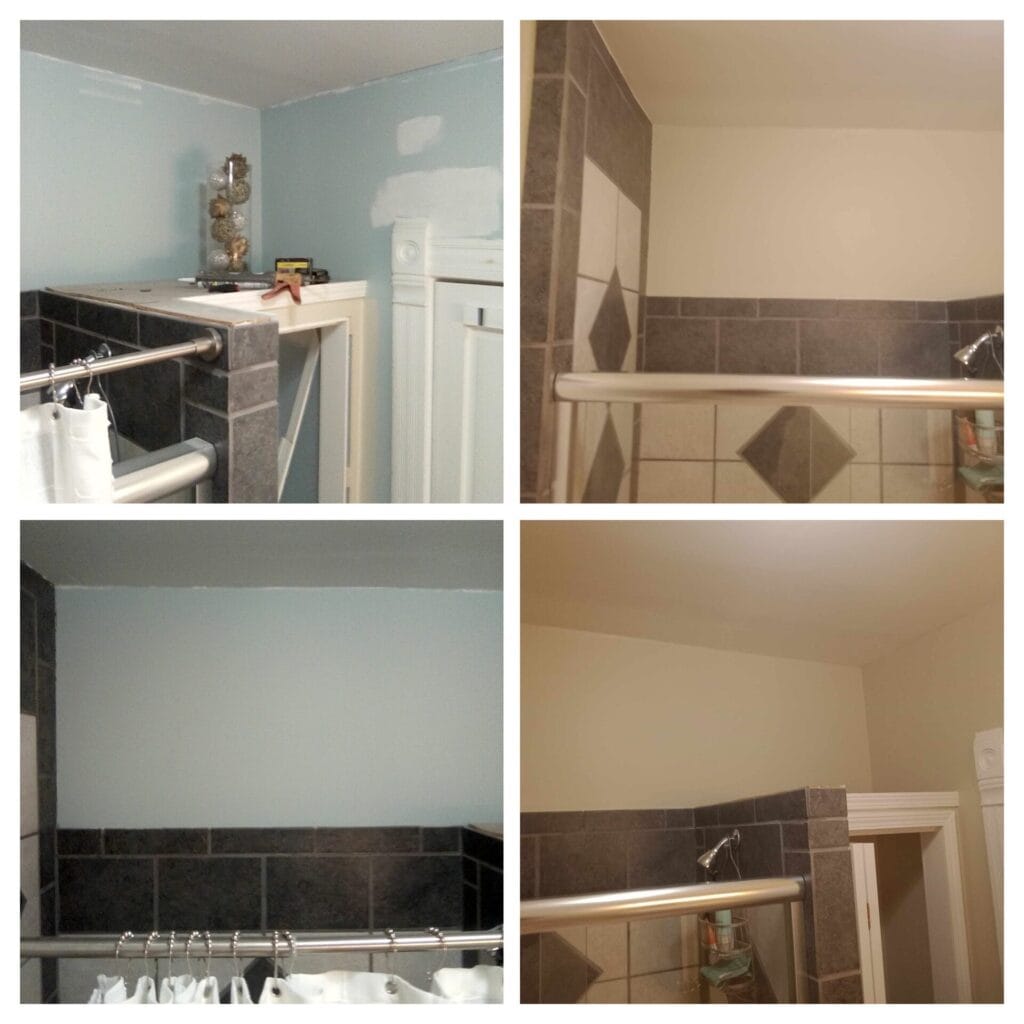
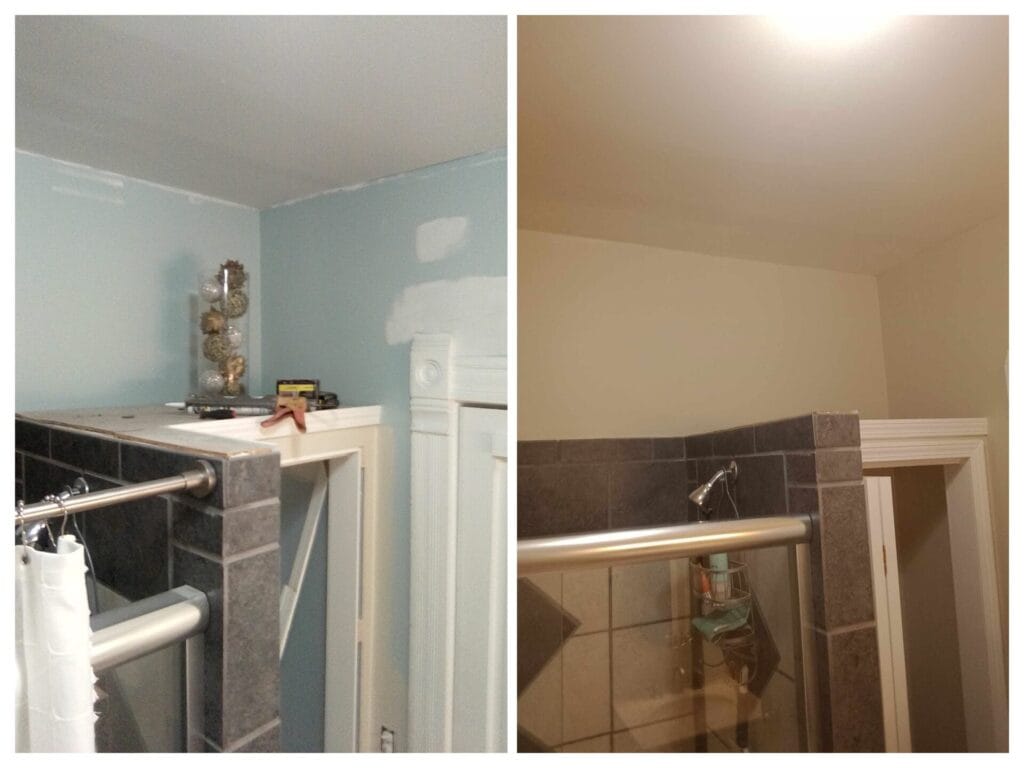
First-Floor Bathroom – This bathroom had some damaged done to it from the pipes leaking in the bathroom above. The floor joist was severely damaged and had to be replaced, once we finished that and leveled the floor out we had to remove the old vanity and sink, toilet and old flooring to replace the damaged sub-flooring. we removed the old plumbing for the vanity sink. We replaced the sub-flooring and installed a new toilet flanged mount and laid new hardwood flooring. Fixed the spots in the drywall on the walls and ceiling, once all the drywall work was done it was time to paint the ceiling and walls, we then installed a new vanity with a white marble sink with all new water supply lines, shut off valves and new drain, topped the marble sink off with a new stainless-steel faucet. Above the vanity we hung a new oversized oval shaped swivel mirror, its stainless-steel hardware and frame matched the stainless-steel faucet. Next, we installed a new stainless steel light bar above the mirror just replaced the old light that was there and used the same electrical connections. Now we have to repair some of the tile that surrounded the walk-in shower, so we re-mortared the back board of the tiles and regrouted the shower and made it look like new! Finally, we finished the bathroom off with all stainless-steel accessories and hardware so everything would match.
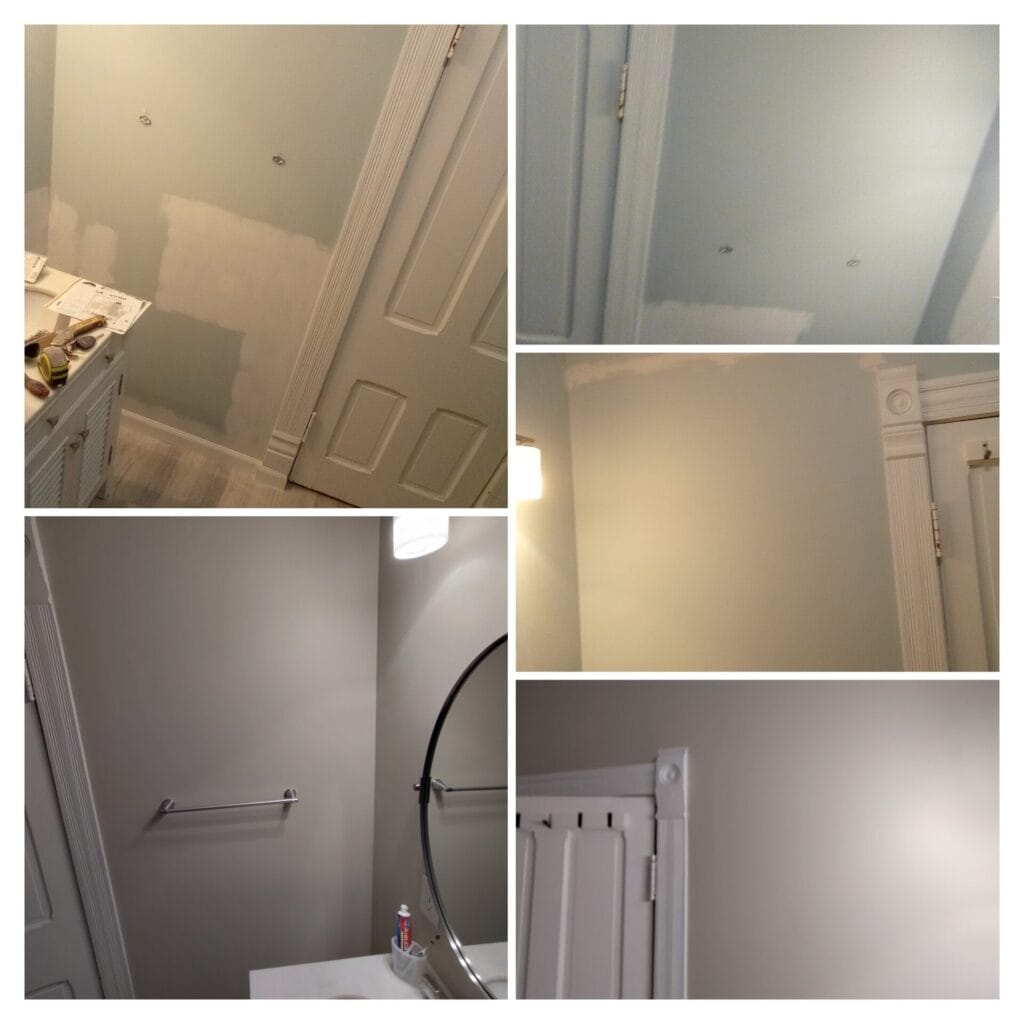

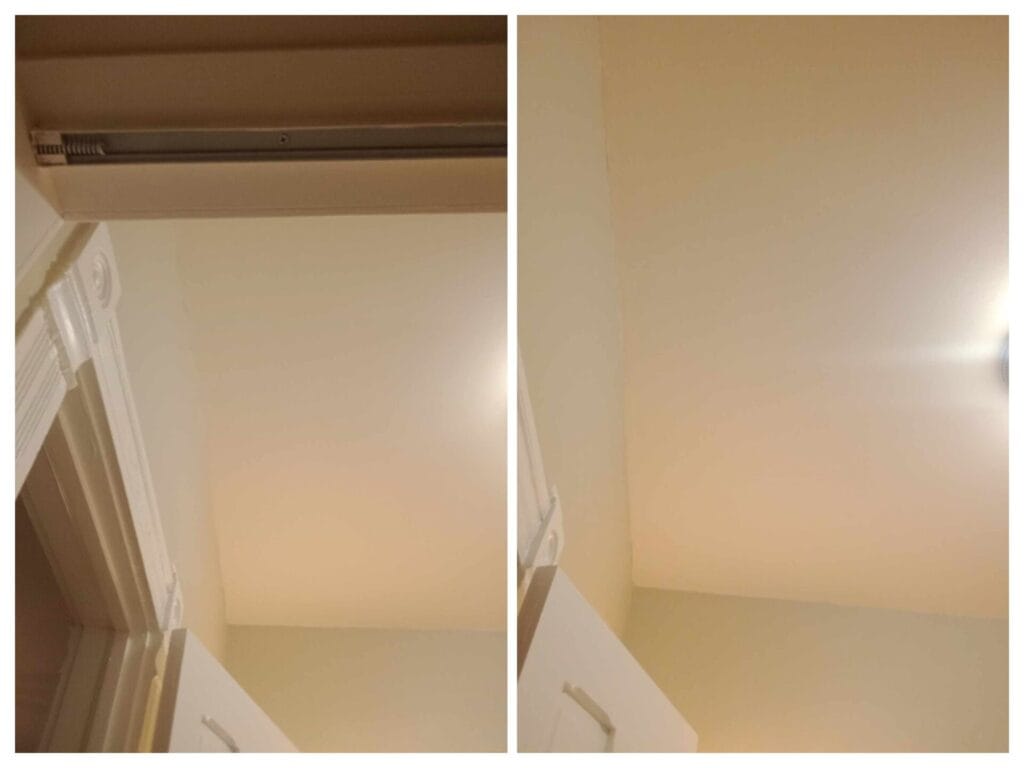
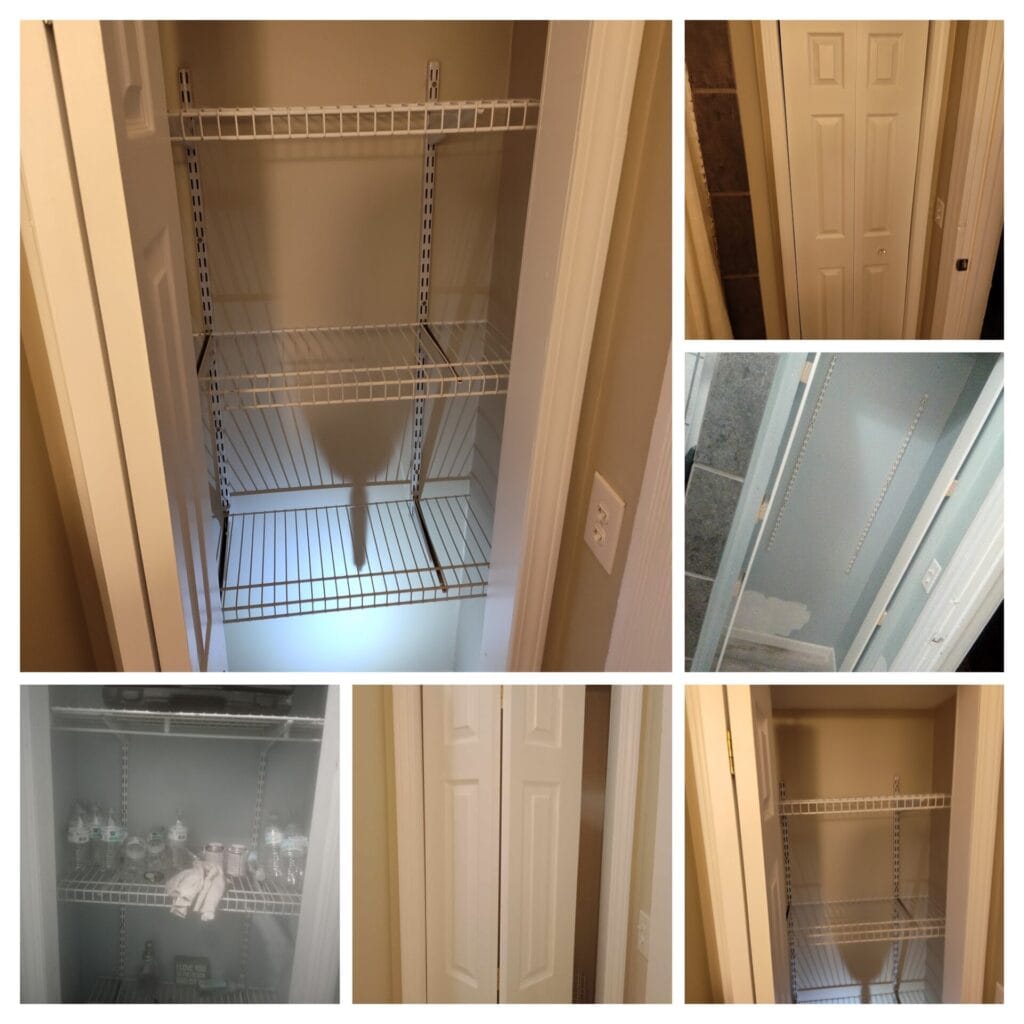
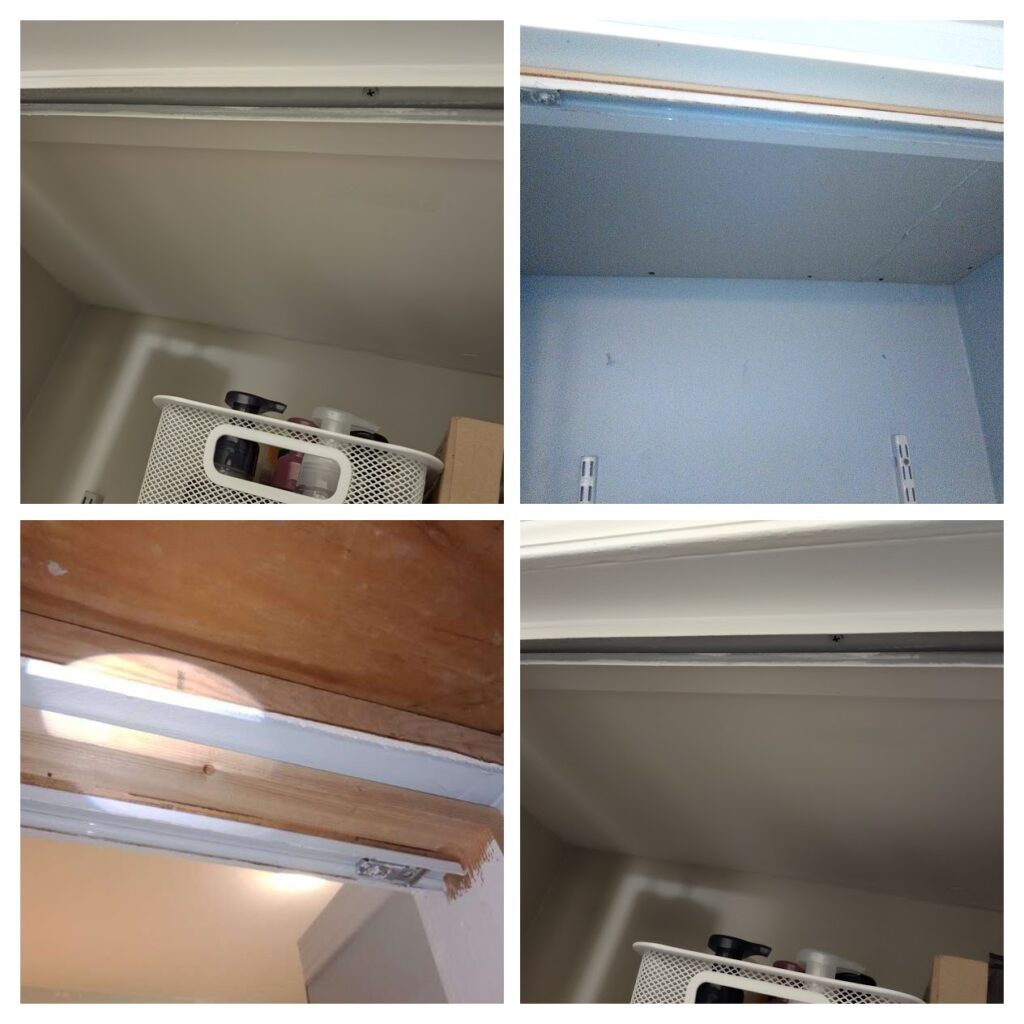
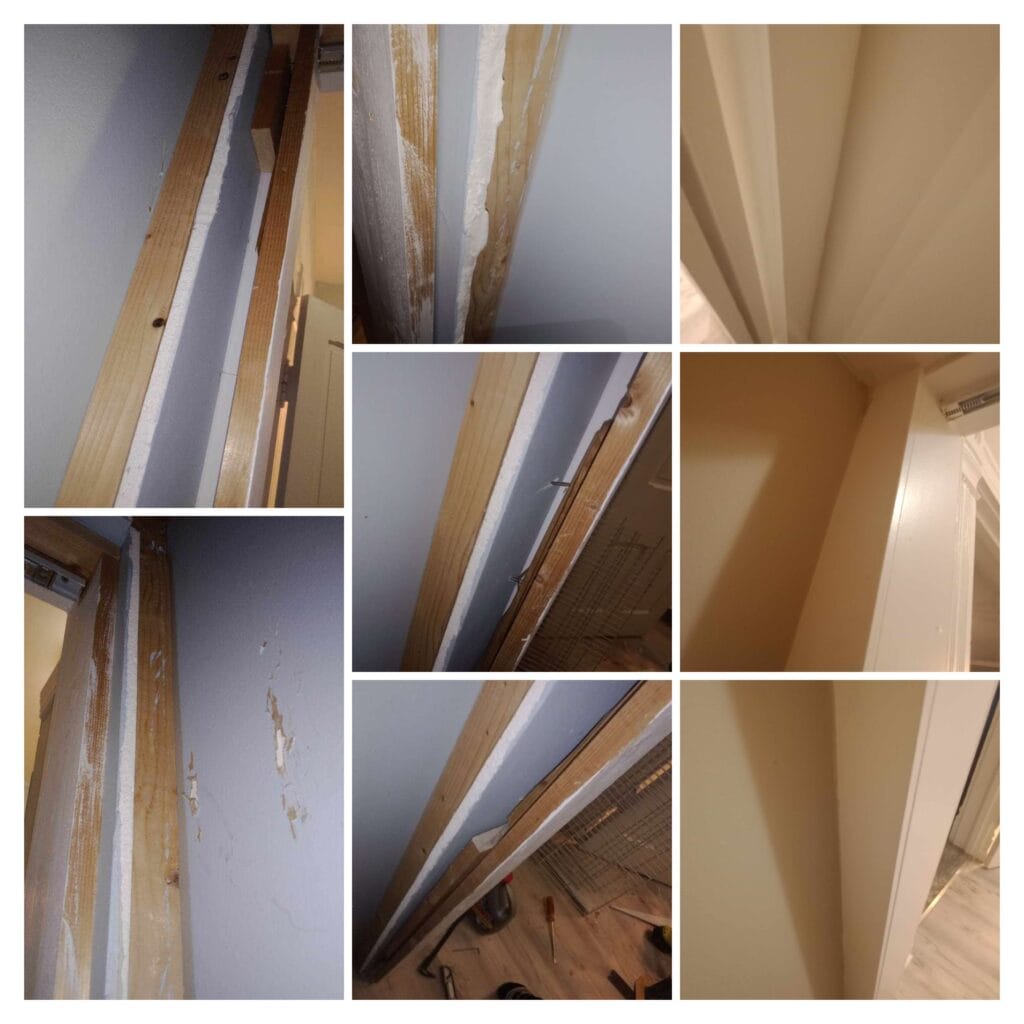
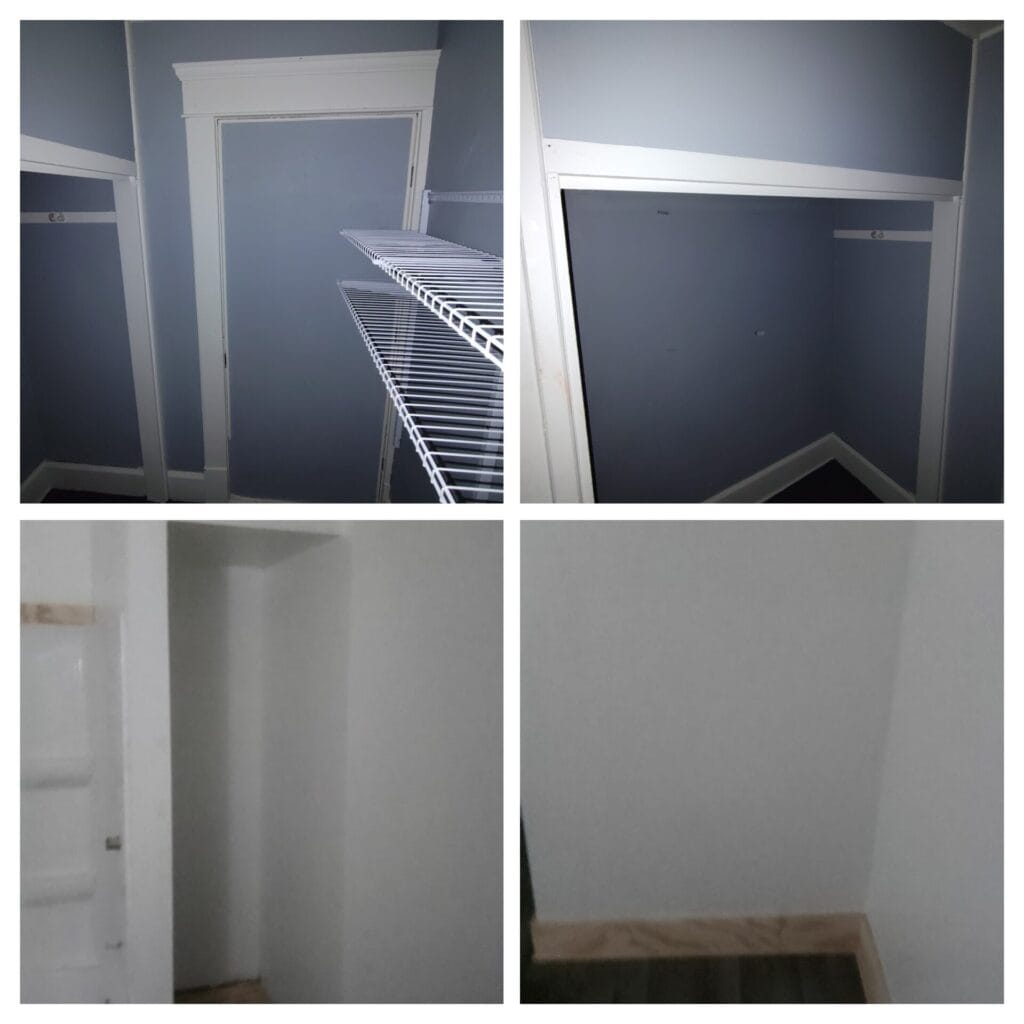
First-Floor Bathroom Closet – So here is the closet that is in the first-floor bathroom from above. The closet was added in at some point by another contractor before, well as you can see, they got the job done, but didn’t do it completely right. The ceiling had gaps in it and wasn’t properly secured to any kind of framing, the door casing wasn’t finished or sealed on the inside and the door tracks were not straight nor centered so the customers closet doors would constantly fall off the tracks. So, we removed all the door casing trim around the outside of the door to fully expose the door casing. We noticed that the door casing was not square up and down nor was it the same size, we removed the door casing and replaced it with a new elegant white door casing that was same size on top and both sides and matching door trim to seal off the door casing on the inside of the closet door as well as the door trim on the outside of the door. once we had the door casing hung and square and all the trim put back up around door casing we re-hung the door tracks and made sure that it was center of top plate of door casing and the pivot bracket was closet to where we needed it to be so we could start or hanging the bi-fold doors back on the tracks once we got the door where it needed to be to function as its intended too we installed the new colonial base trim mold around the base of the closet, we hung new 1/2″ drywall on the closet ceiling and after we built and sturdy frame and mounted to the studs in the walls. We proceeded to paint the walls and ceiling to match the bathroom and when the paint was dry enough, we installed the new wire rack shelving. We then put the new stainless-steel closet door handle on and that finished up the closet.