Welcome
This is our Renovations Completed Project gallery page. All the photos seen in this gallery was completed by our build team. There may also be some photos that we assisted our fellow renovations companies with their project. Please feel free to browse through the gallery and if you have any inquiries or questions, please feel free to get in touch with our team today.
10 Locust St
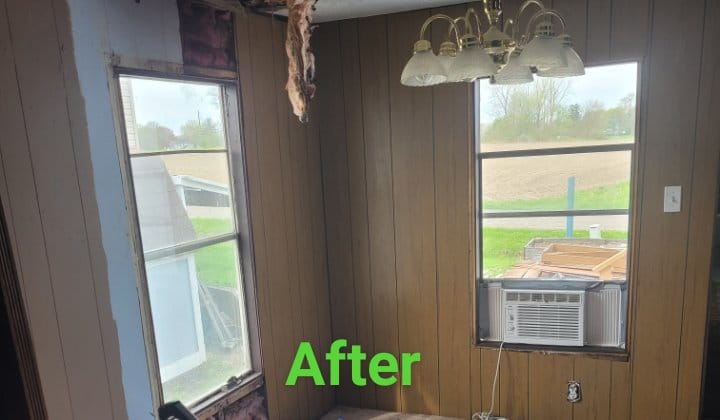
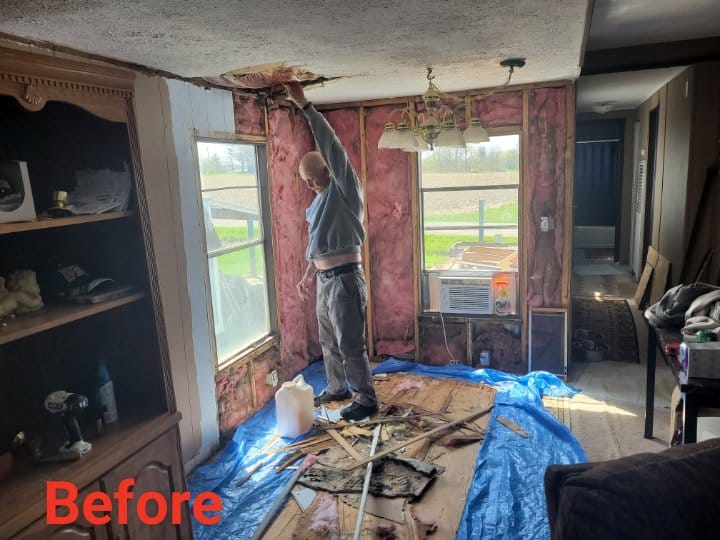
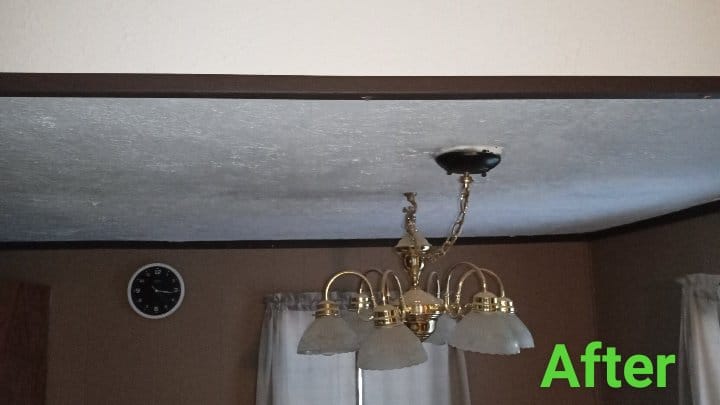
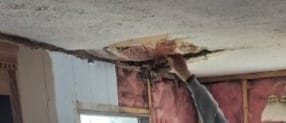
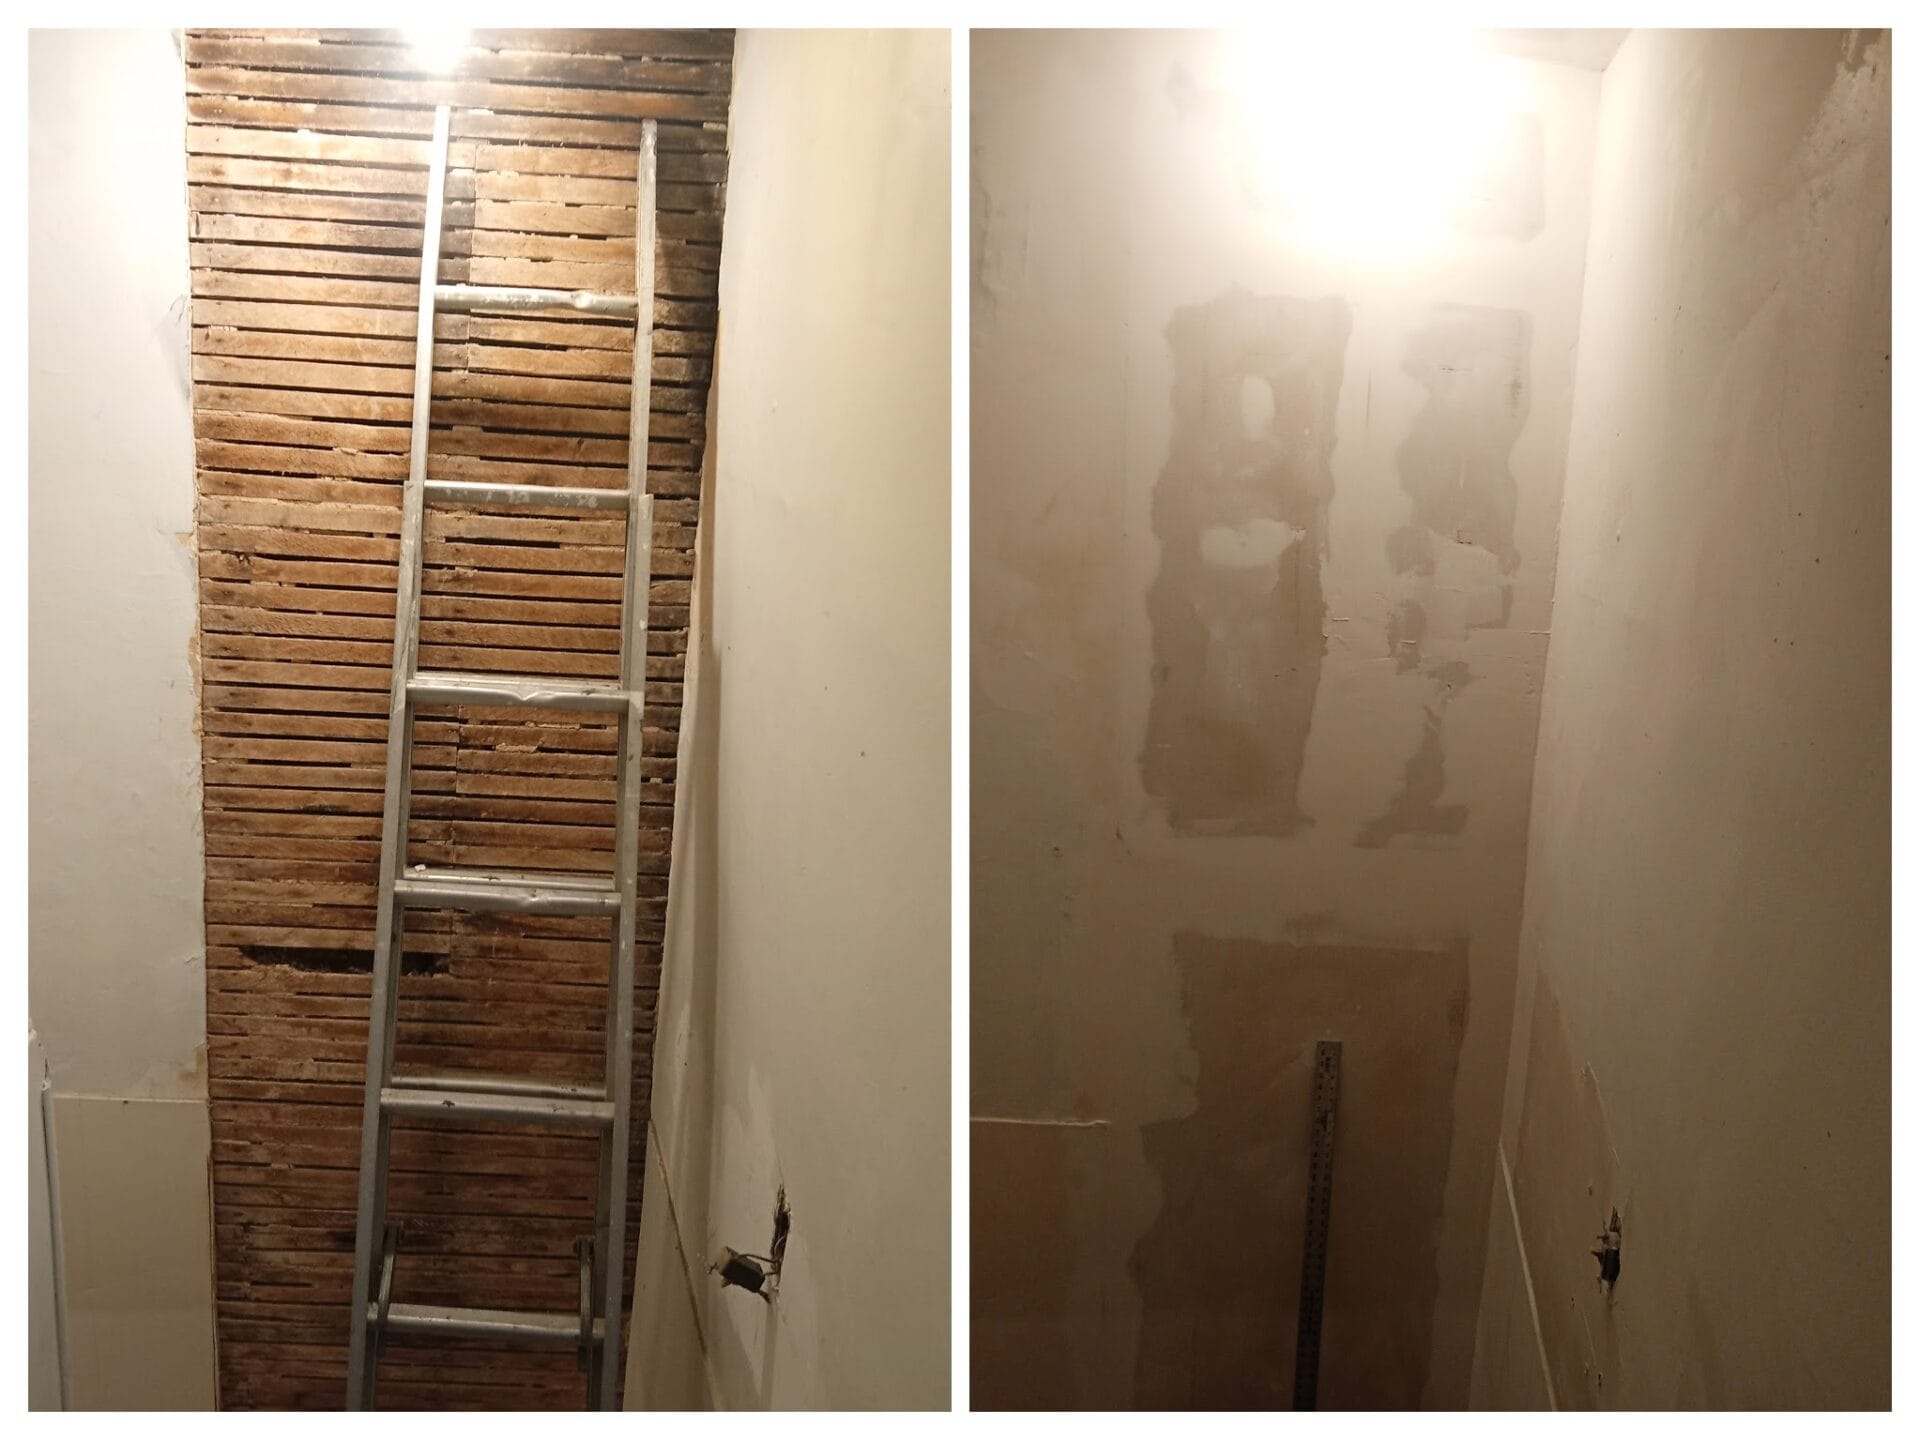
Customer had damaged to their ceiling drywall and wood wall paneling in their dining room caused by a leak in the roof. We removed all the water damaged wall paneling and the section of ceiling drywall that was damaged. Hung new 1/2″ drywall on the ceiling in the place where we had to remove the damaged drywall and to finish it we stomped it with mud to match the pre-existing pattern. Once we completed that we measured out the walls so we could cut the new wood paneling to exact size, so it would fit in the place of the old wood paneling without any struggles. We hung the new wall paneling and re-installed the base-trim and the ceiling crown trim.
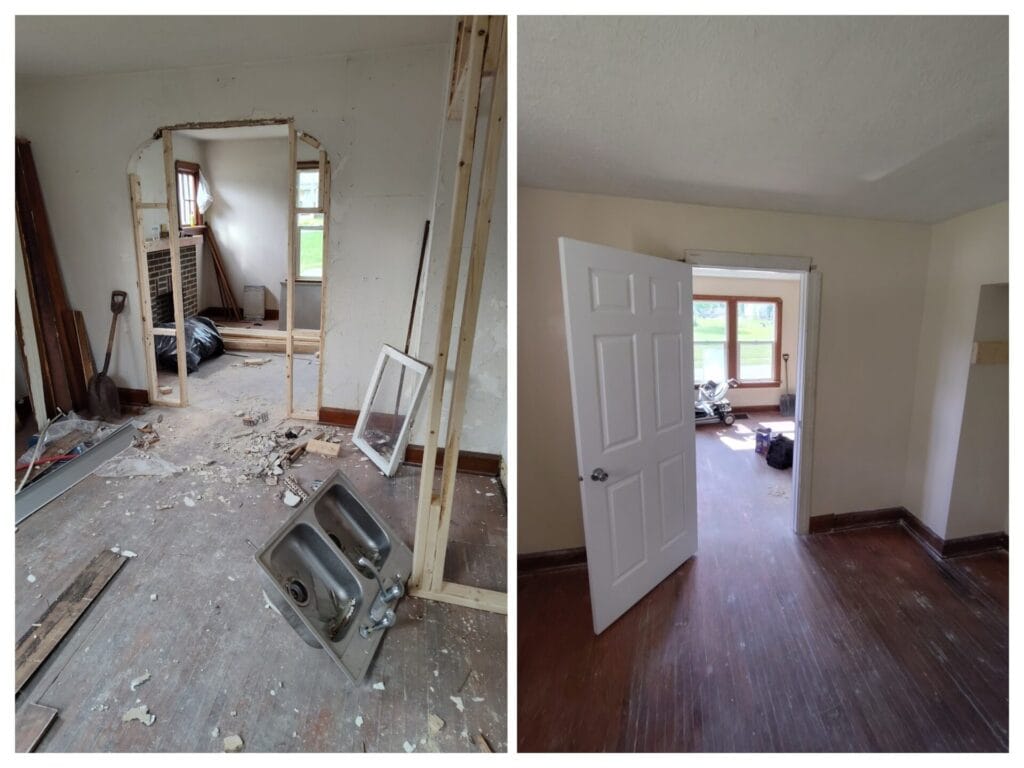
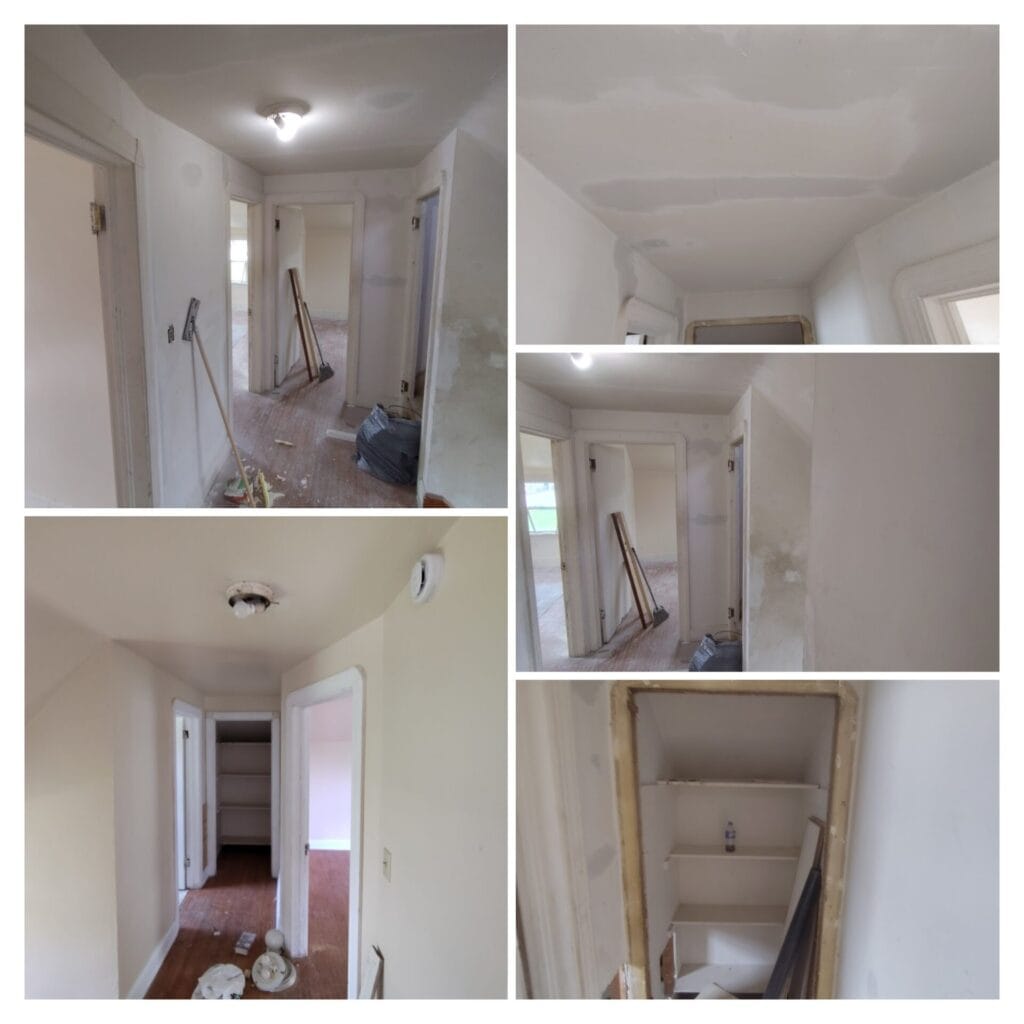
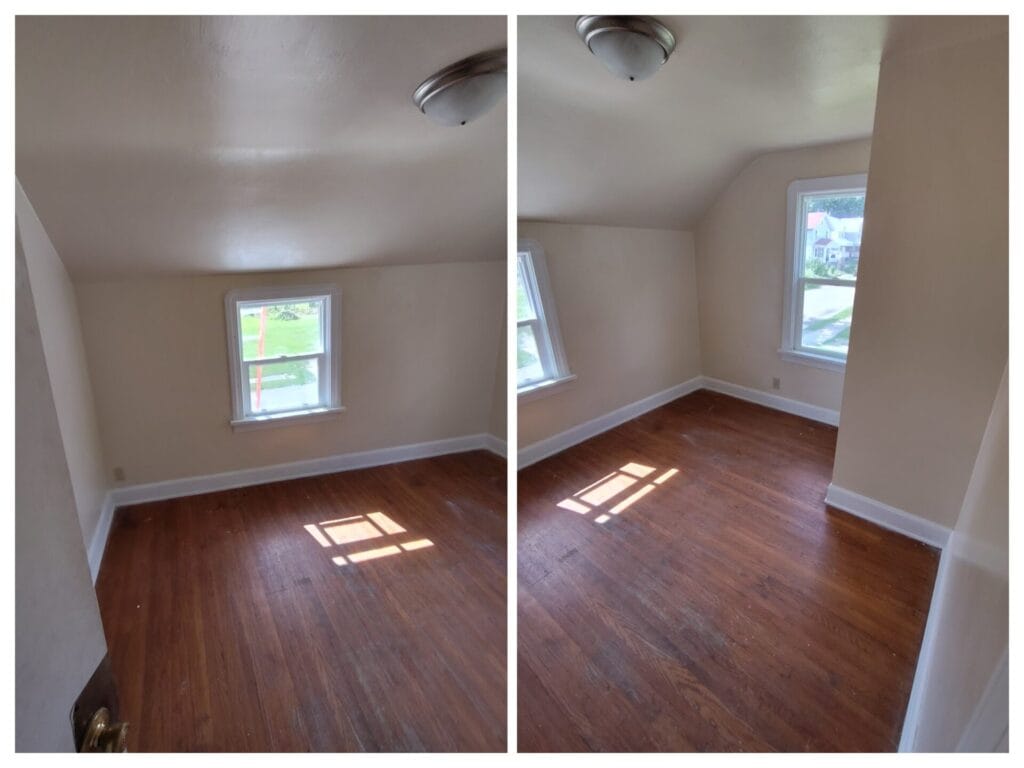
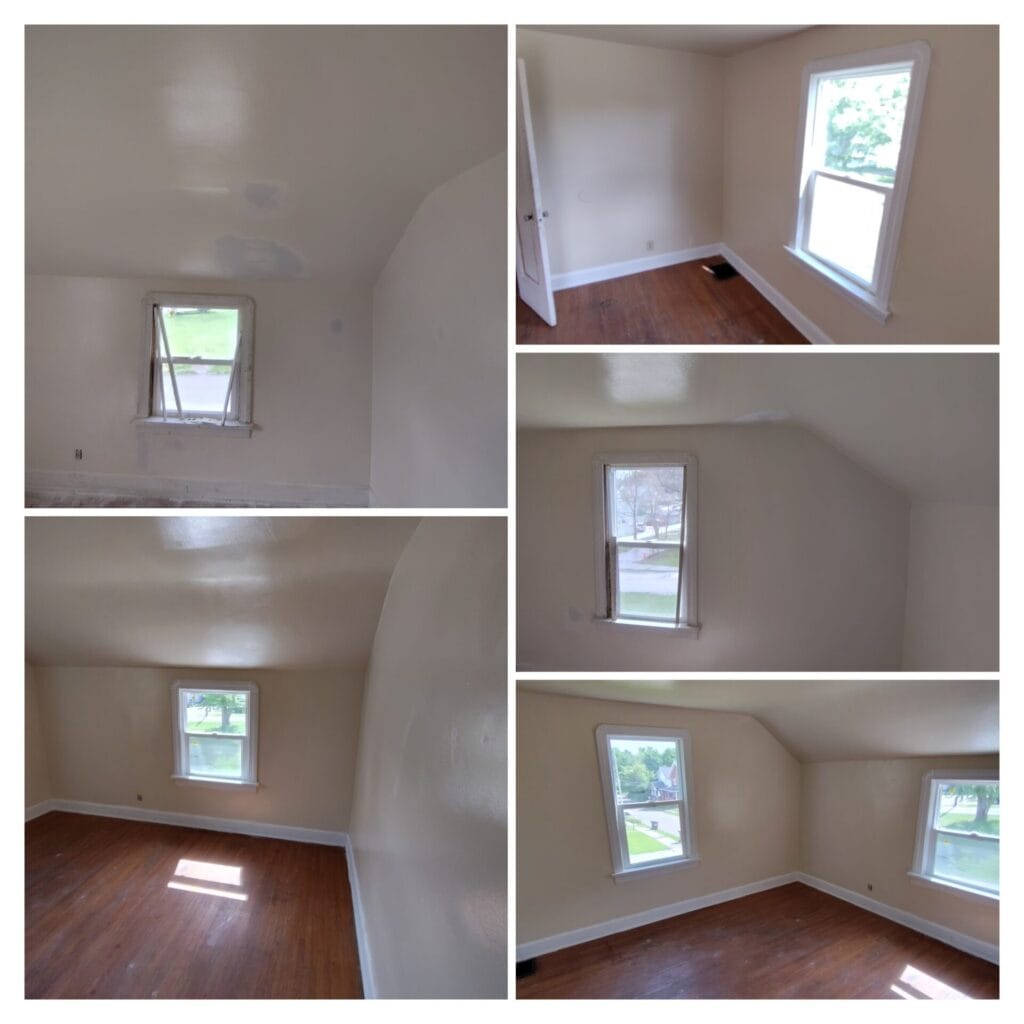
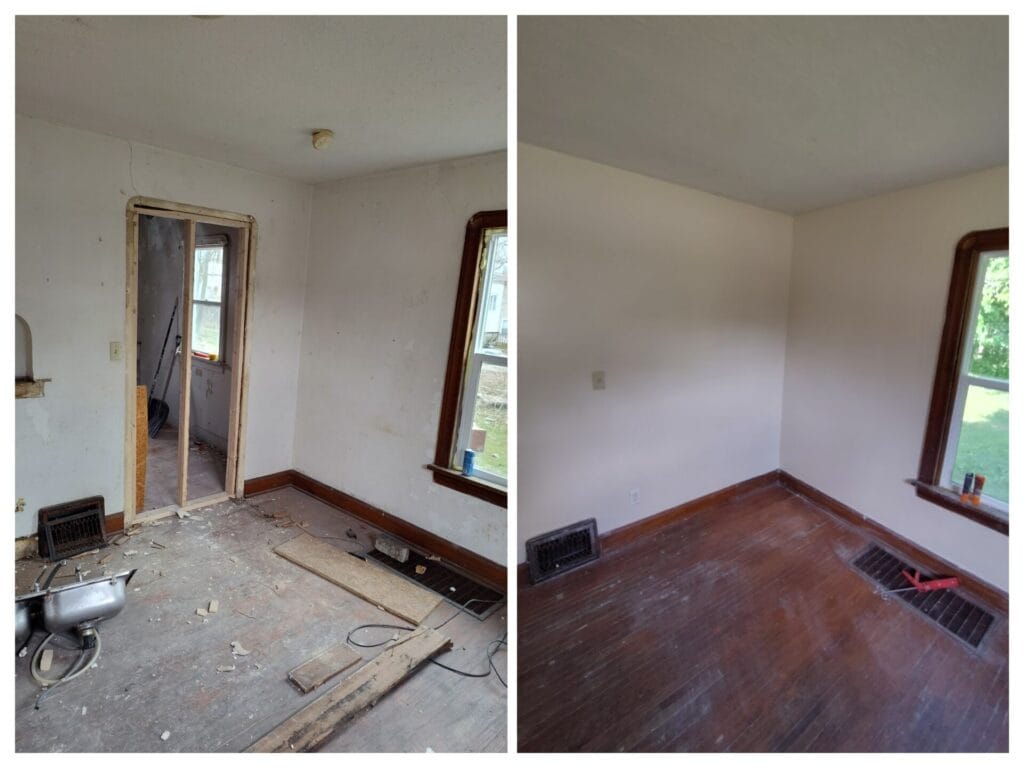
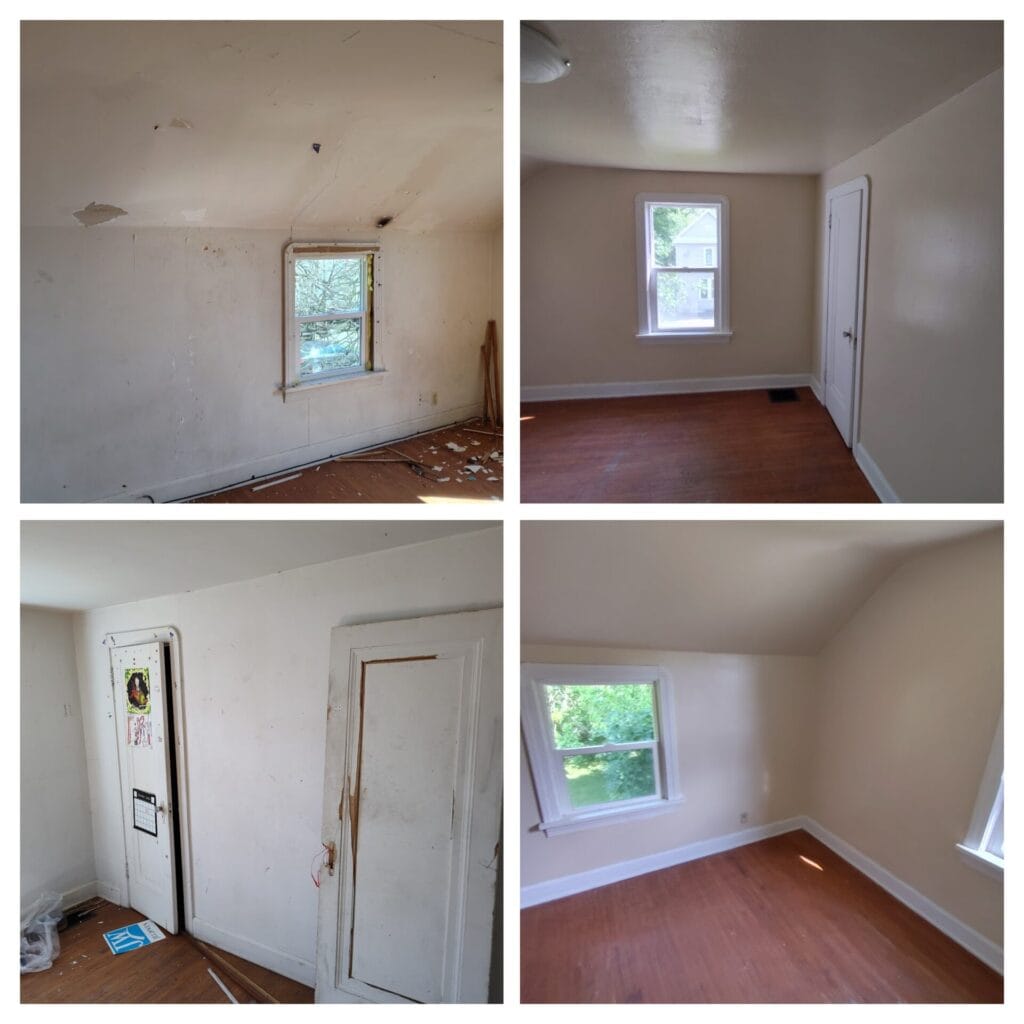
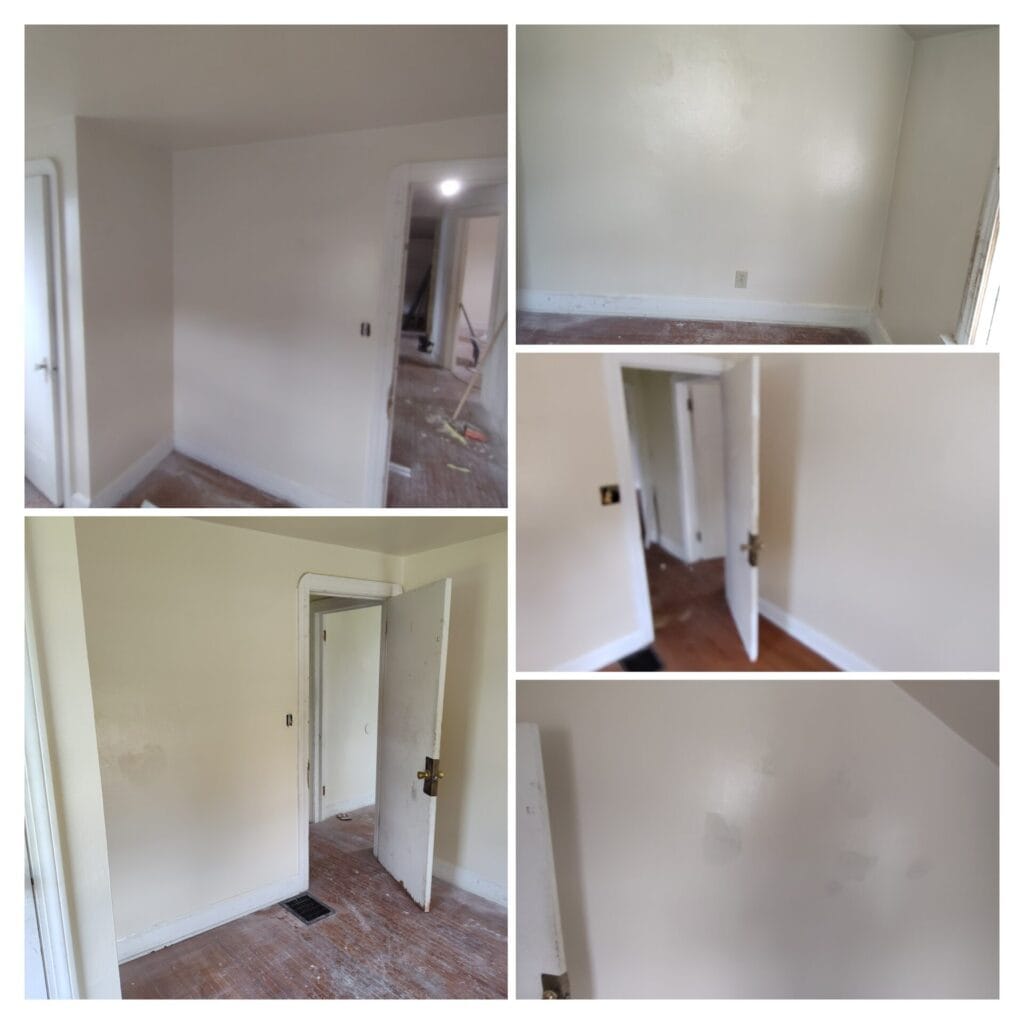
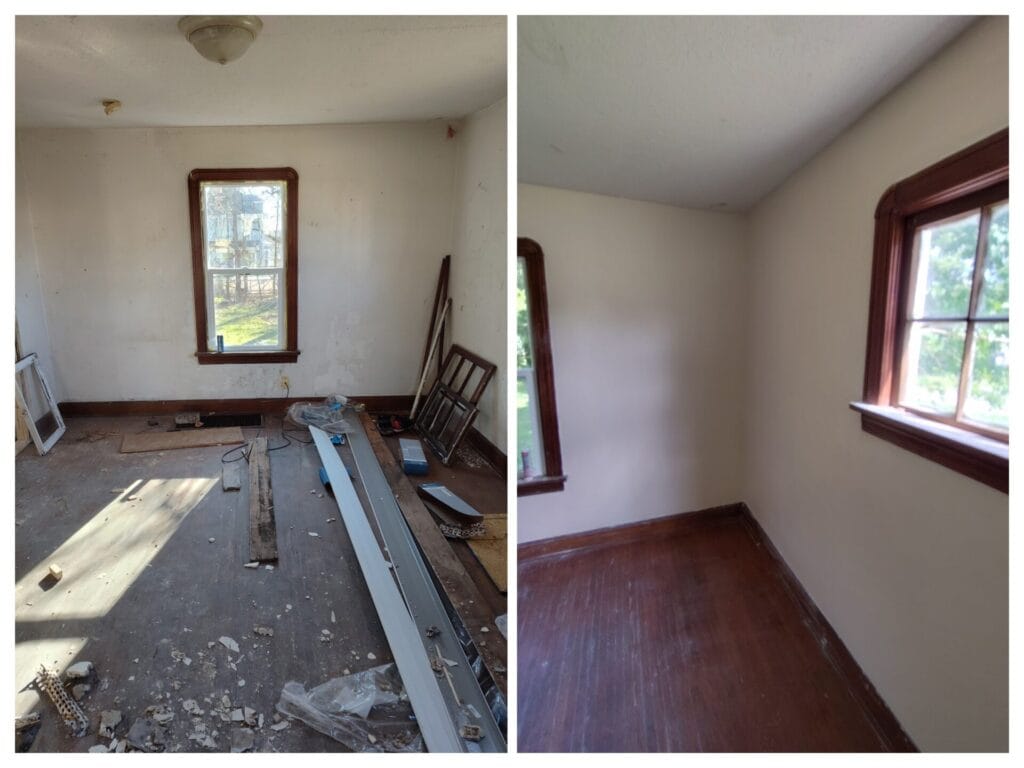
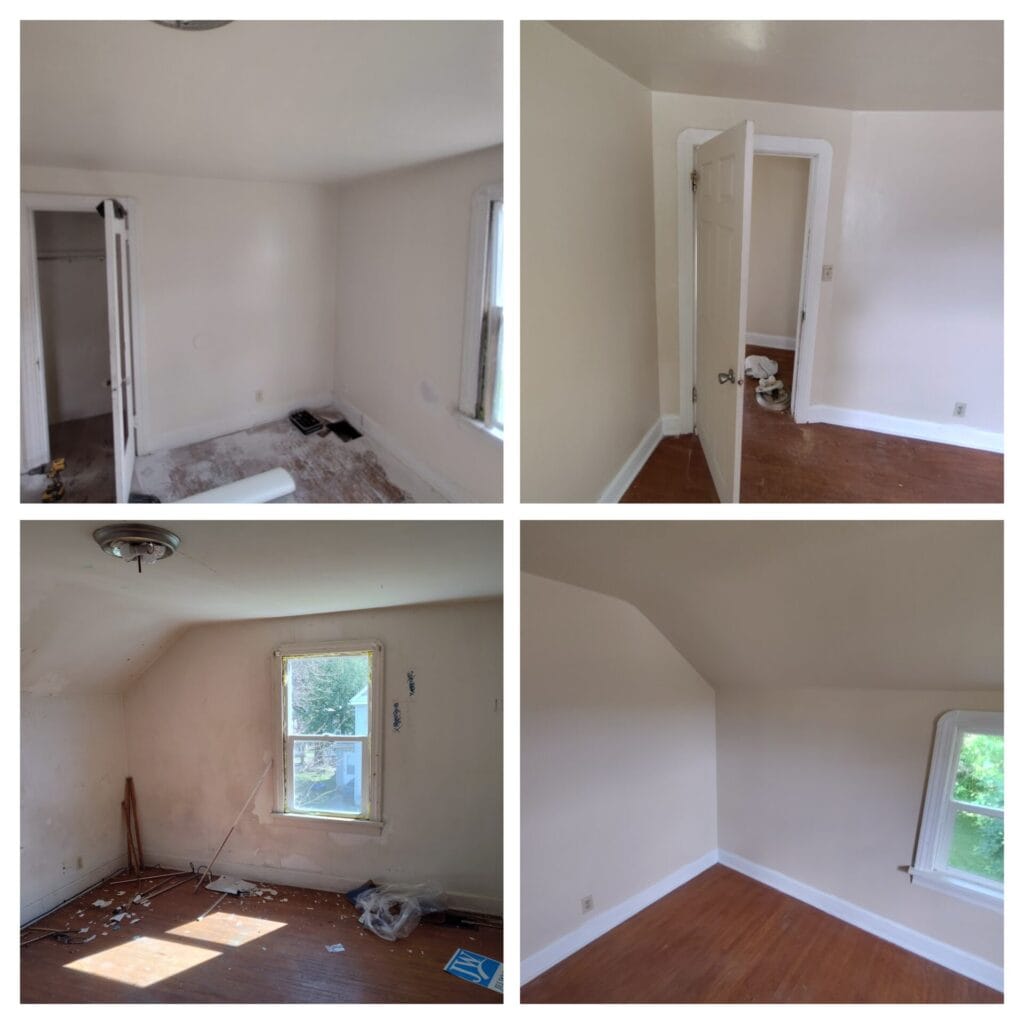
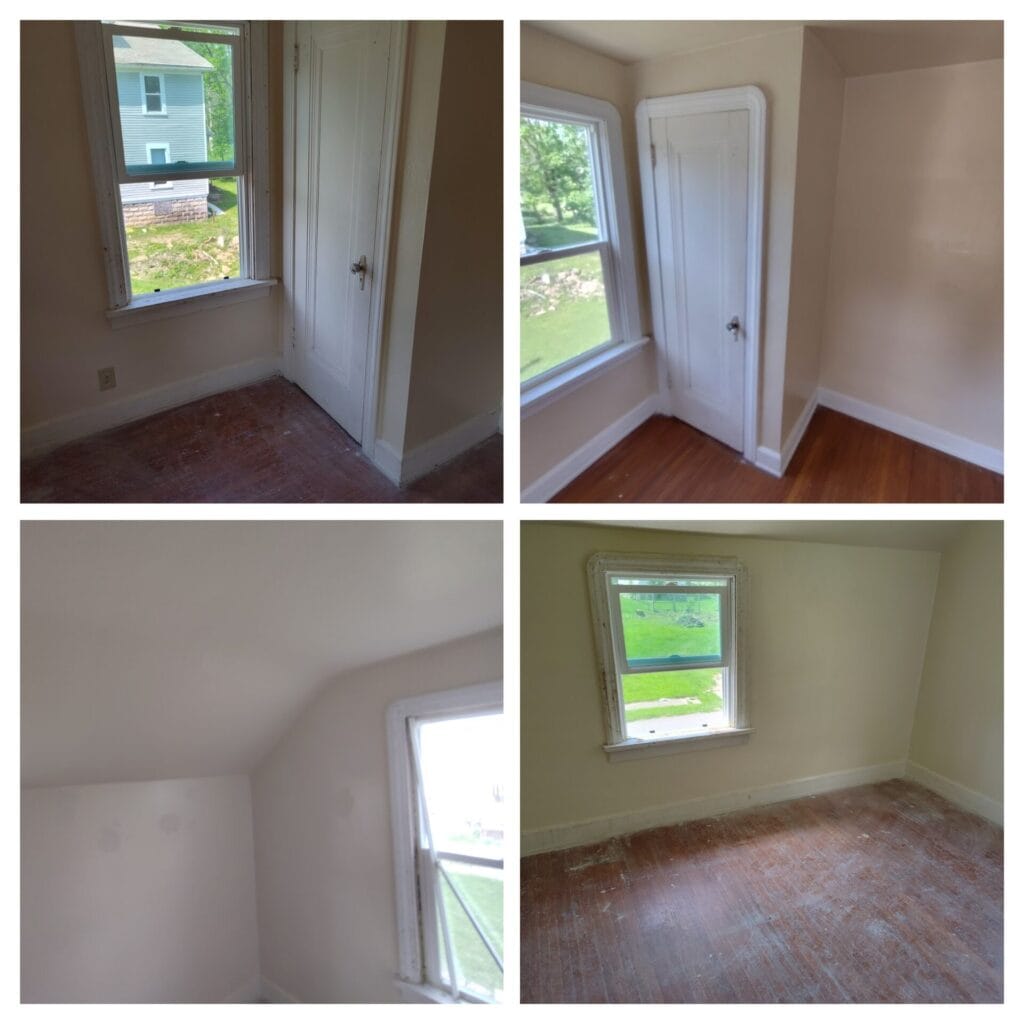
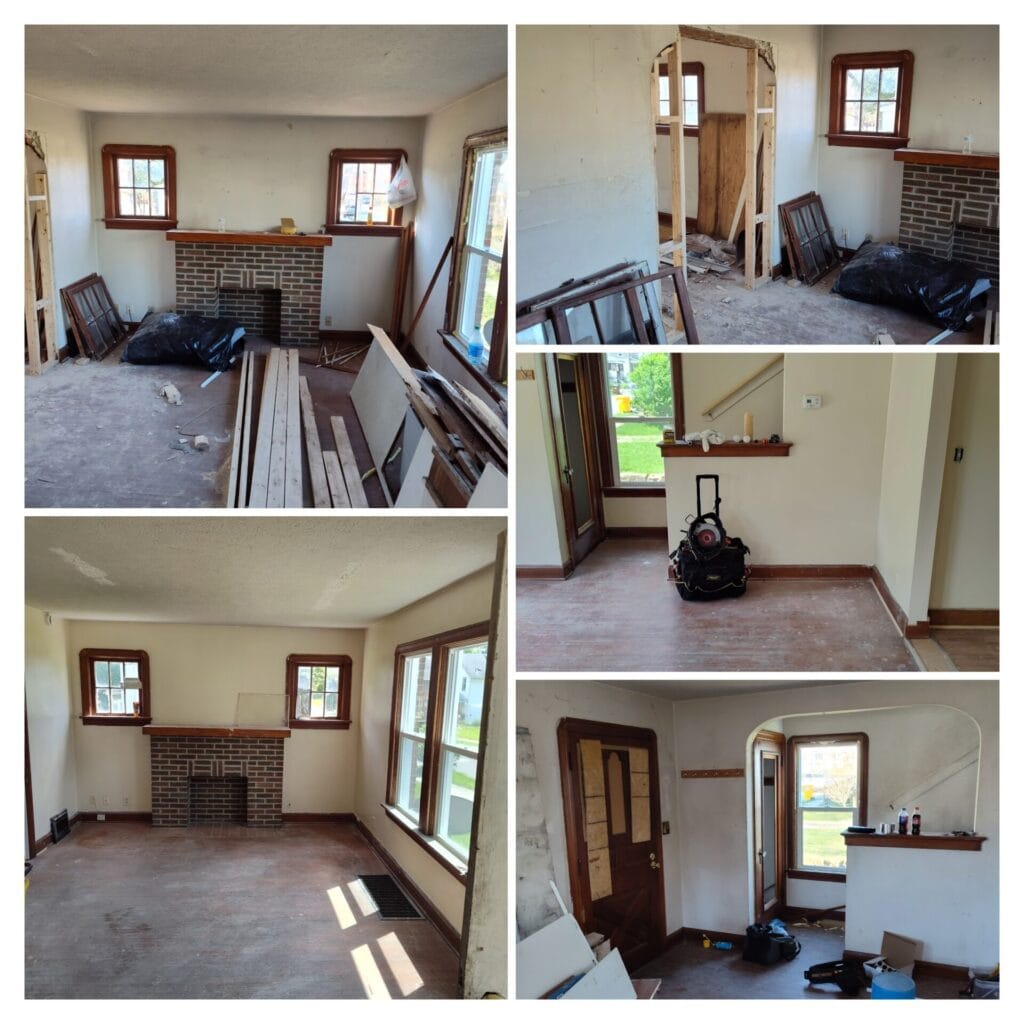
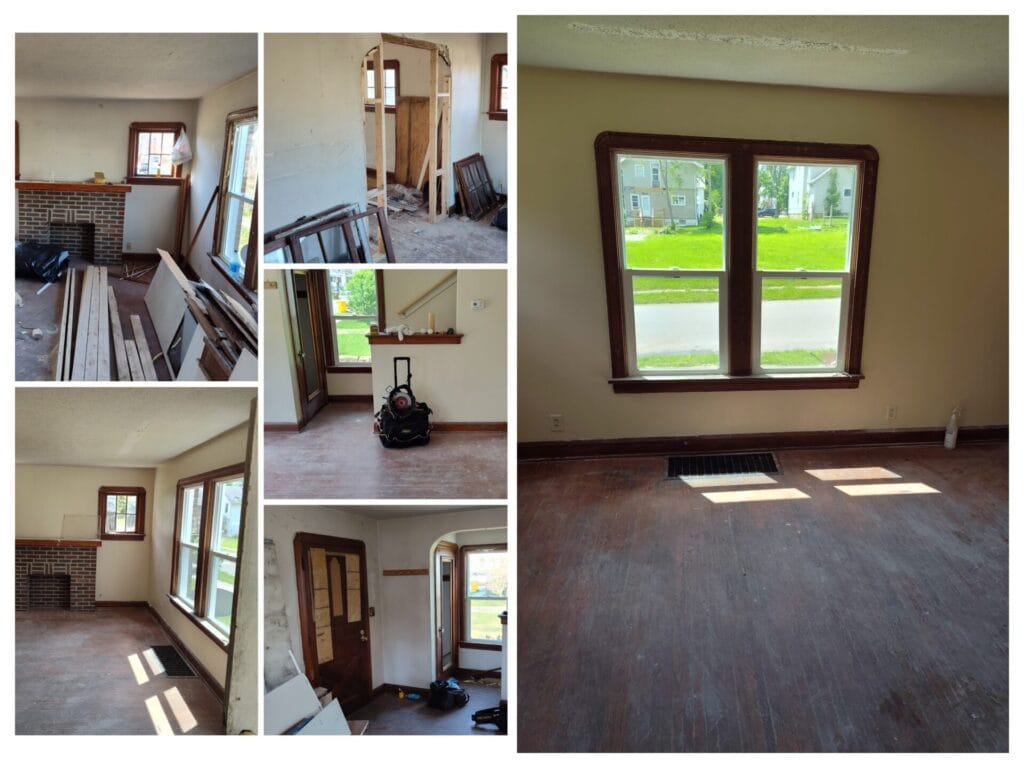
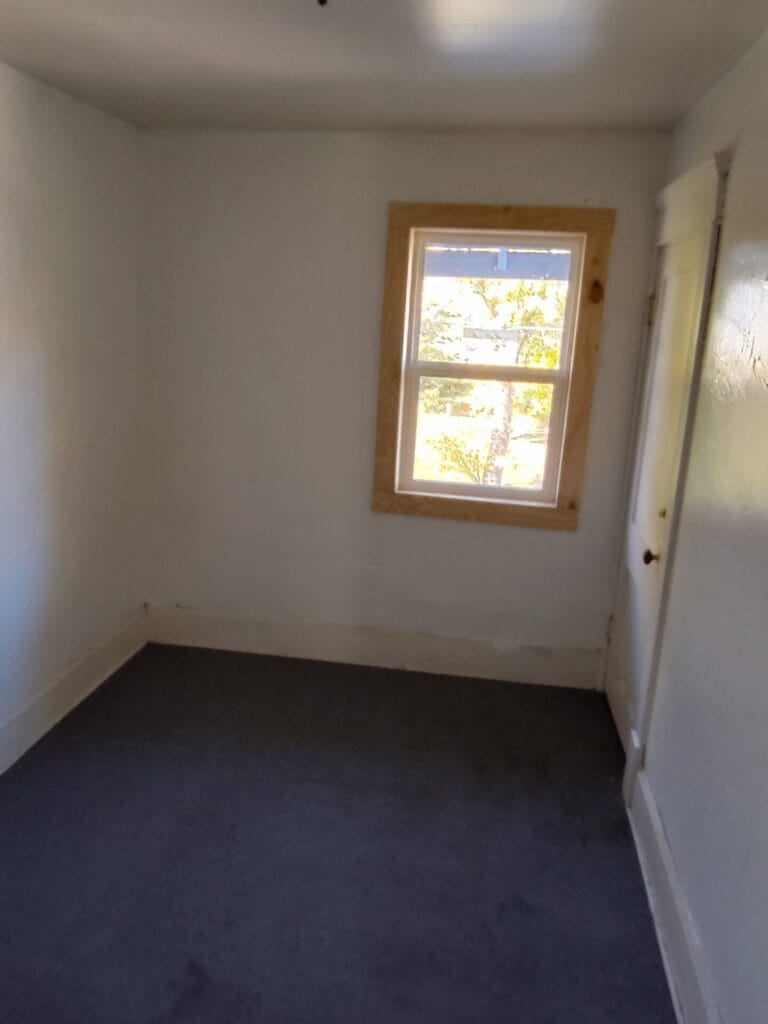
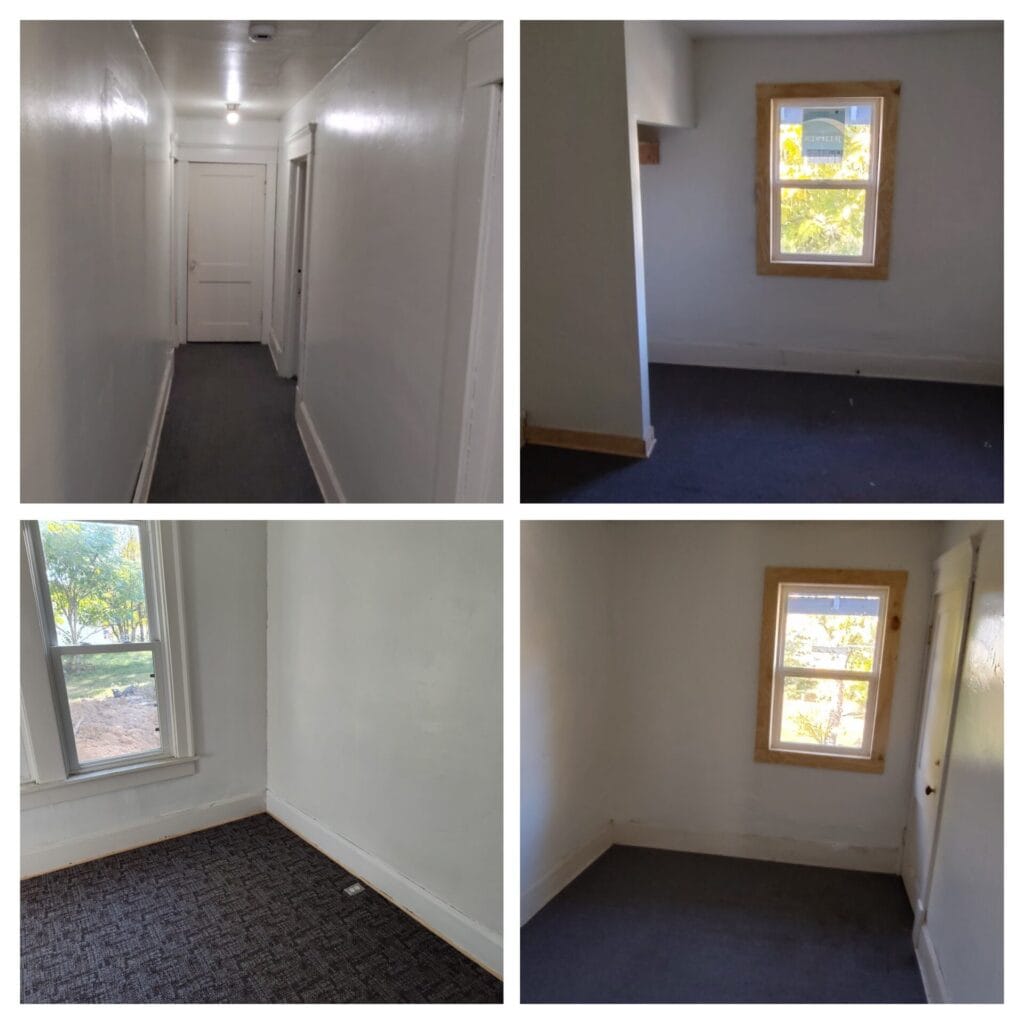
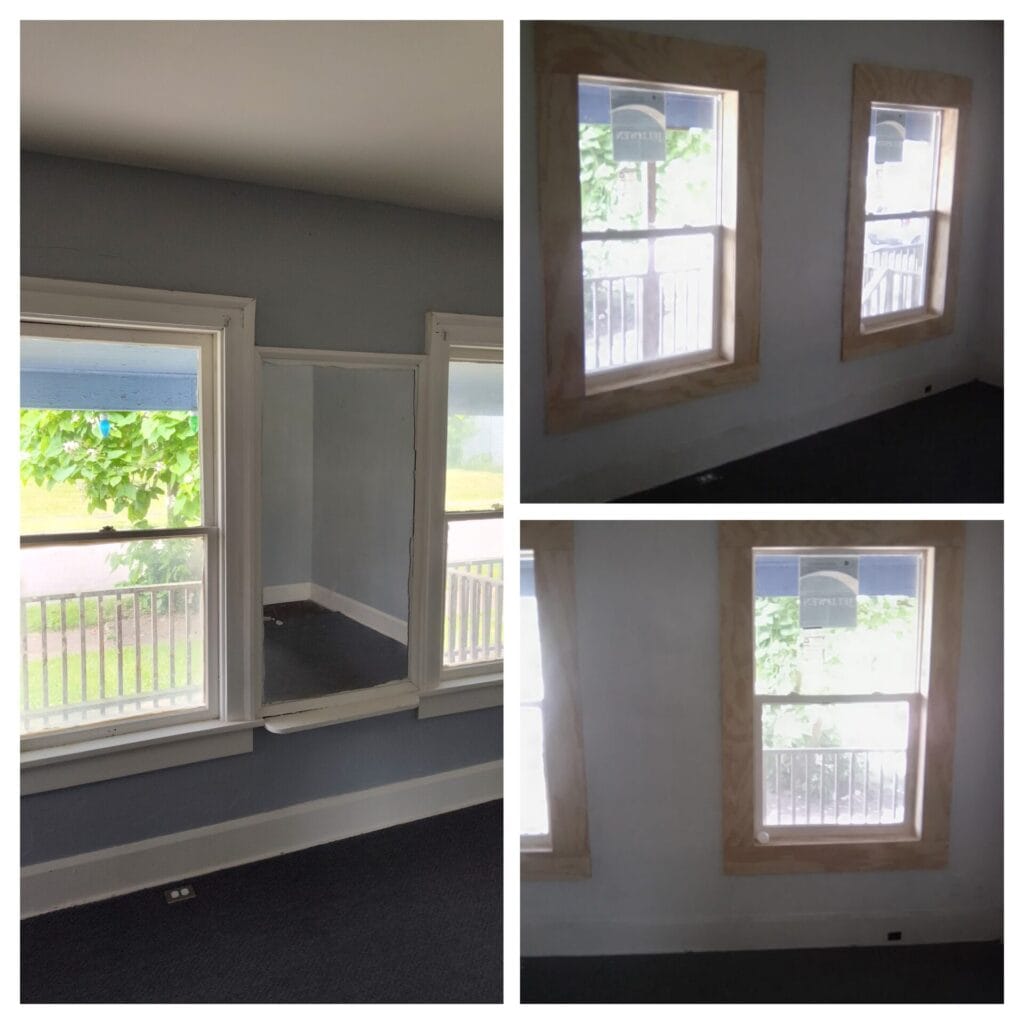
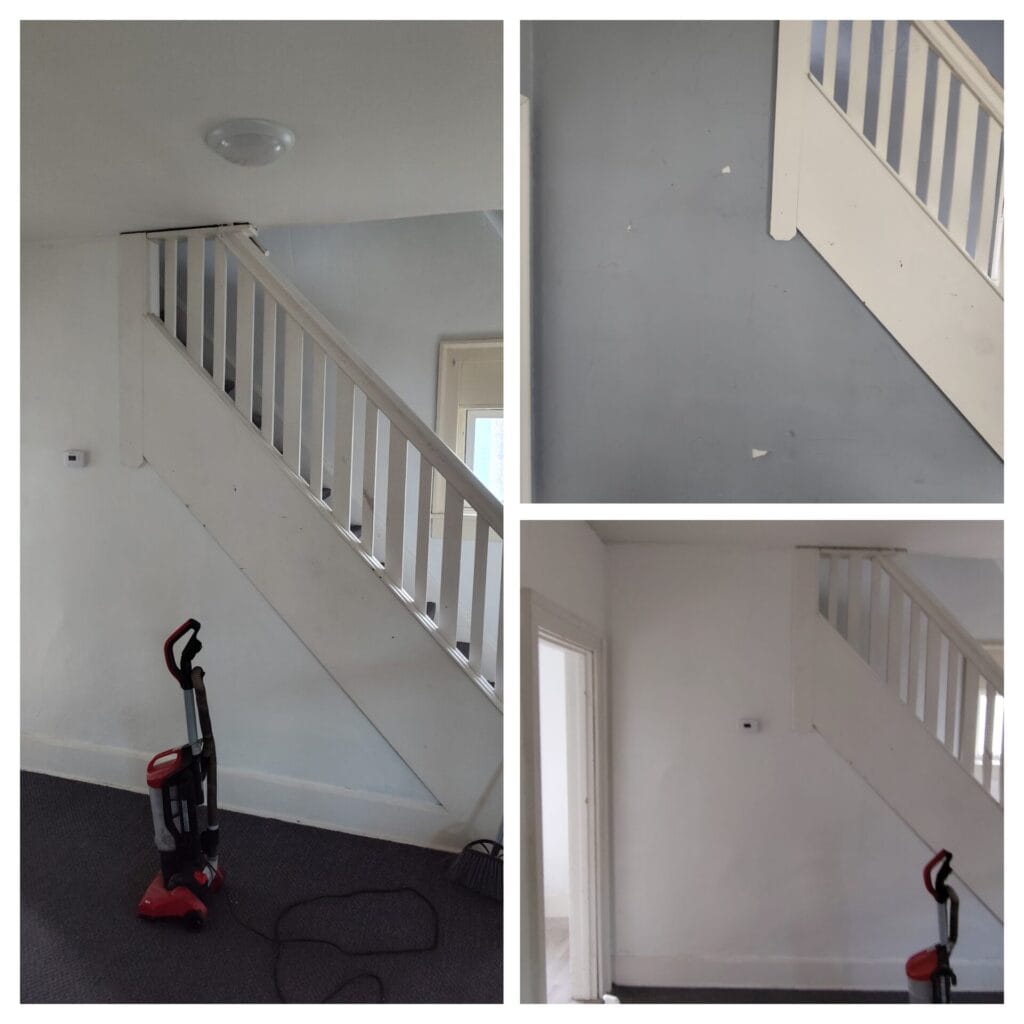
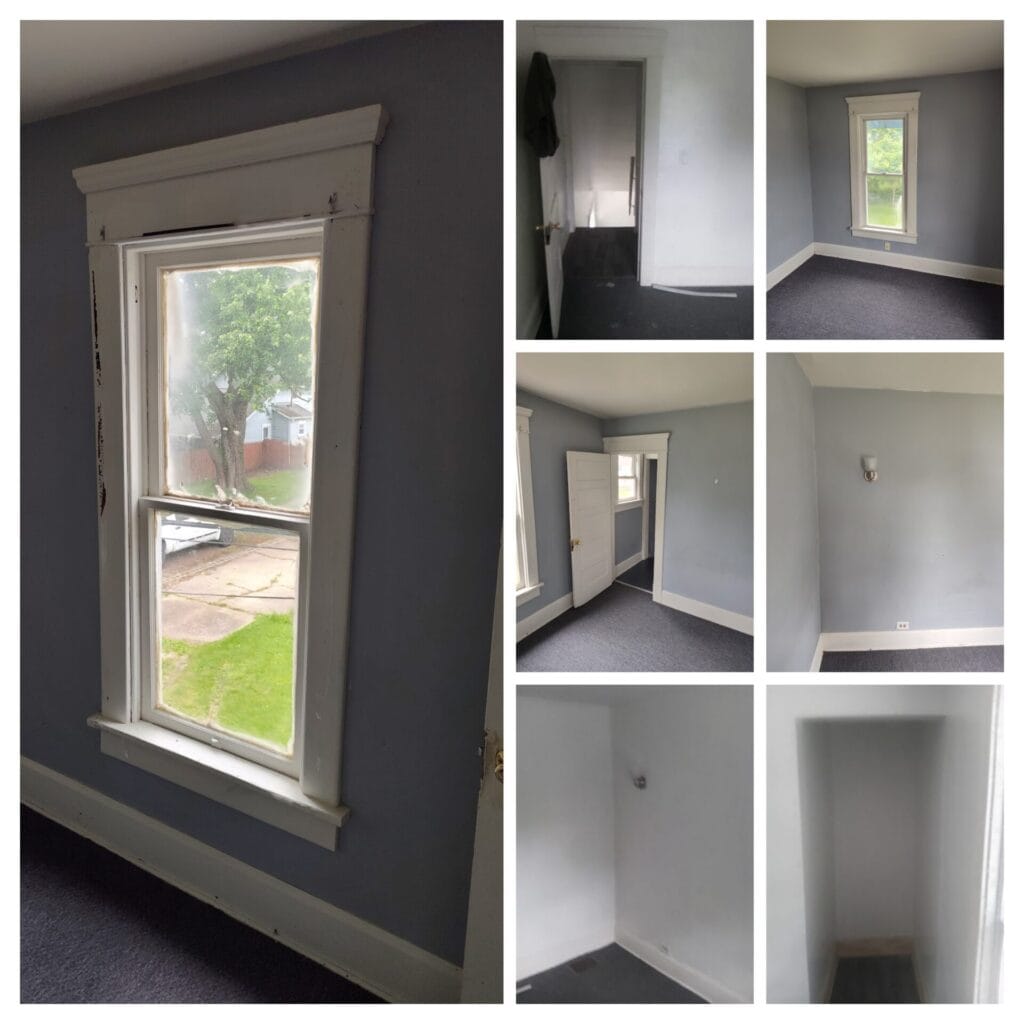
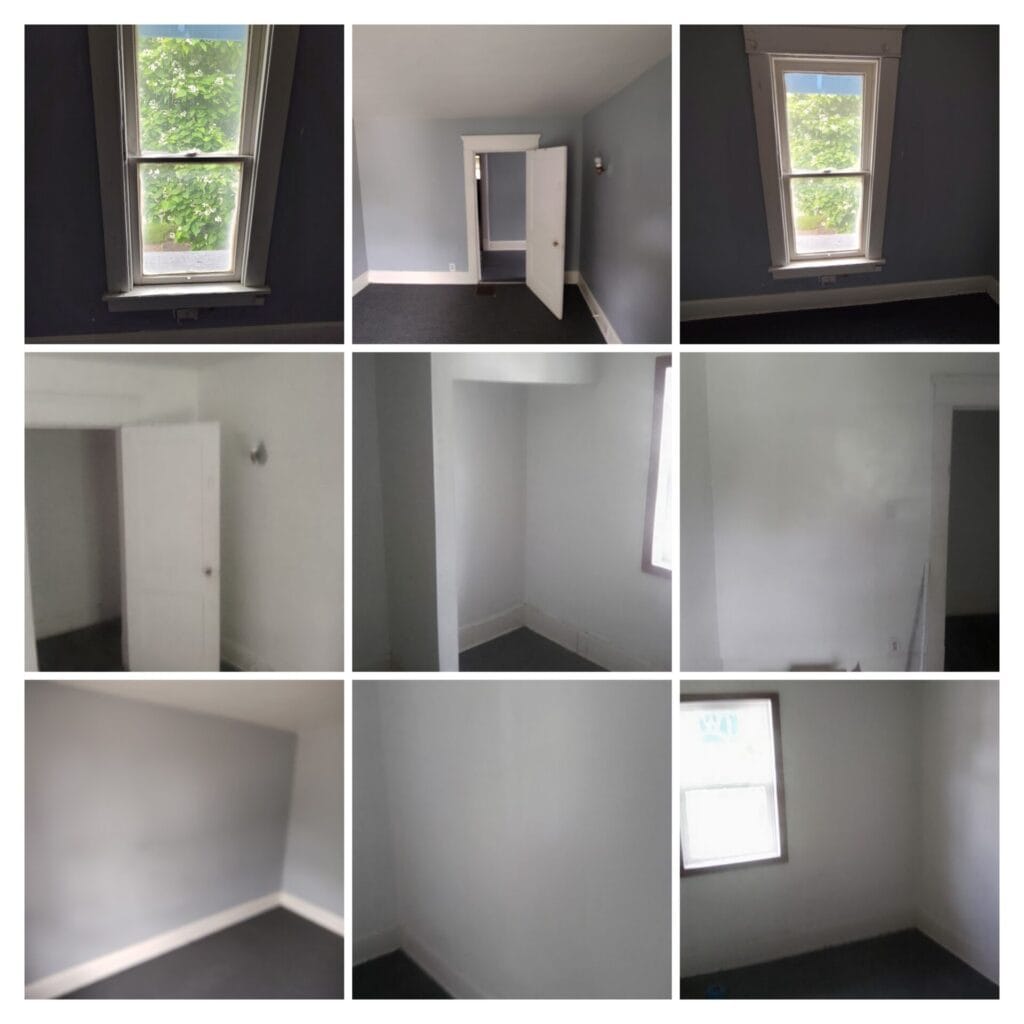
133 Arthur Ave
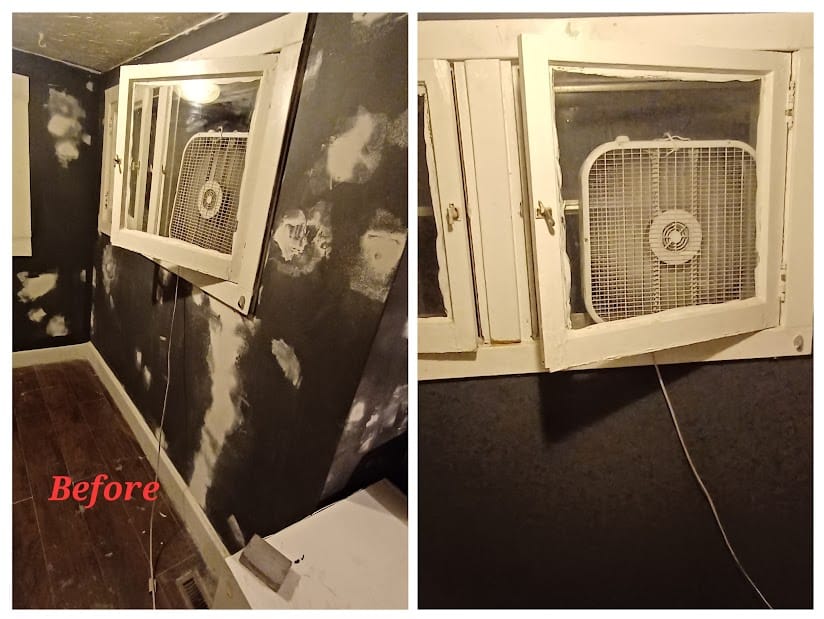
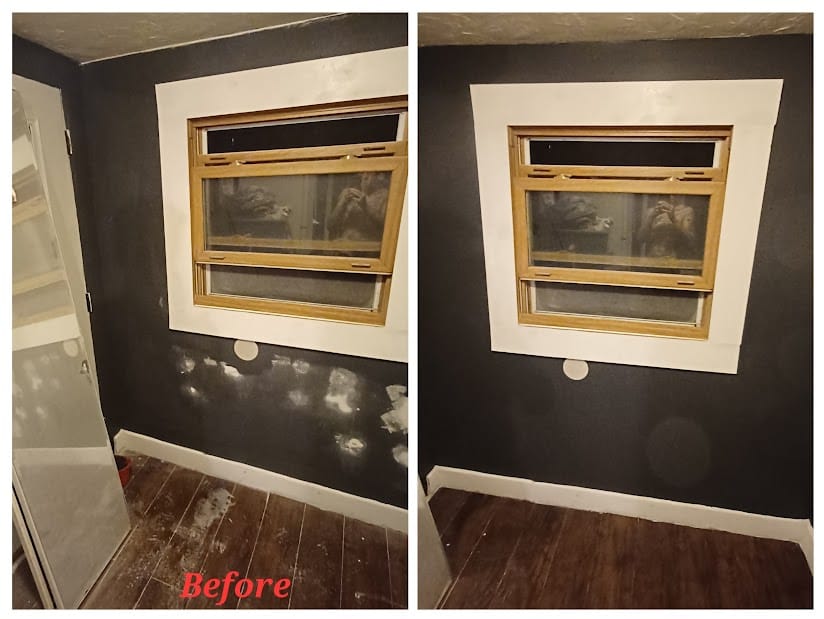
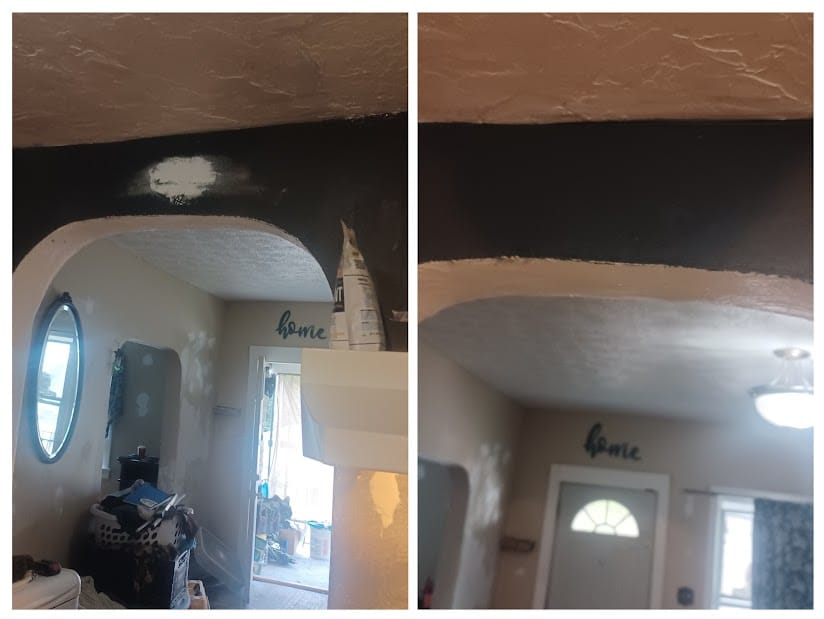
The client wanted to turn the dining room into another bedroom, so we framed in a bedroom door frame that comes off the living room and framed in the doorway that came off from the kitchen. We ran new electrical wire up from the basement and installed a new outlet box and outlet to the framing then we sealed it off with hanging new 1/2″ drywall on the framing and finishing it to blend in with the surrounding walls. We removed the wooden frame windows through the whole house and replaced them with high energy efficient double pane windows. We built framing for a closet for the new first-floor bedroom and finished it with new 1/2″ drywall, we had to scrape the outside walls of the first-floor bedroom and skimmed them with fresh mud once dry we sanded them smooth, hung new door on the first-floor bedroom and took out the wall that separated the living room from the kitchen and made it a big open doorway. Throughout the rest of the house, we had to do some drywall patch work and fix some of the second-floor bedroom doors. Once we finished all that we rolled all the walls and ceilings with fresh coats of new paint, since all the floors and trim work was all nice hard wood, we scrubbed the floors and all woodwork trim clean and really gave it a nice shine. Installed new hand railings on the staircase. The front porch needed some attention as well, we re-poured a new layer of concrete on top landing and re-mortared the sides where the mortar was missing and added rebar re-enforcement in spots that needed it. Then lastly, we framed in the outside entrance to the basement and hung a new full sized steel door.


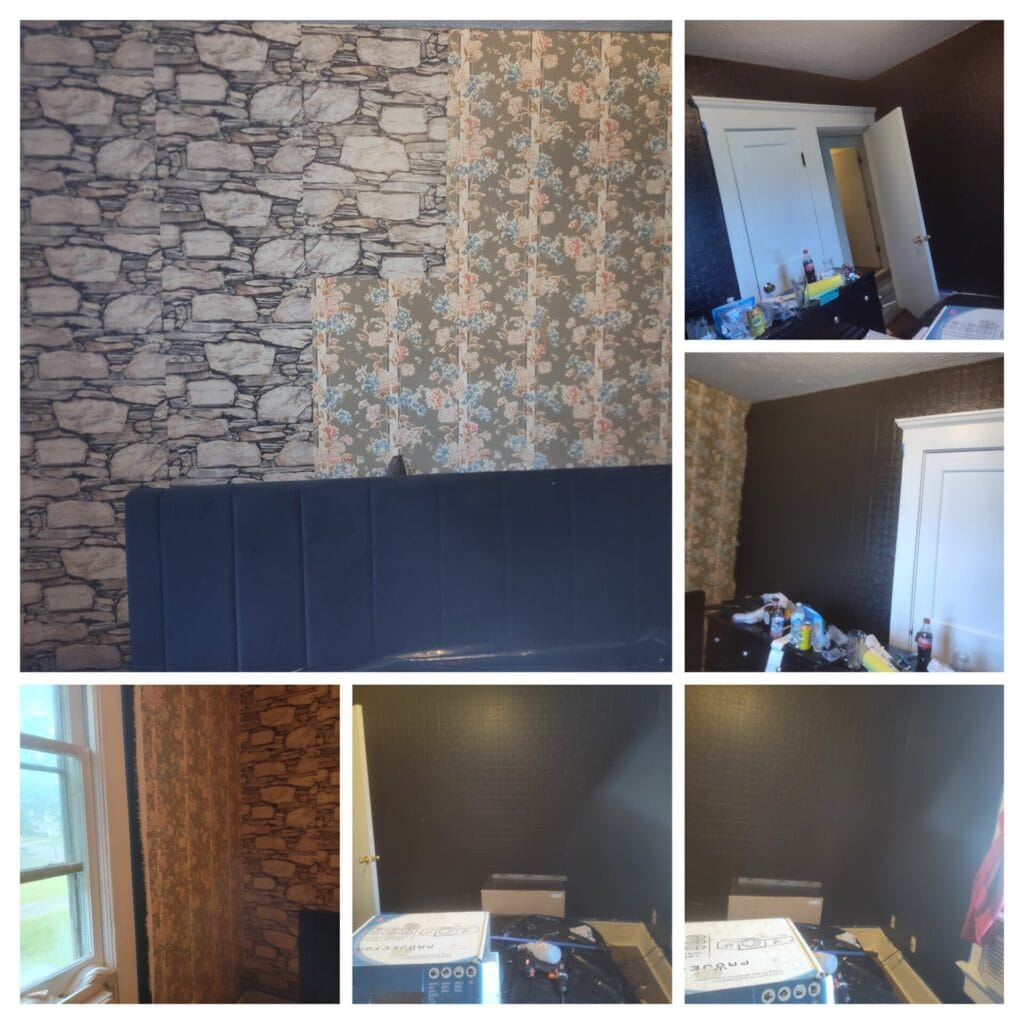
109 W 2nd St.
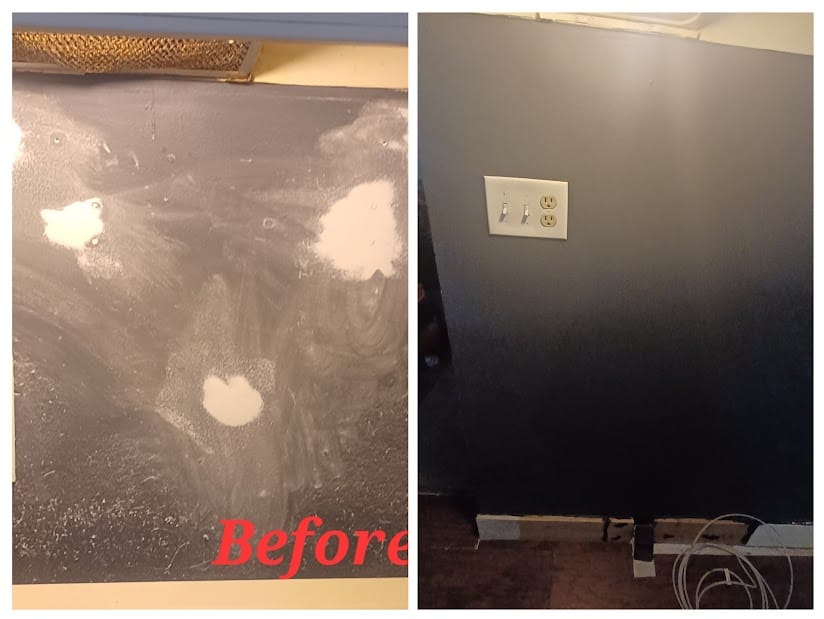
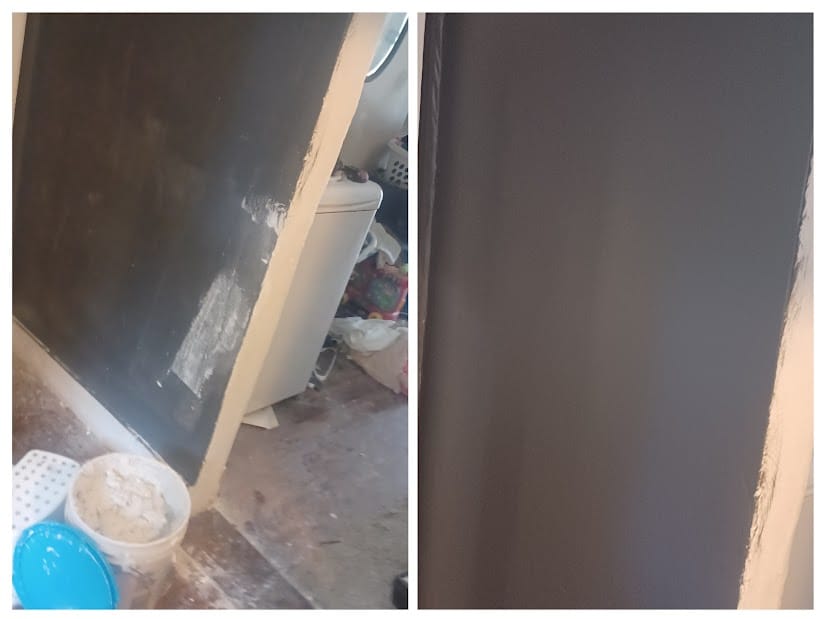
Nothing to crazy here, Customer just wanted some elegant 3D wallpaper hung up on 3 of the 4 walls and then paint them black and on the 4th wall some sandstone design wallpaper put up. Then needed a shelf mounted on the stone wall above the bed for their projector.
514 Park Ave
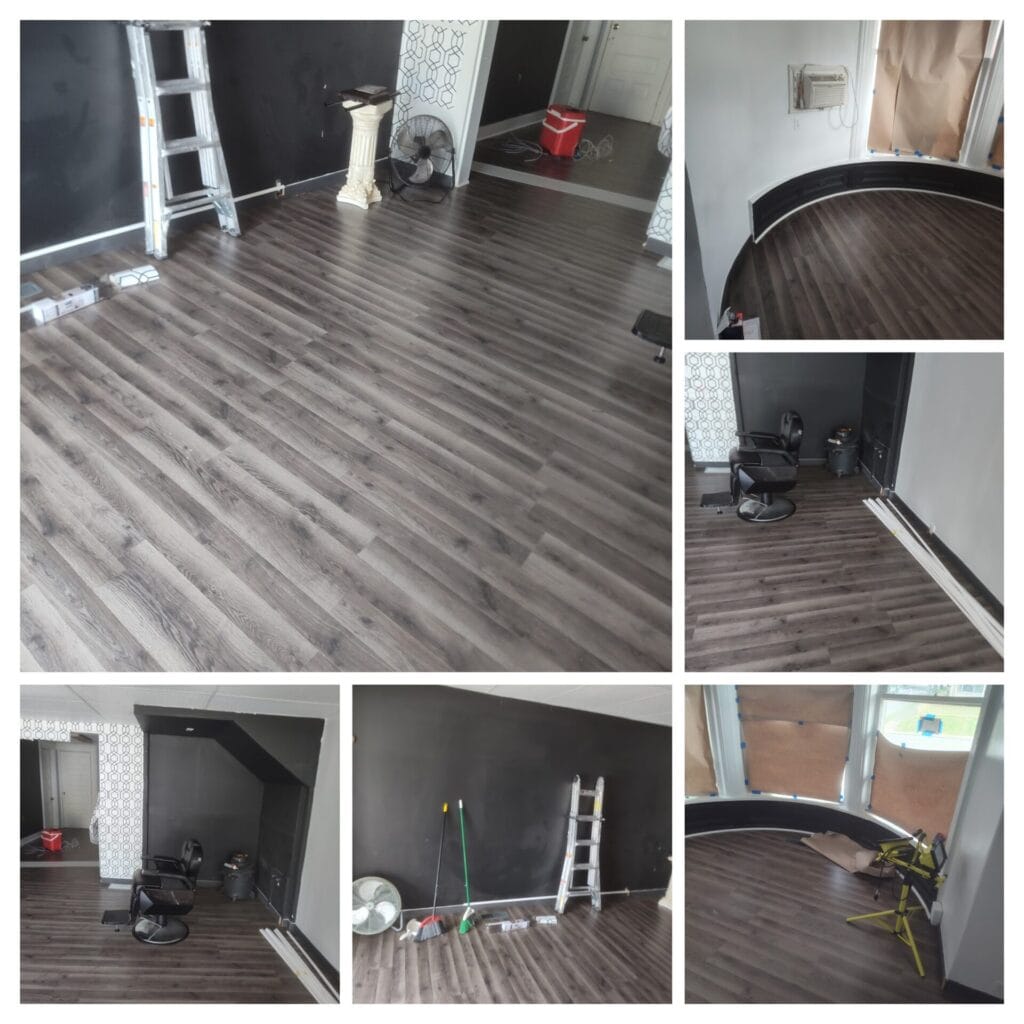
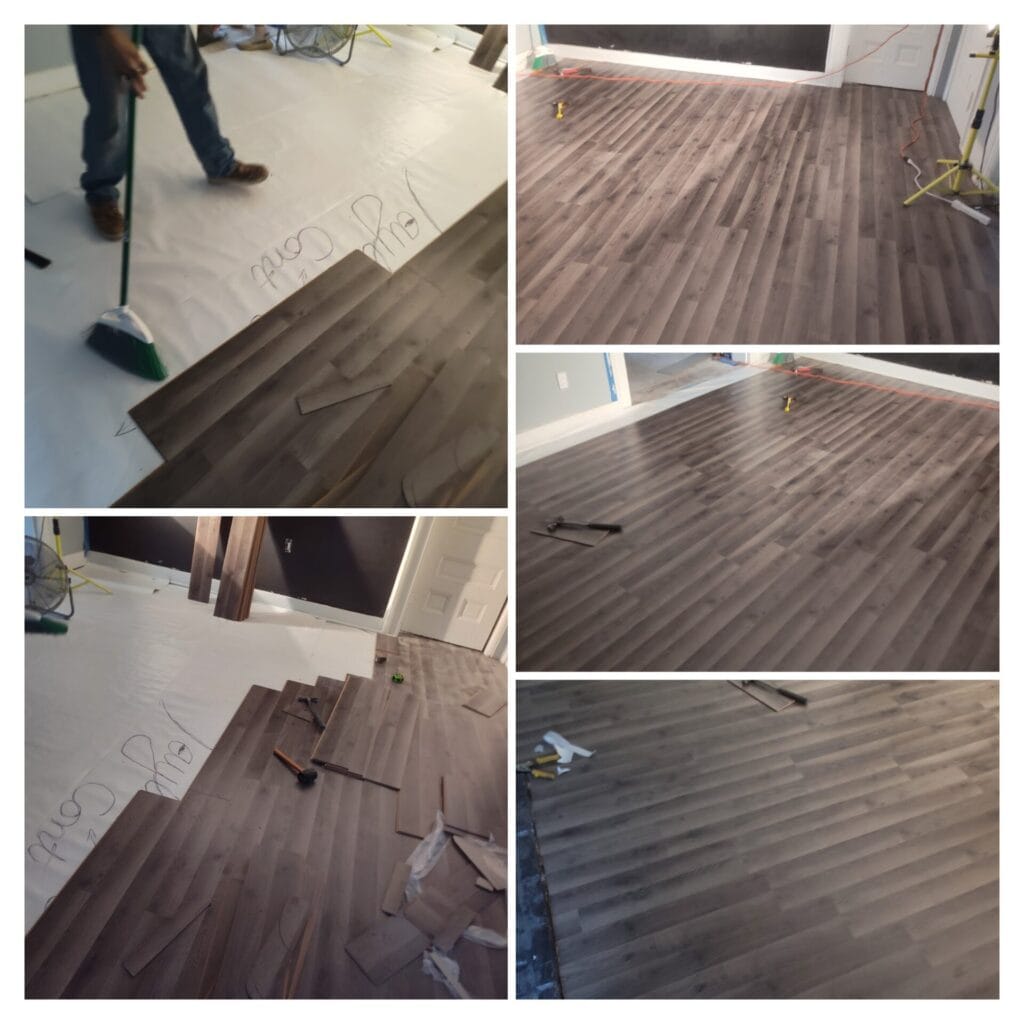
Customer wanted wood plank laminate flooring put down in his shop. So, we removed all the old flooring and trim. We laid down new foam underlayment barrier then laid the new laminate flooring on top of it completely the entire floor. Once done with all the flooring we re-installed the quarter-round base trimming.
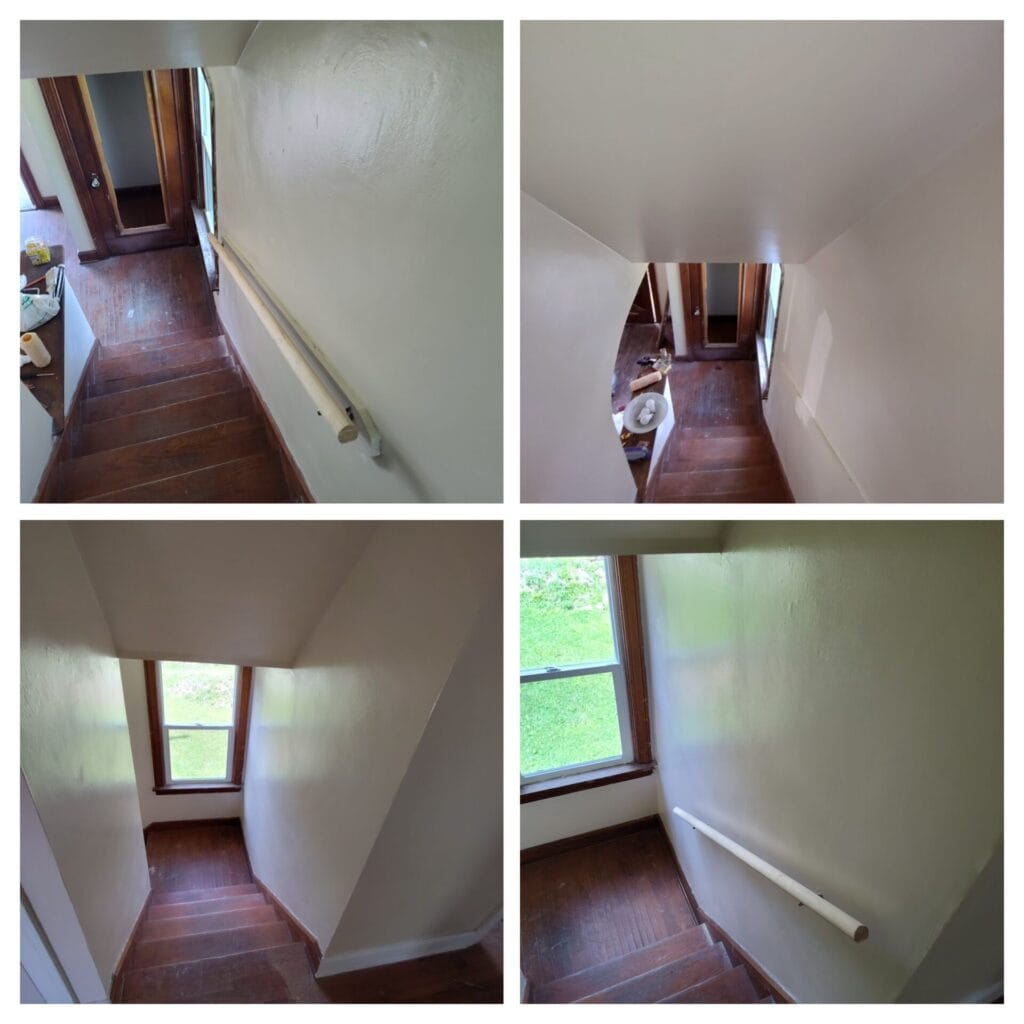
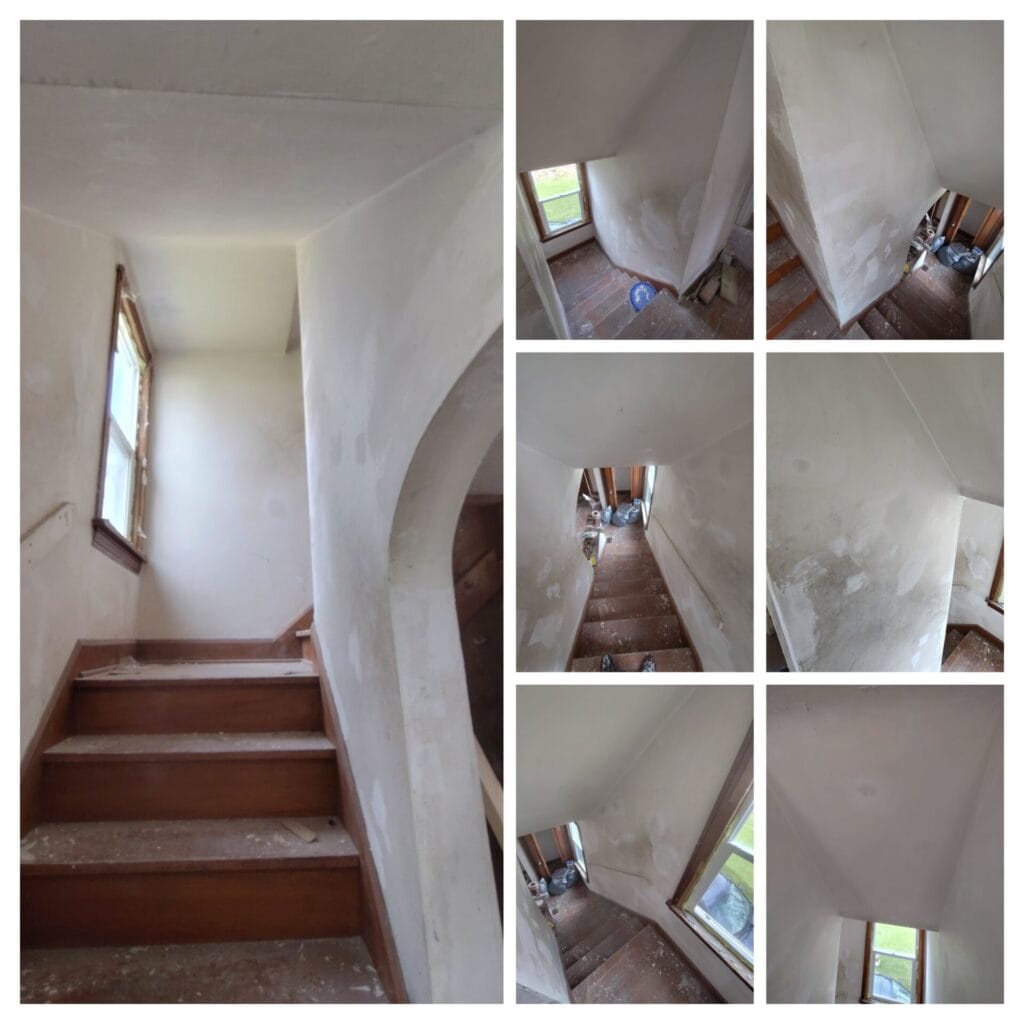
29 E Arch St
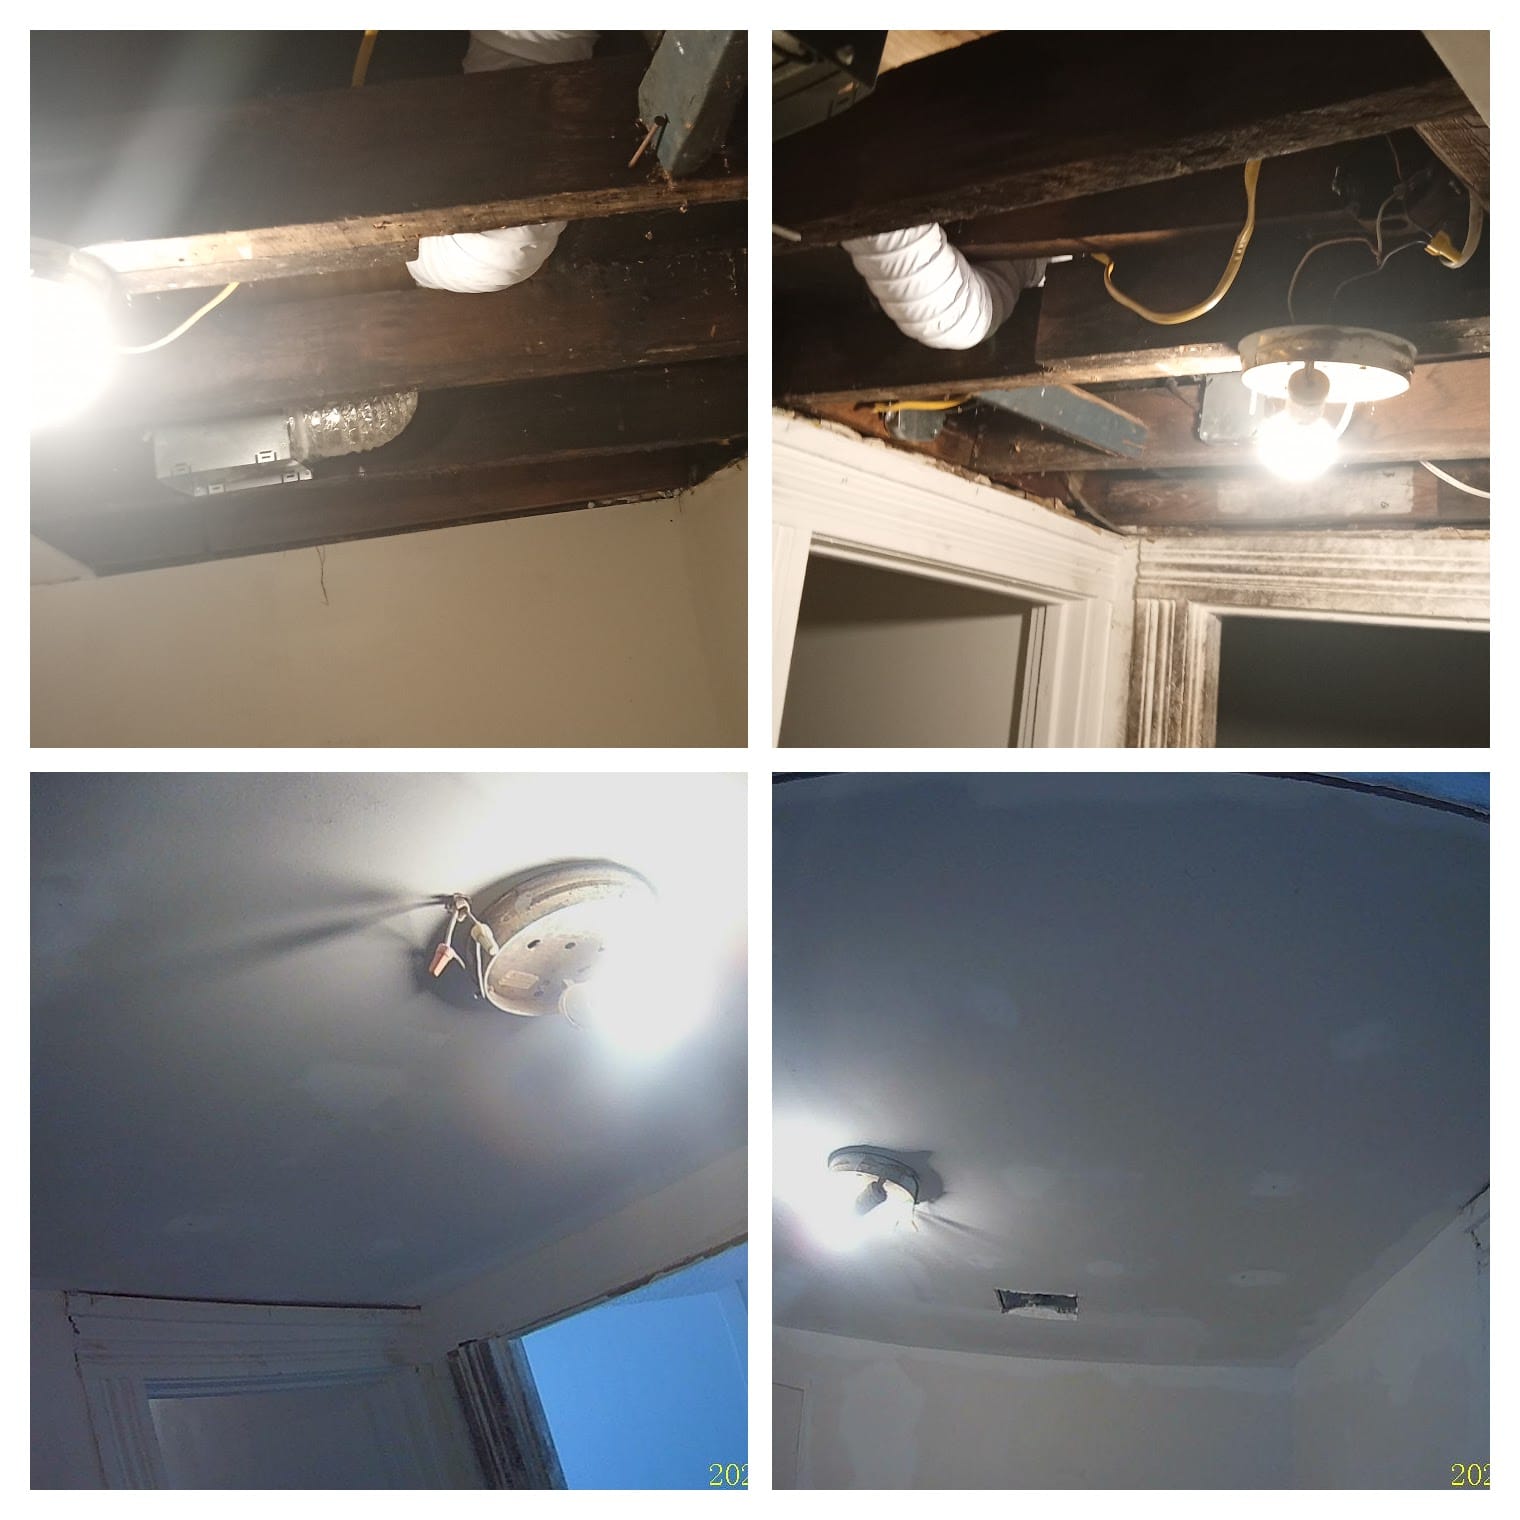
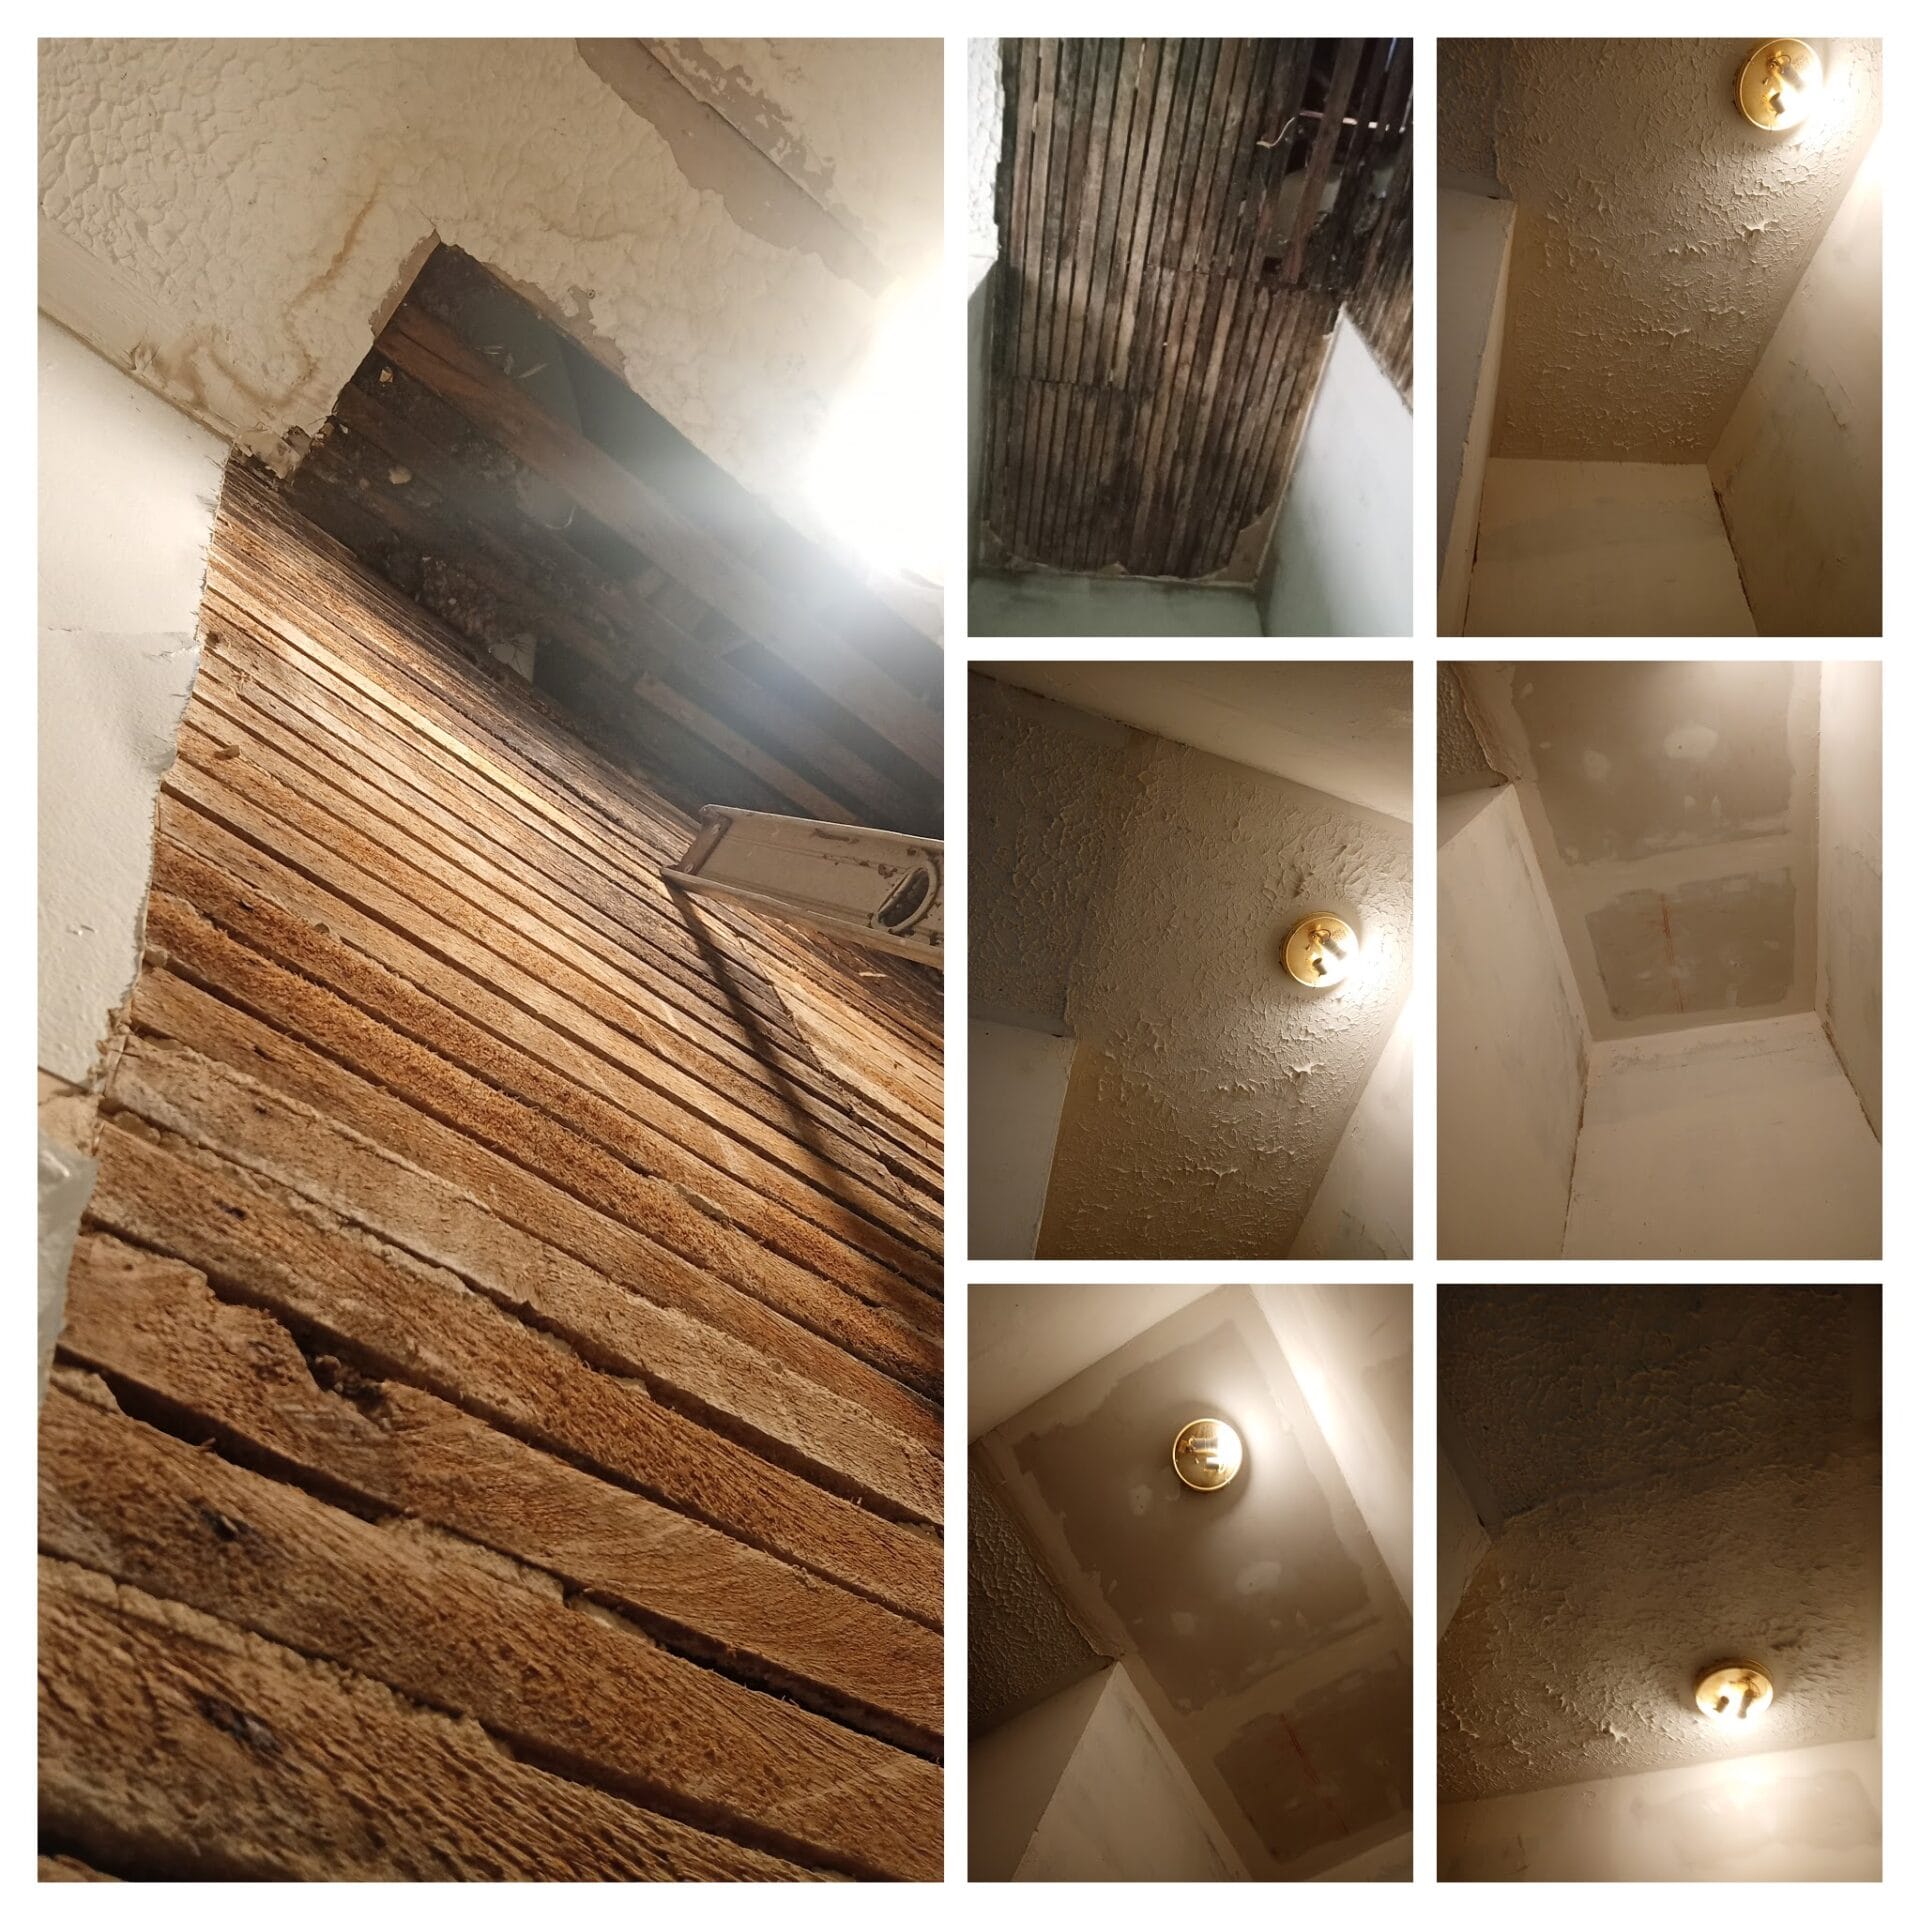
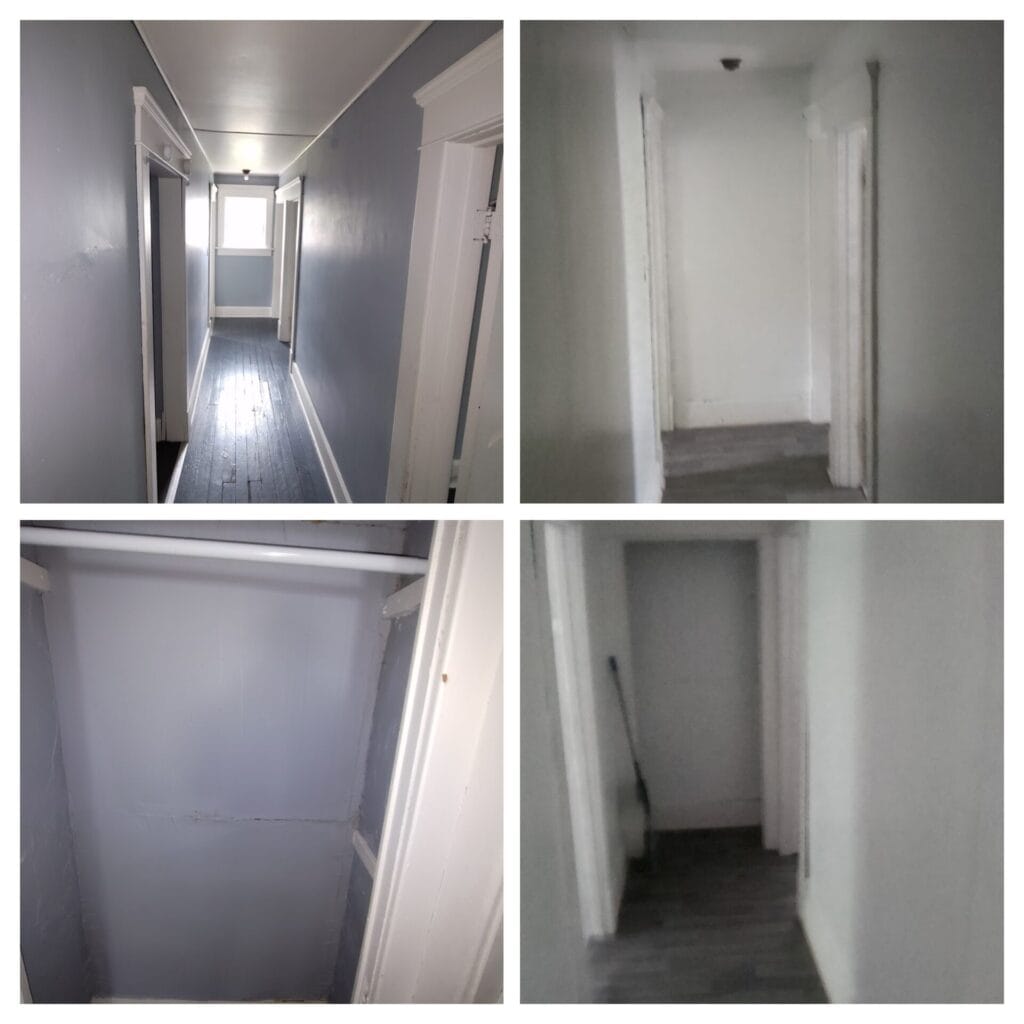
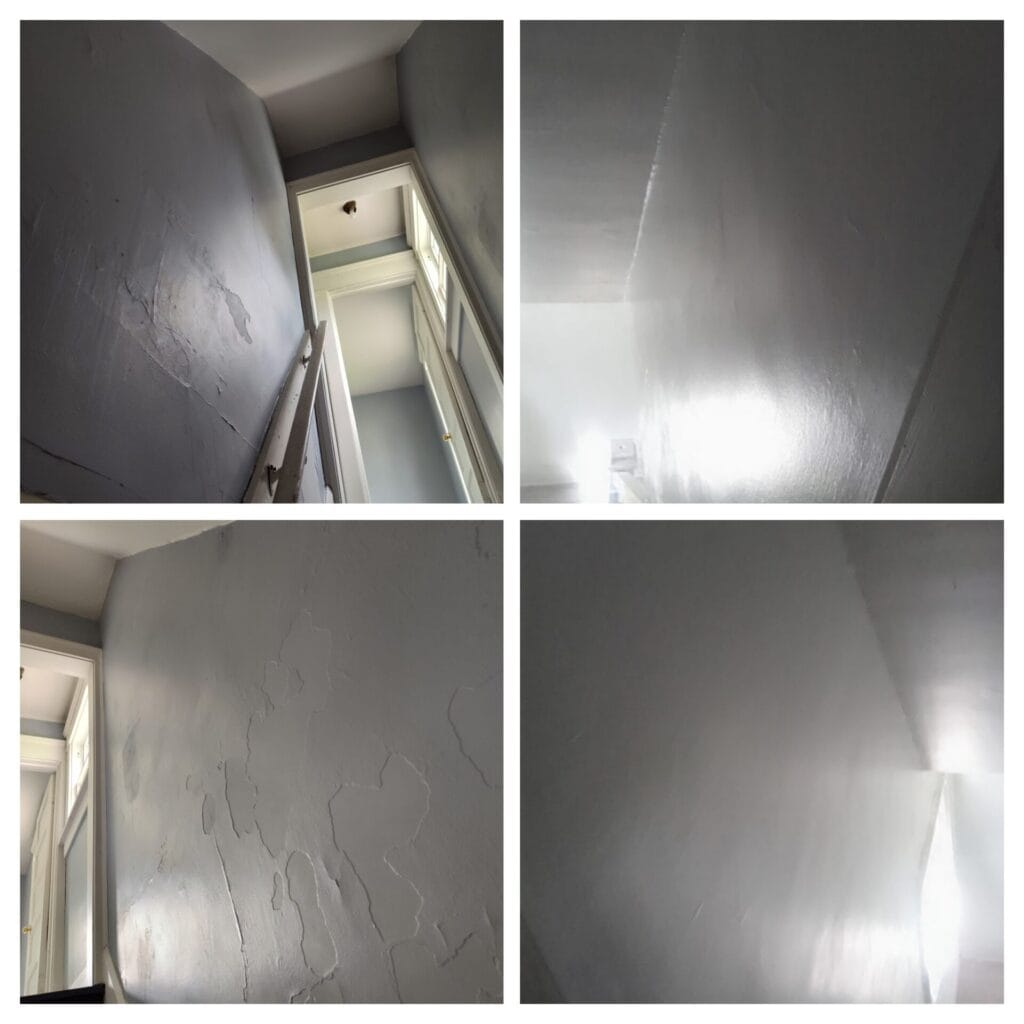
Customer had severe water damage to their second-floor bathroom, hallway and staircase ceiling and staircase outer wall. In the bathroom the customer asked us to install a new exhaust fan/light in the ceiling close to the shower and vented it up through the roof. We ran new electrical wires to the exhaust fan/light and to a new separate light switch so the bathroom light and the exhaust fan/light could be run separately. Then we hung new 1/2″ drywall on the ceiling and the customer wanted it left as a smooth finish. In the hallway we scraped down the discolored mud stomp on the ceiling, fixed any cracks that were visible, and re-mud stomped the hallway ceiling to match the rest of the existing ceiling pattern. On the stairwell we had to remove entire ceiling and a good portion of the wall. We hung new 5/8″ drywall on the staircase ceiling and mud stomp finished it to match the rest of the ceilings pattern. On the wall we hung new 1/2″ drywall and finished to a smooth finish and topped all of it off with white primer.
241 Richland Ave
Drywall patch work in the kitchen and second-floor hallway and bedroom. Fresh coat of paint and fixed the second-floor hallway closet.
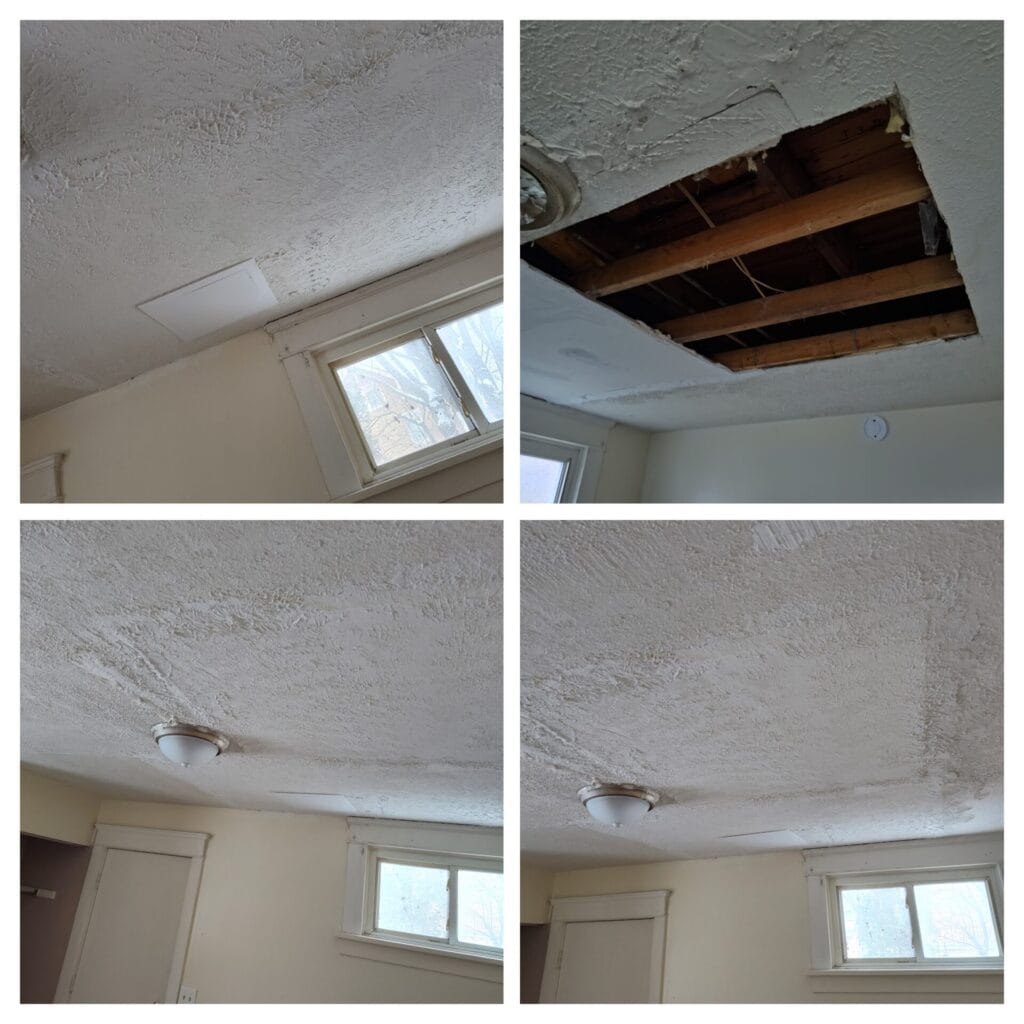
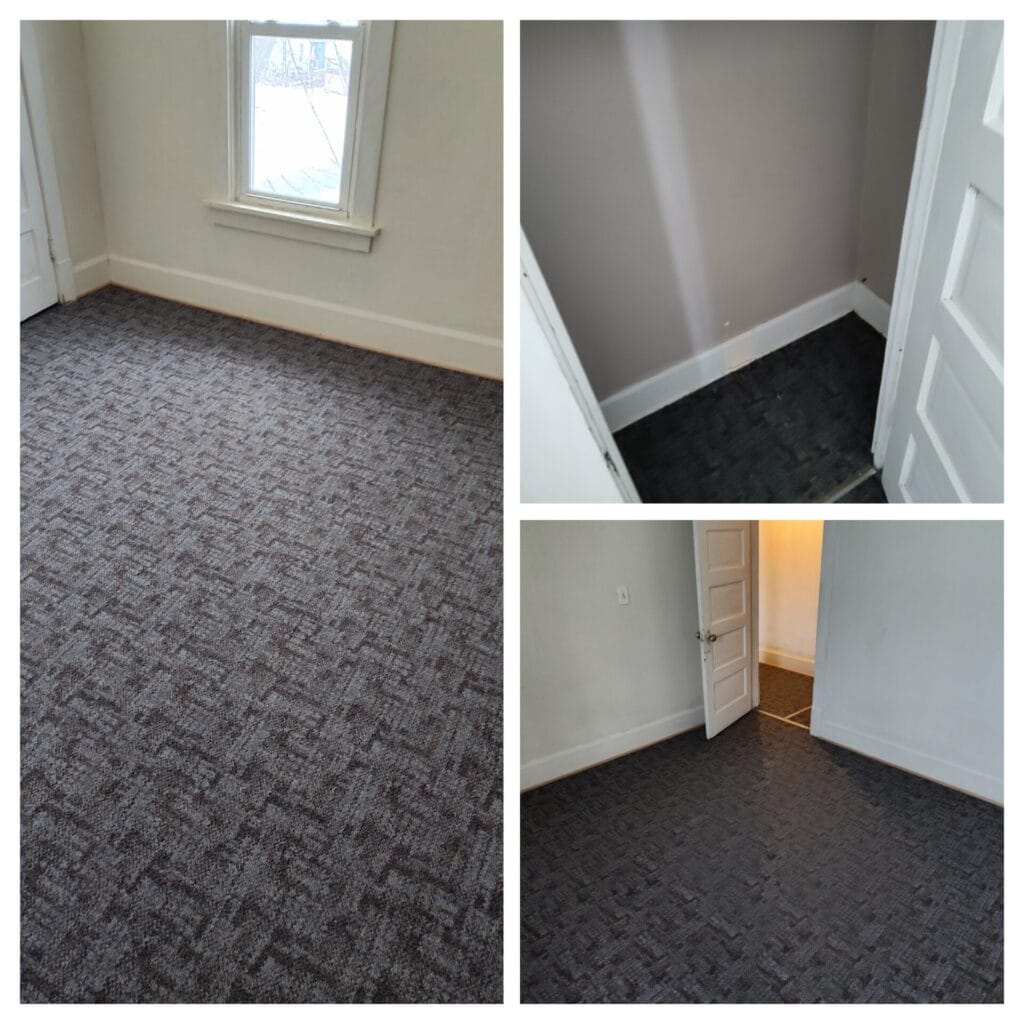
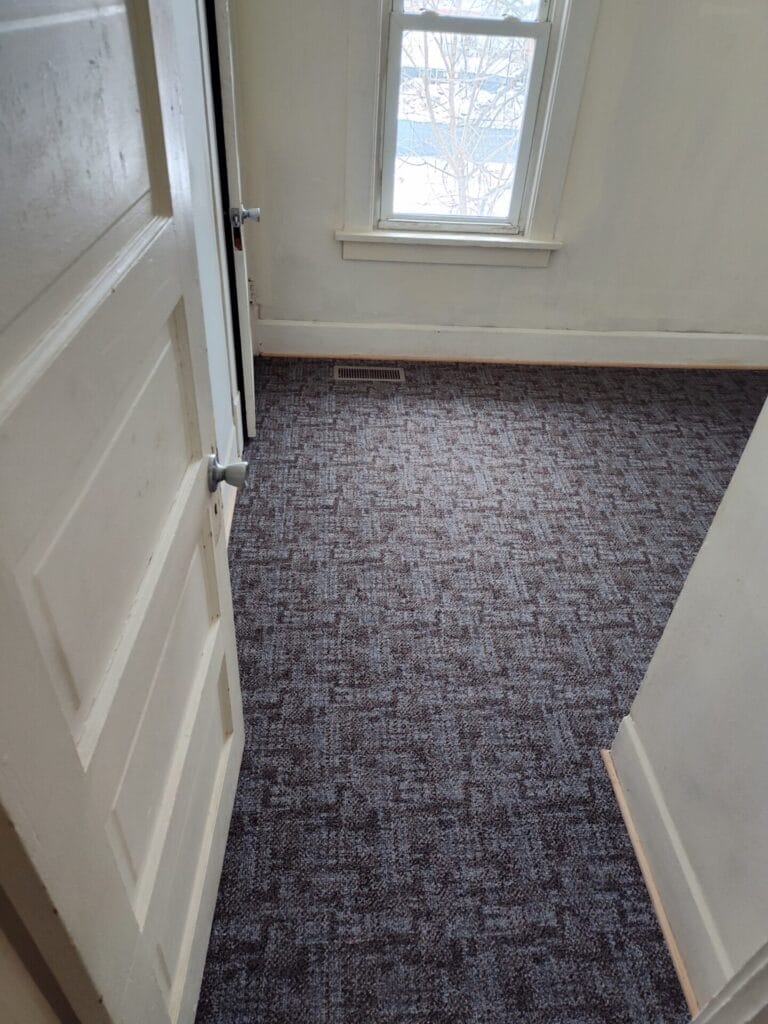
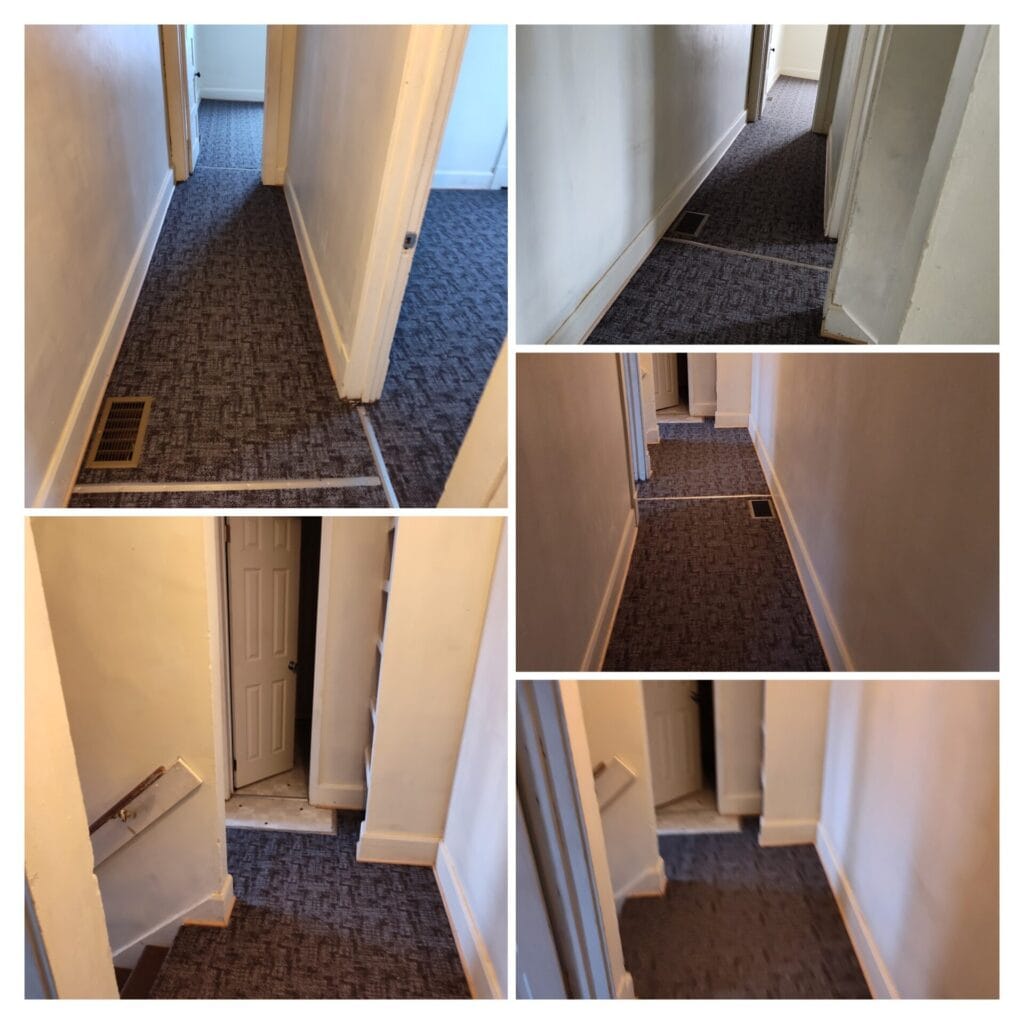
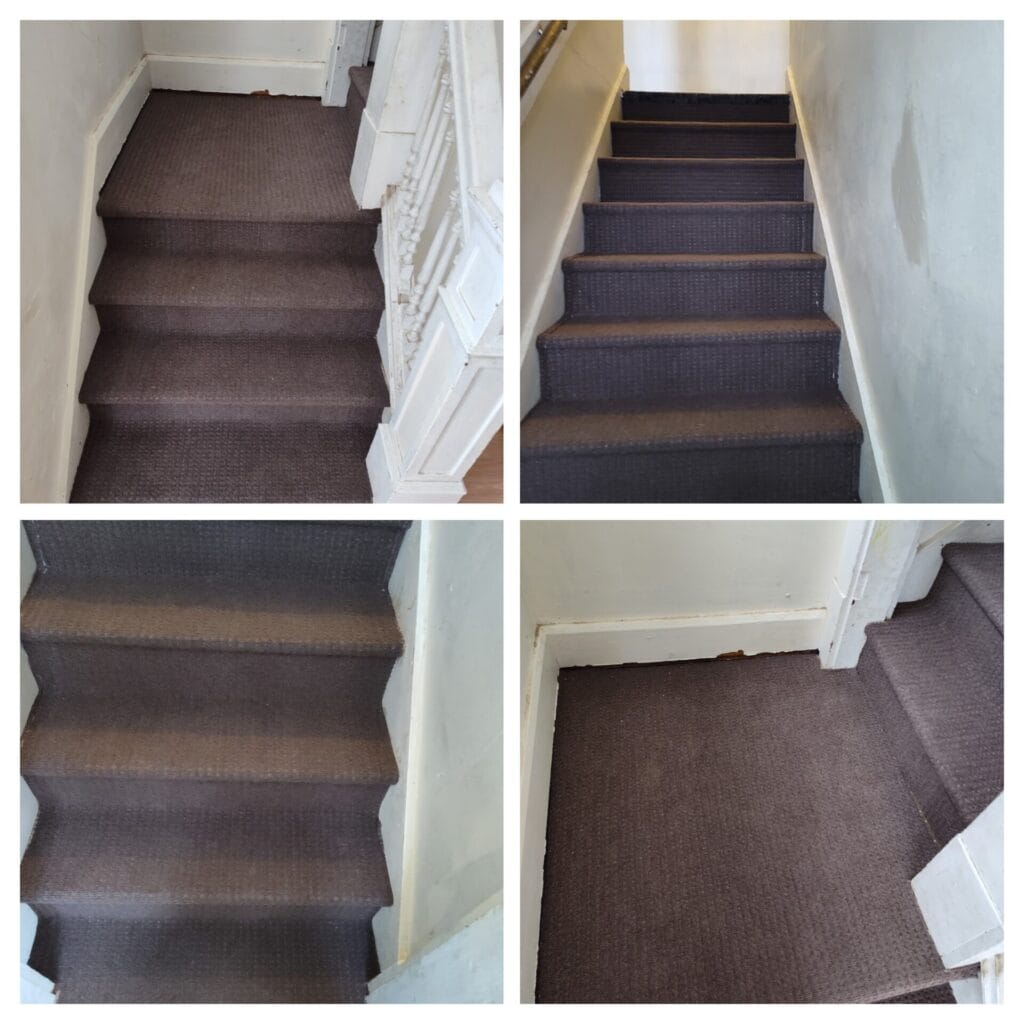
138 Weldon Ave
Installed carpet in all 3 of the second-floor bedrooms, down the hallway and the whole staircase. In the first-floor bedroom the ceiling had damaged drywall due to a leak. We removed all the damaged drywall and replaced it with new 1/2″ drywall and stomped it to match the existing pattern. Also installed an access panel in the ceiling to be able to access the plumbing for the bathroom above.

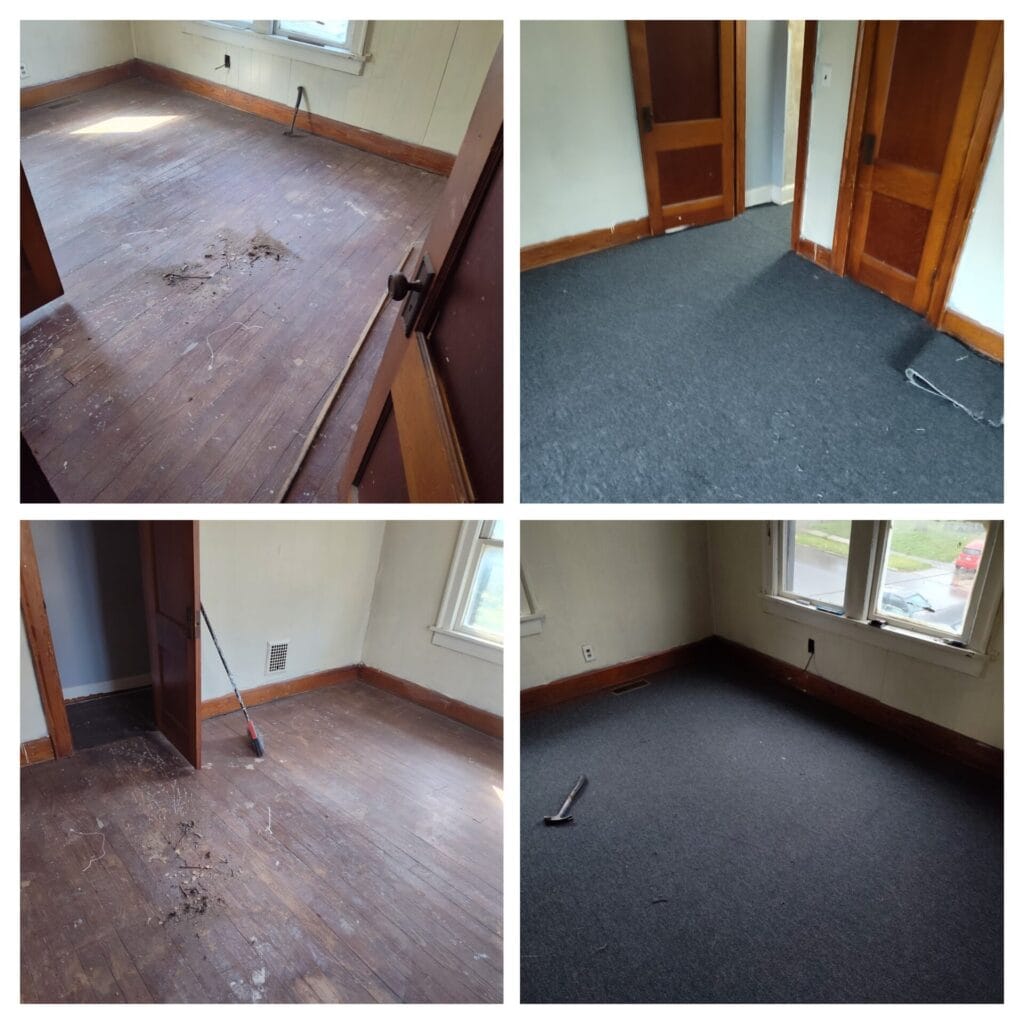
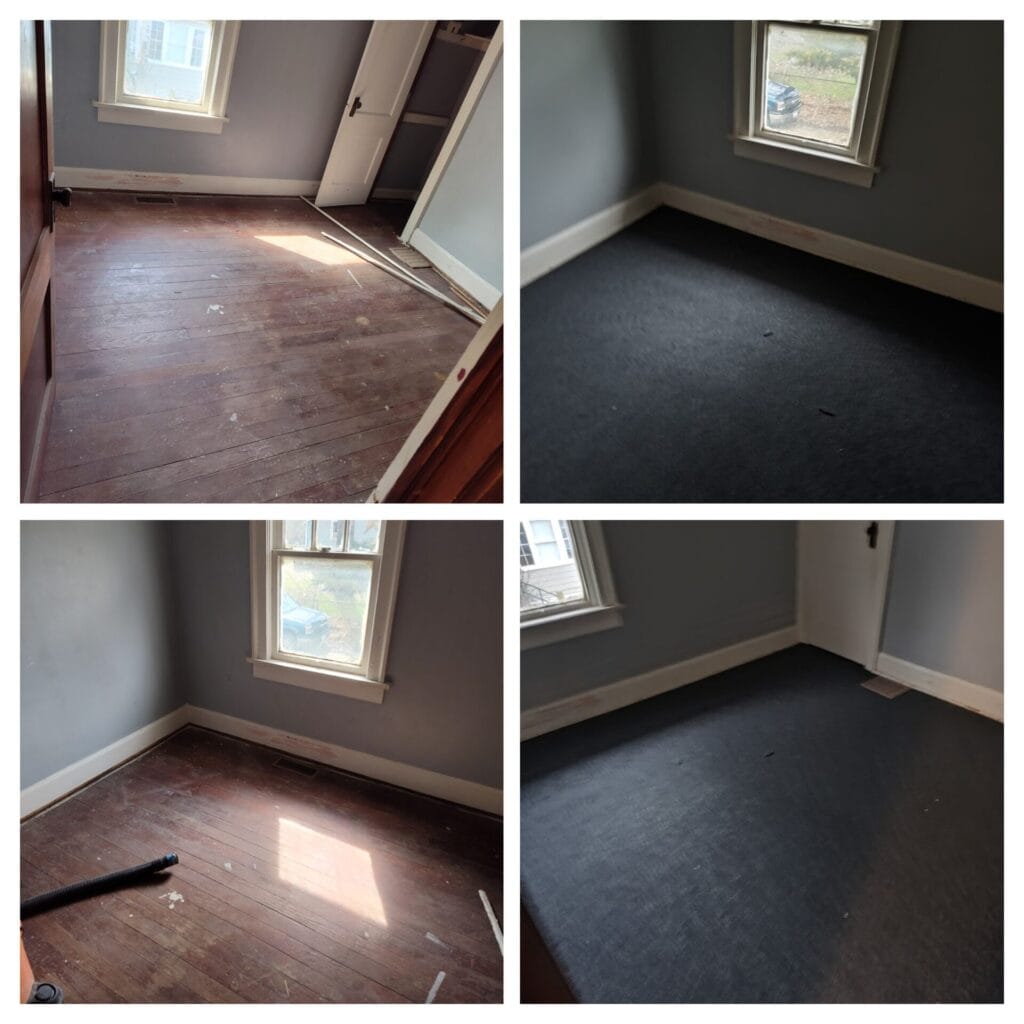
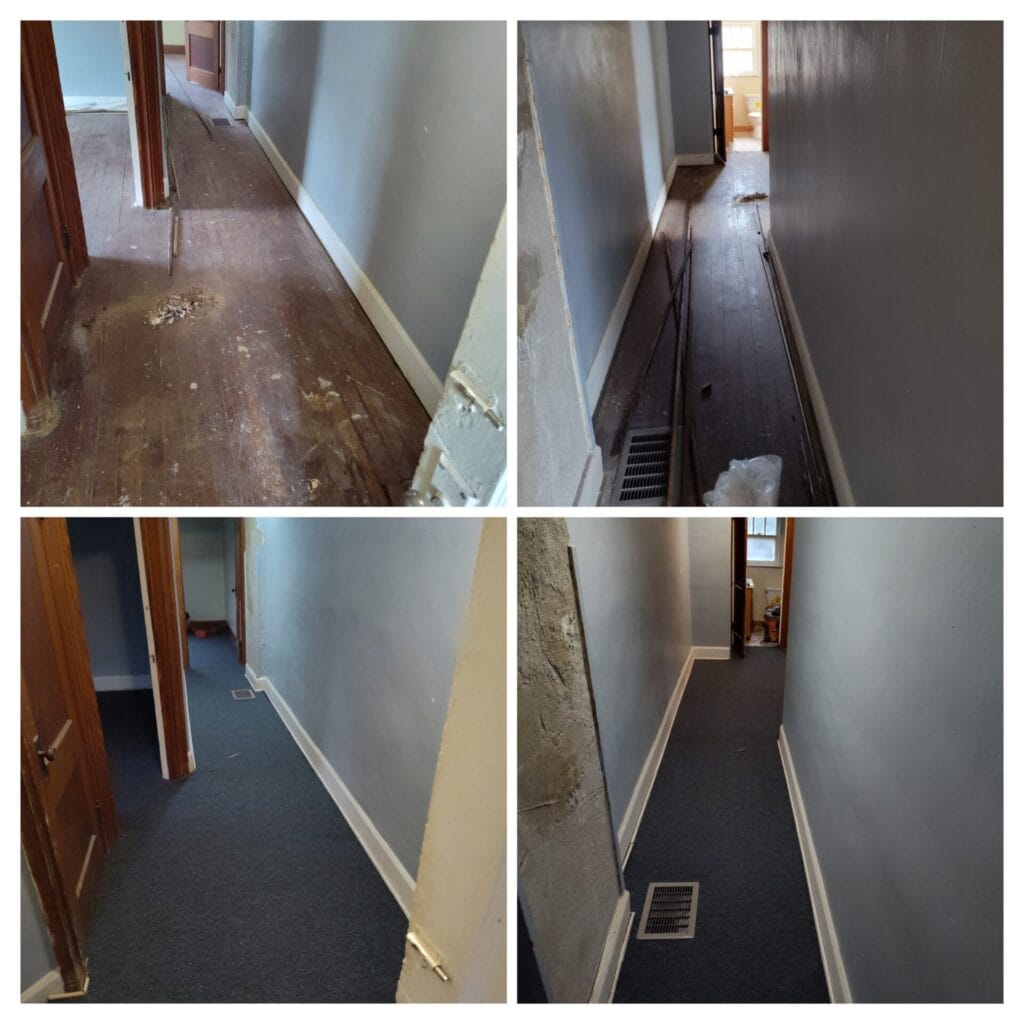
38 Rowland Ave
Installed new carpet in all the second-floor bedrooms and down the hallway.
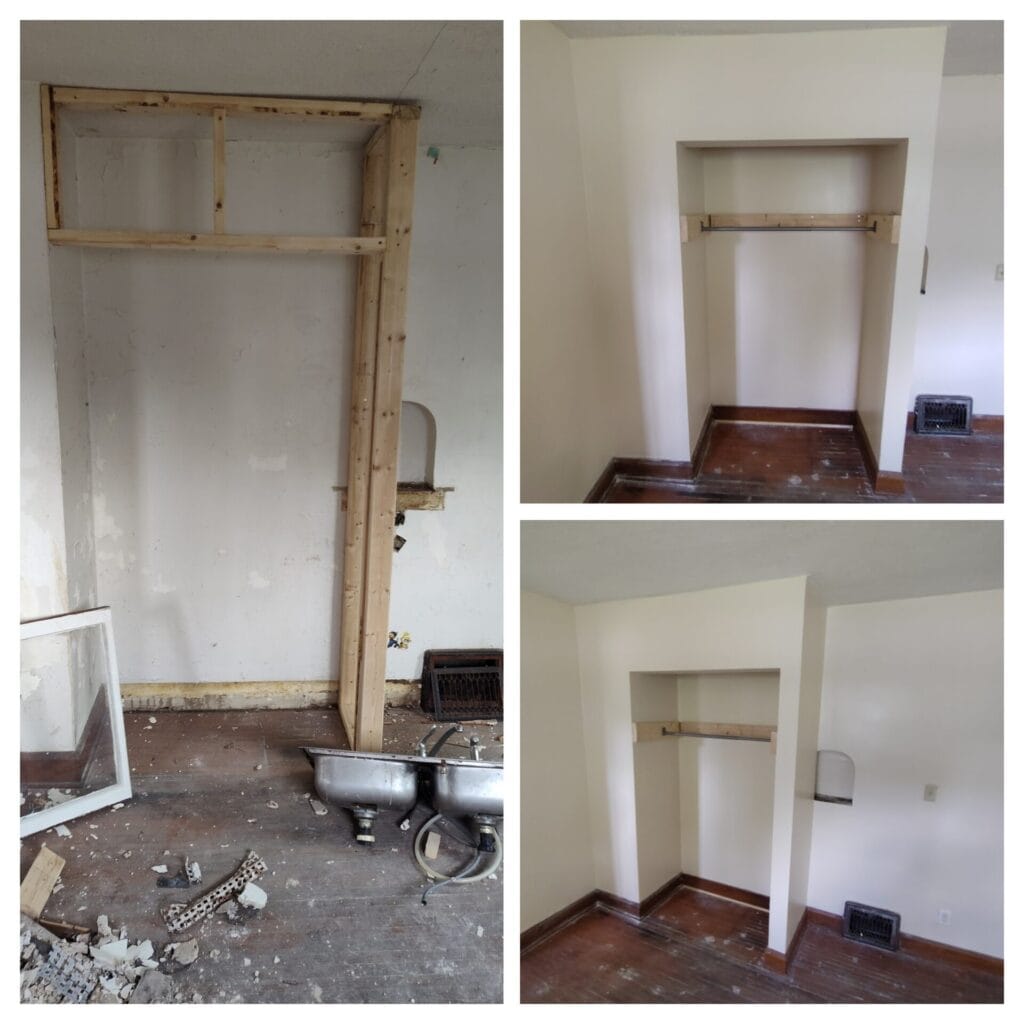
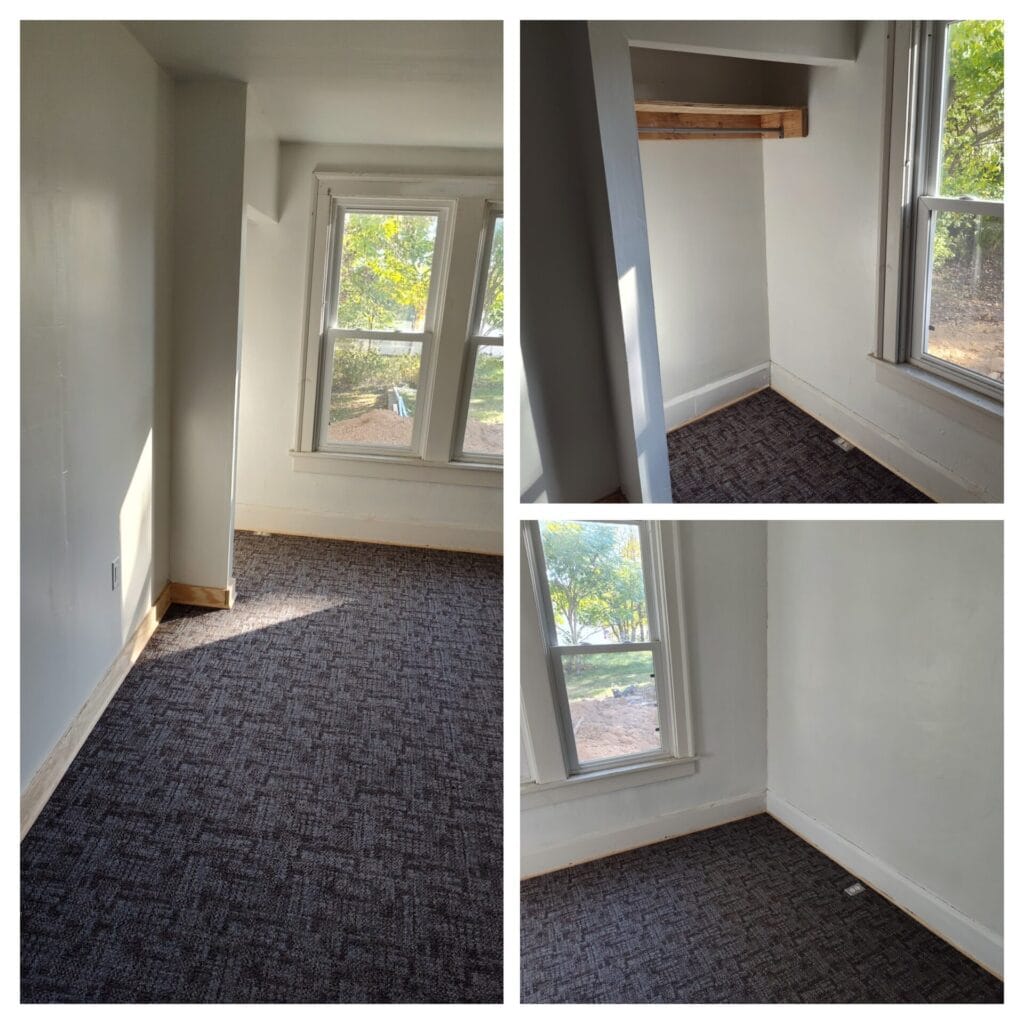
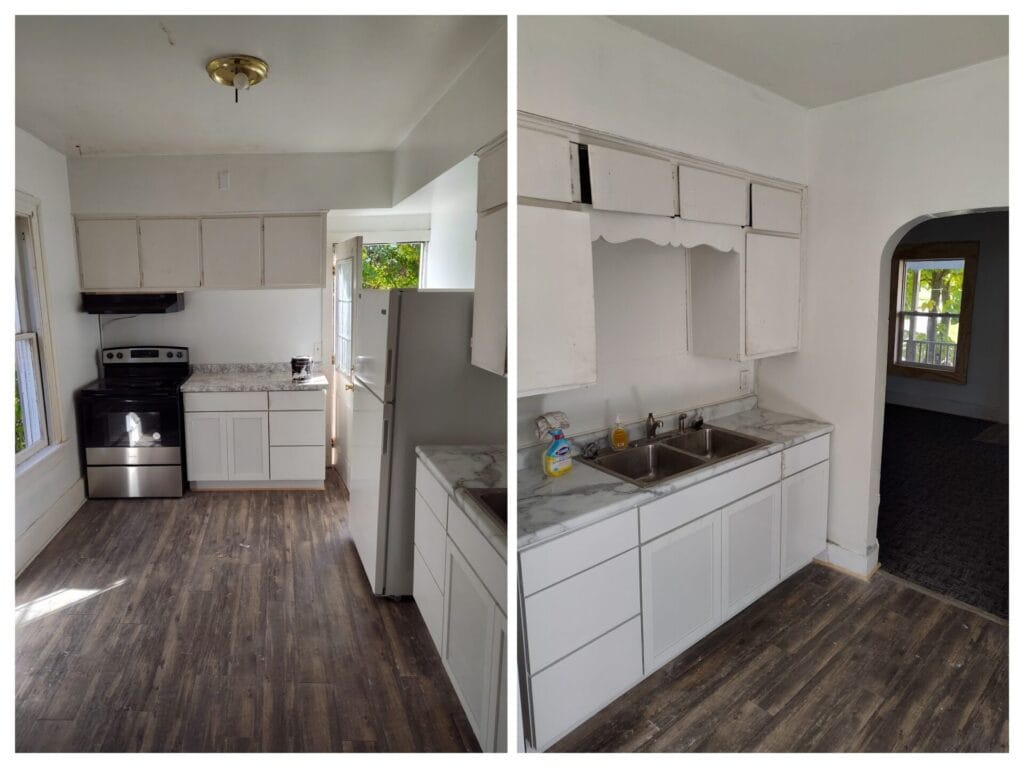
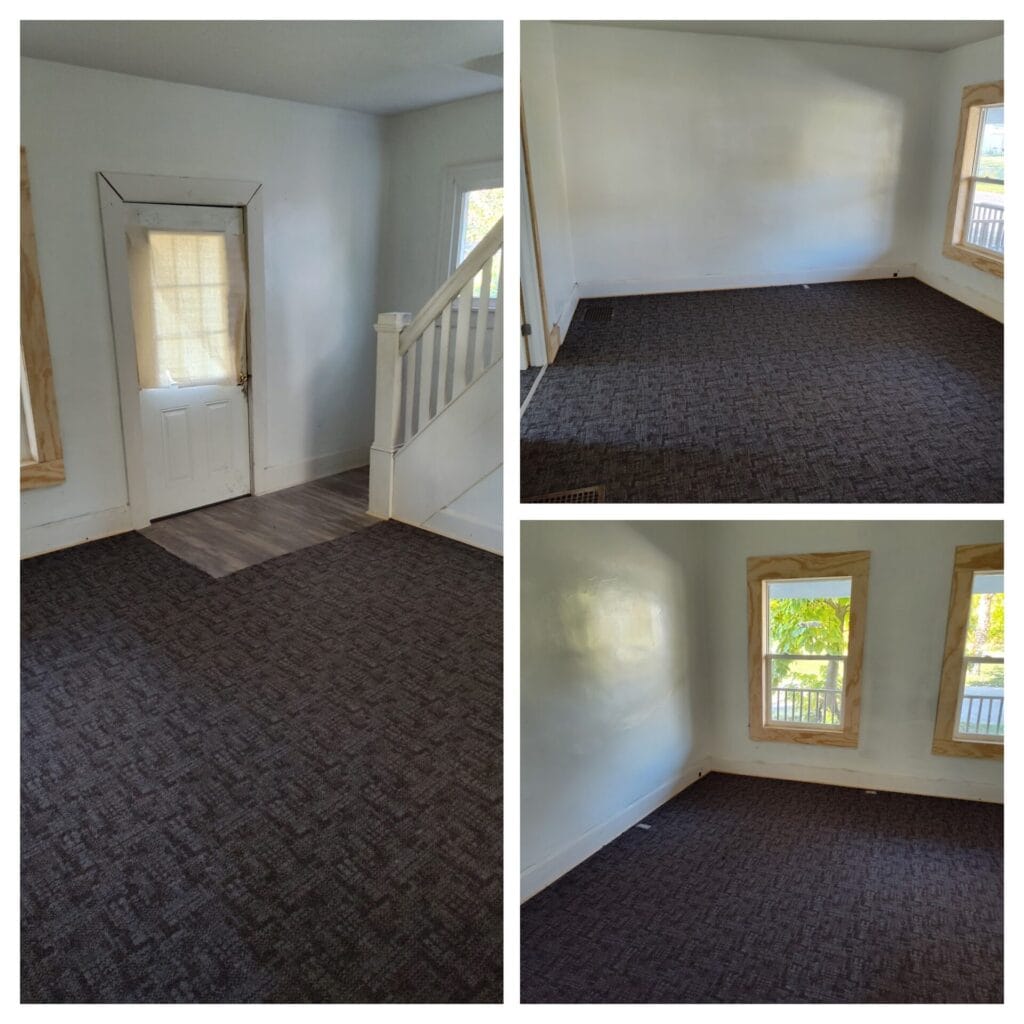
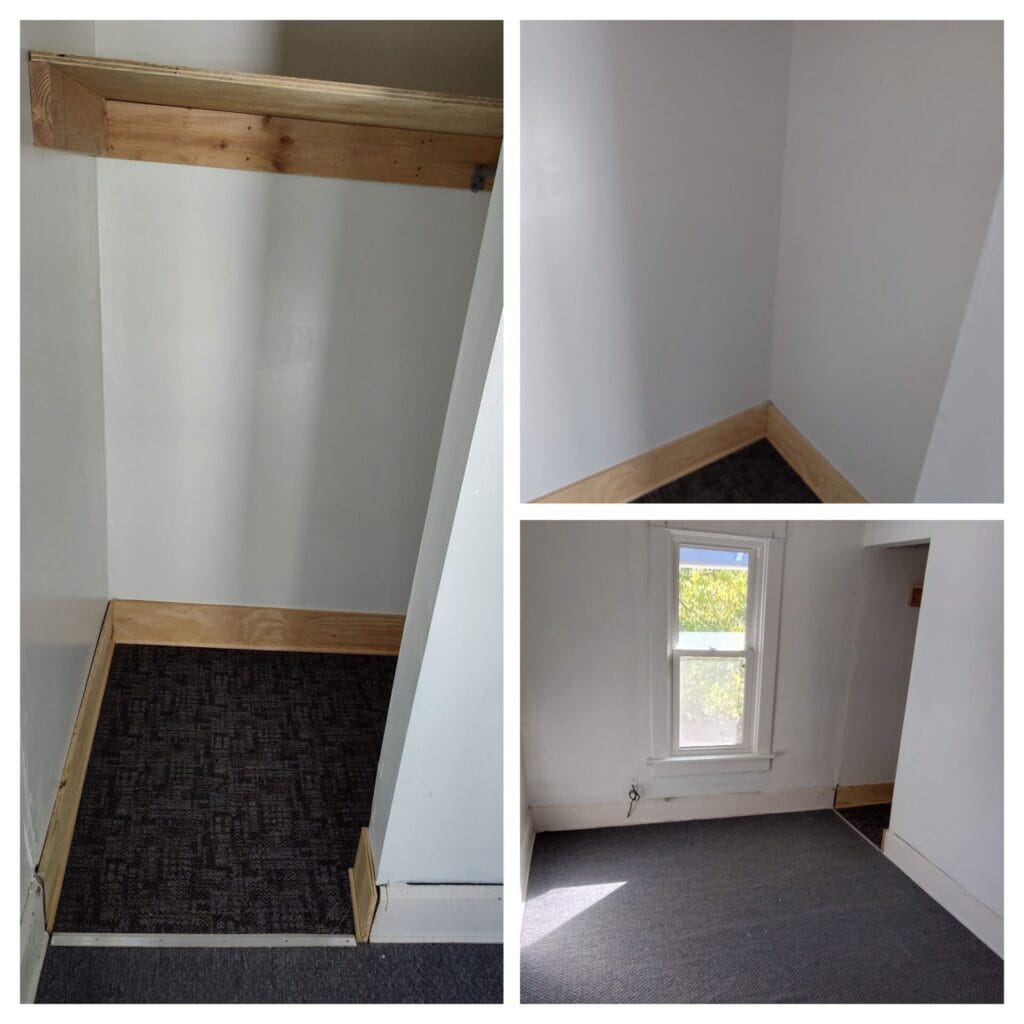
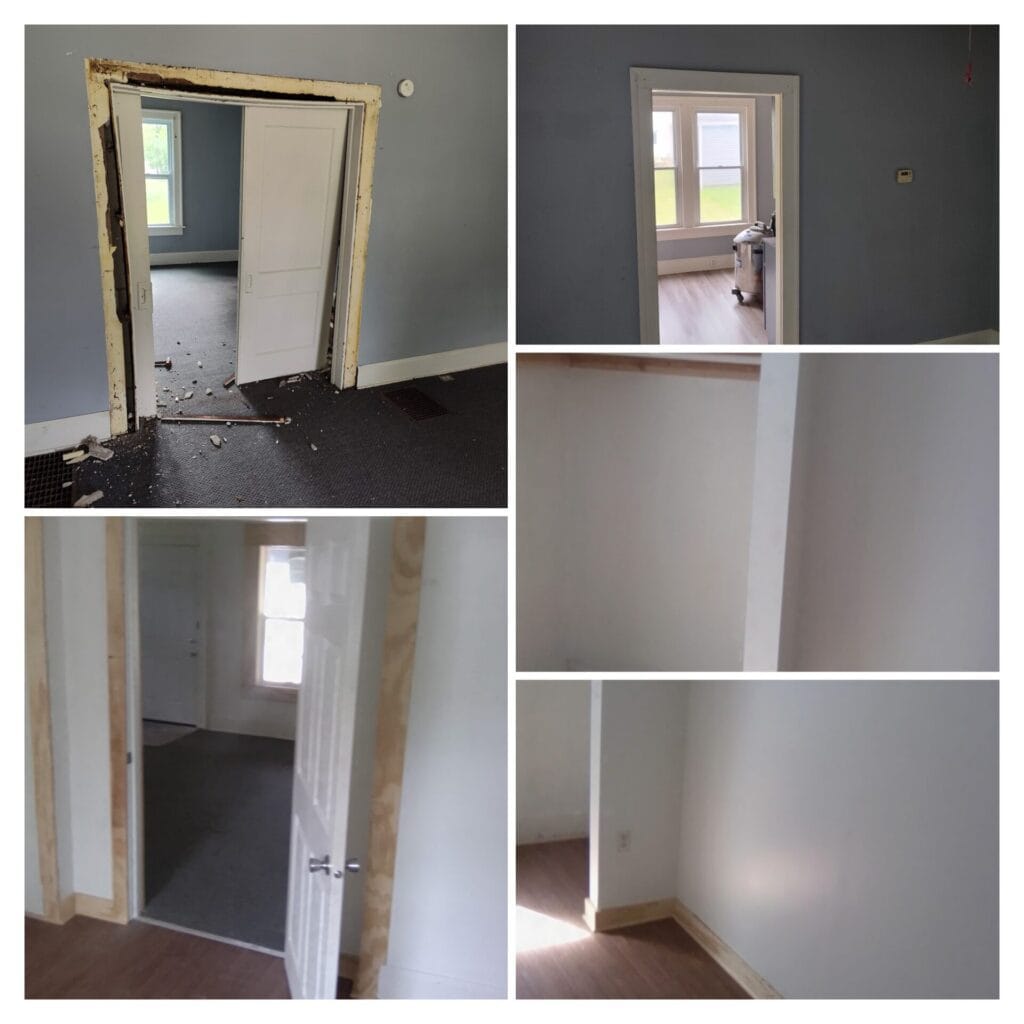
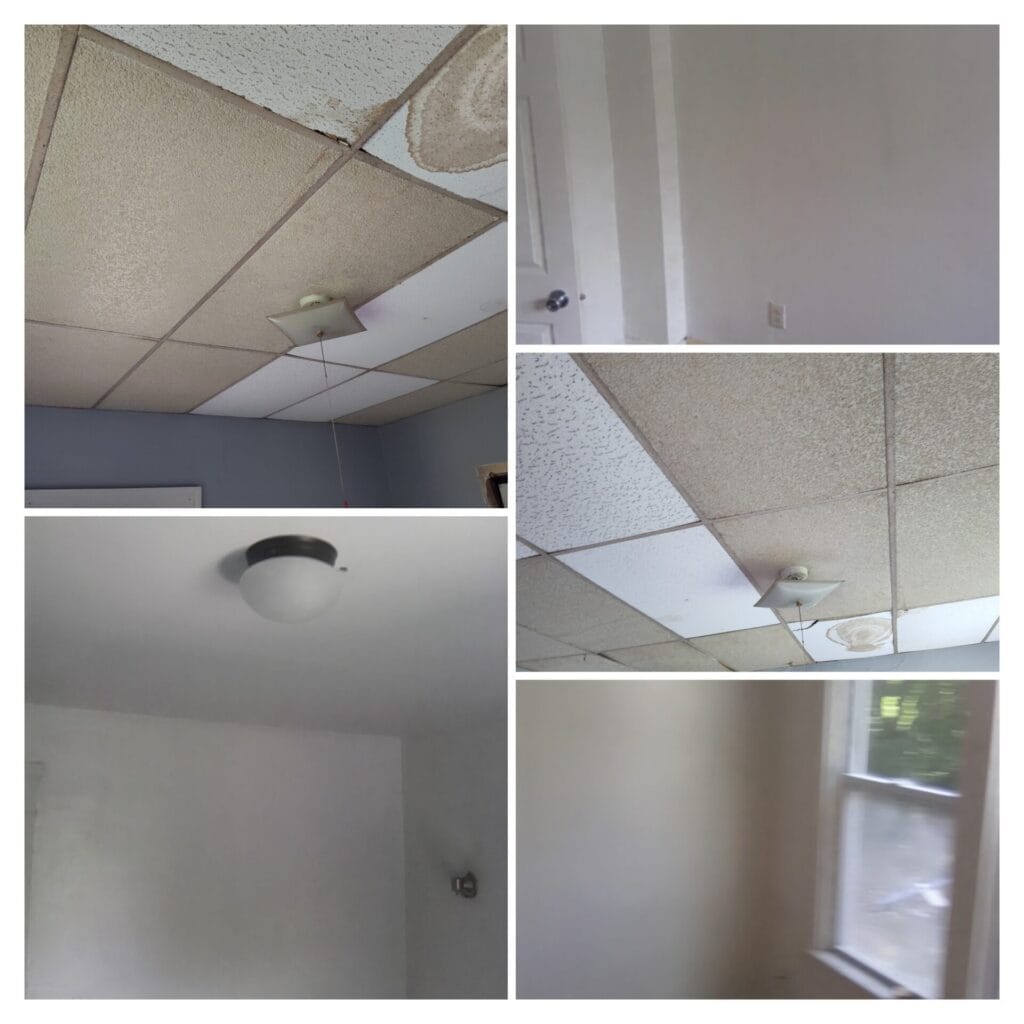
203 Buckingham Ave
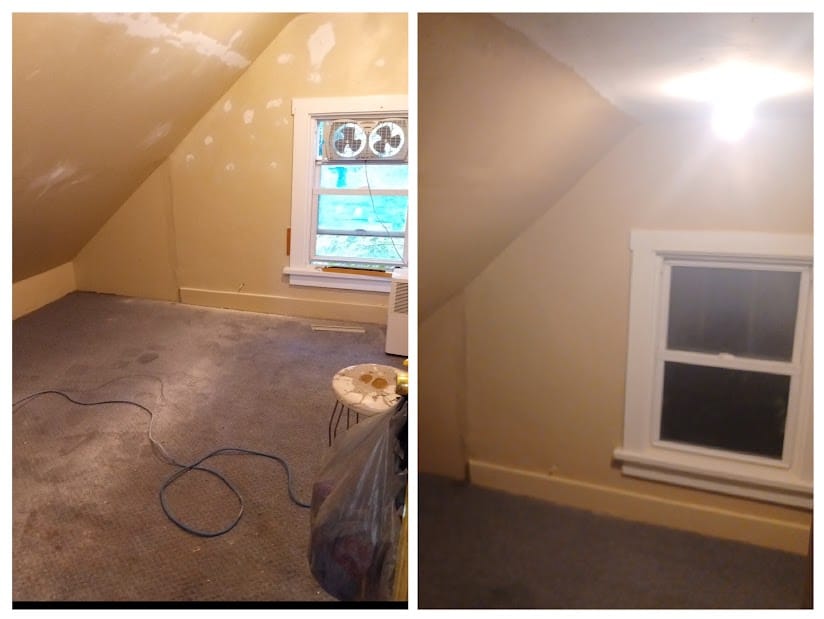
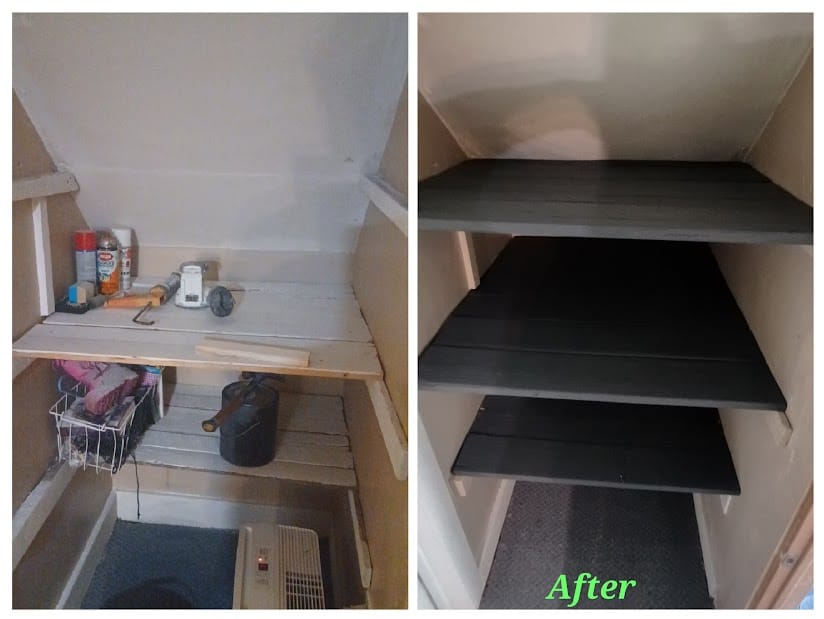
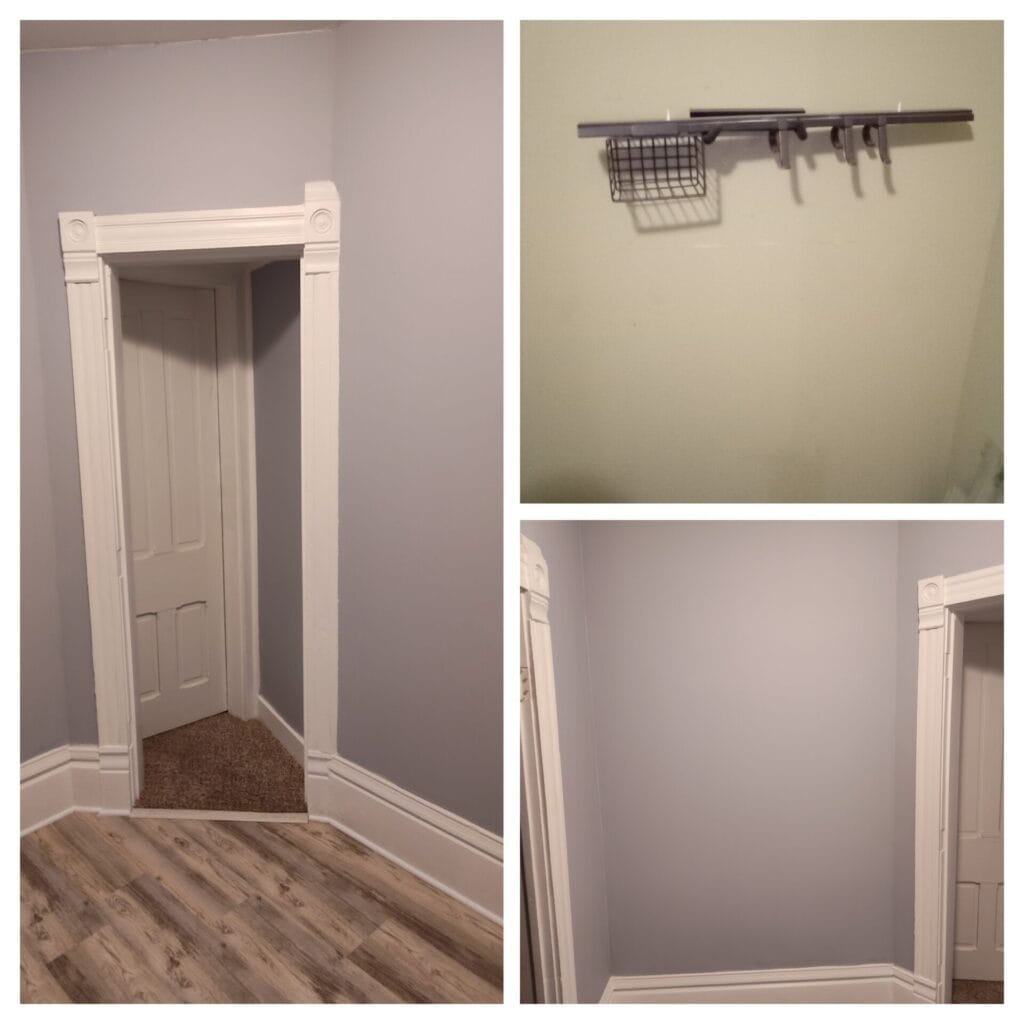
This is one side of a duplex. The customer wanted to renovate this apartment. To see the bathroom make over check out our Bathroom Remodels project page. We began by building closets in two of the second-floor bedrooms. Once we finished the framing for the closets, we hung new 1/2″ drywall on the framing and finished them to a smooth finish, then we made wooden shelving and install a new clothes rack. All three of the second-floor bedrooms got new light fixtures in the ceiling with all new wiring and light switches. The second-floor hallway we removed the window and framed it in and sealed it up with new drywall. The first-floor dining room we removed the old, damaged drop ceiling and the old, damaged drywall that was on the original ceiling above it. We had to replace two of four walls with new drywall cause the plaster was to severely damaged to be repaired. The doorway leading to the kitchen the customer wanted sealed off, so we built framing in the doorway and sealed it off with new drywall. The double sliding doors that lead to the Livingroom was removed and we framed the entrance to the size of a regular door, we hung a new bedroom door in the newly framed doorway. The new entrance was finished with new drywall and custom wood trim. We hung new drywall on the ceiling and finished it with a smooth finish adding a new light fixture with new electrical wiring and new light switch. New carpet was installed in this now bedroom and new custom handmade wood trim. The Livingroom also got brand new carpet. In the kitchen we replaced the base cabinets for the sink and added cabinets and countertop by the stove. All the windows in this unit were removed and replaced with new high energy efficient double pane windows. To finish the apartment off we painted the ceilings and walls with new fresh coat of paint.
205 Buckingham Ave
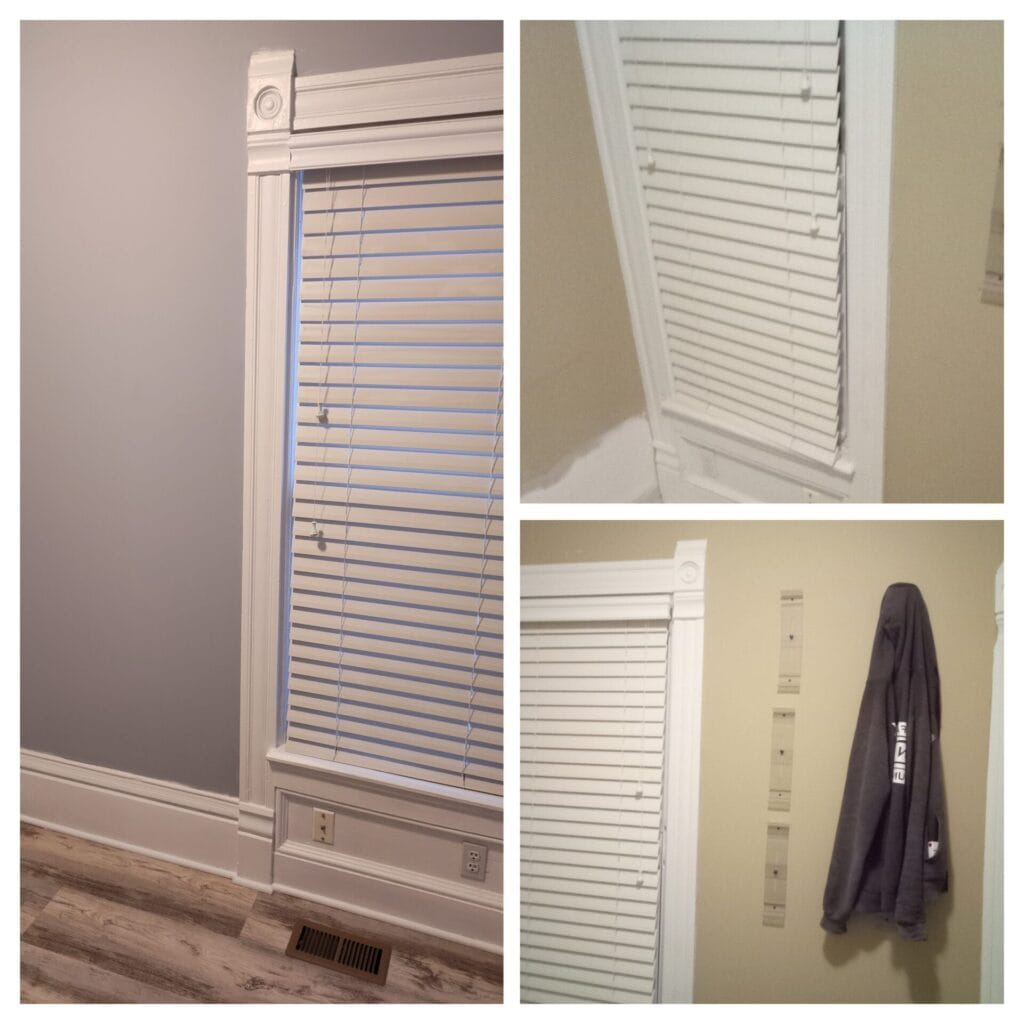
This is the other apartment of the above duplex. To see the bathroom of this apartment please check out our Bathroom Remodels page. Prety much the same as the other apartment we started with the second-floor bedrooms, building framing for closets and adding drywall to finish the closets and adding new wooden shelves and a new clothes rack. Installed new light fixtures in the ceilings of all three second-floor bedrooms with new wiring new light switches. We also ran new wiring for new outlets and installed new outlets. In the second-floor hallway we laid down new linoleum flooring and added quarter round trim, we took the hallway window out and framed it in and sealed it off with new drywall. The first-floor dining room we removed the old drop ceiling and damaged drywall on the ceiling above it and damaged plaster on the walls. We framed a new ceiling and hung new 1/2″ drywall on the ceiling and finished it with a smooth finish and added a new light fixture and new wiring to a new light switch. There was a doorway that led into the kitchen, but we framed it in and sealed it off with drywall. The double door entrance that leads to the Livingroom we removed and framed it in for a regular bedroom door. We then hung a new bedroom door in the new framed entrance and finished the new framing with new drywall and door trim. Two of the four walls got new drywall hung on them and we built framing for a closet and finished it with drywall and put new wooden shelves and a new clothes rack in it. Laid new wood grain linoleum on floor and new custom base trim. We moved onto the Livingroom which all we had to do was replaced a few outlets and added new window trim. All the windows in the apartment were removed and replaced with new energy efficient double pane windows. We finished the apartment with new fresh coats of paint.


485 Church St
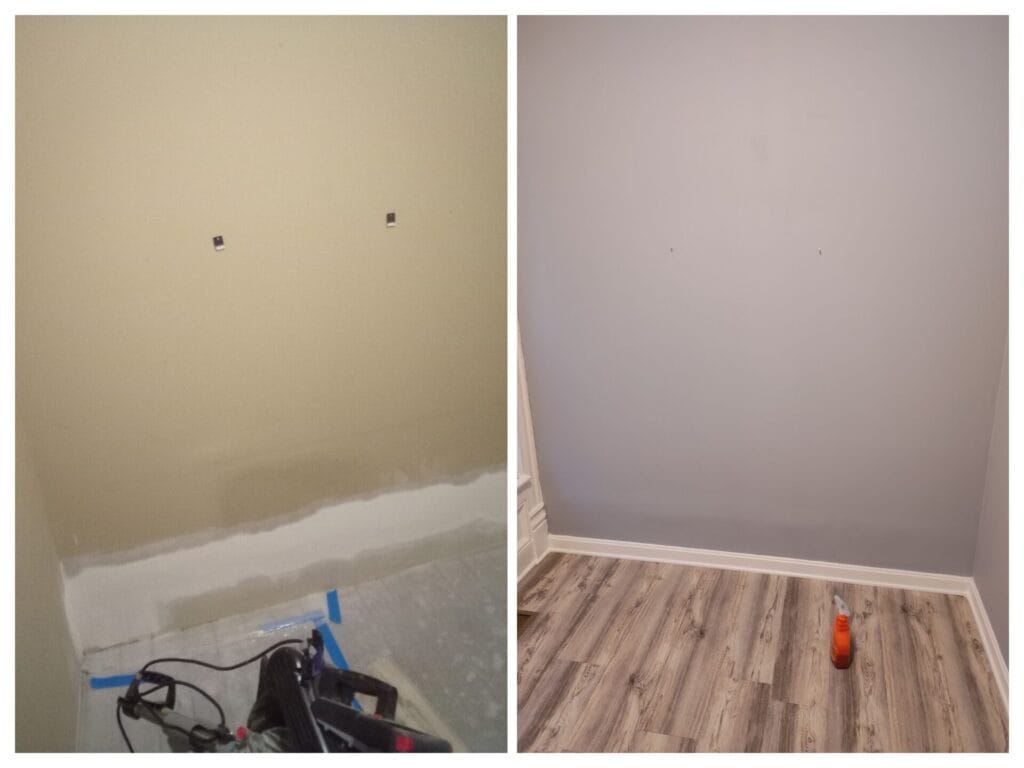
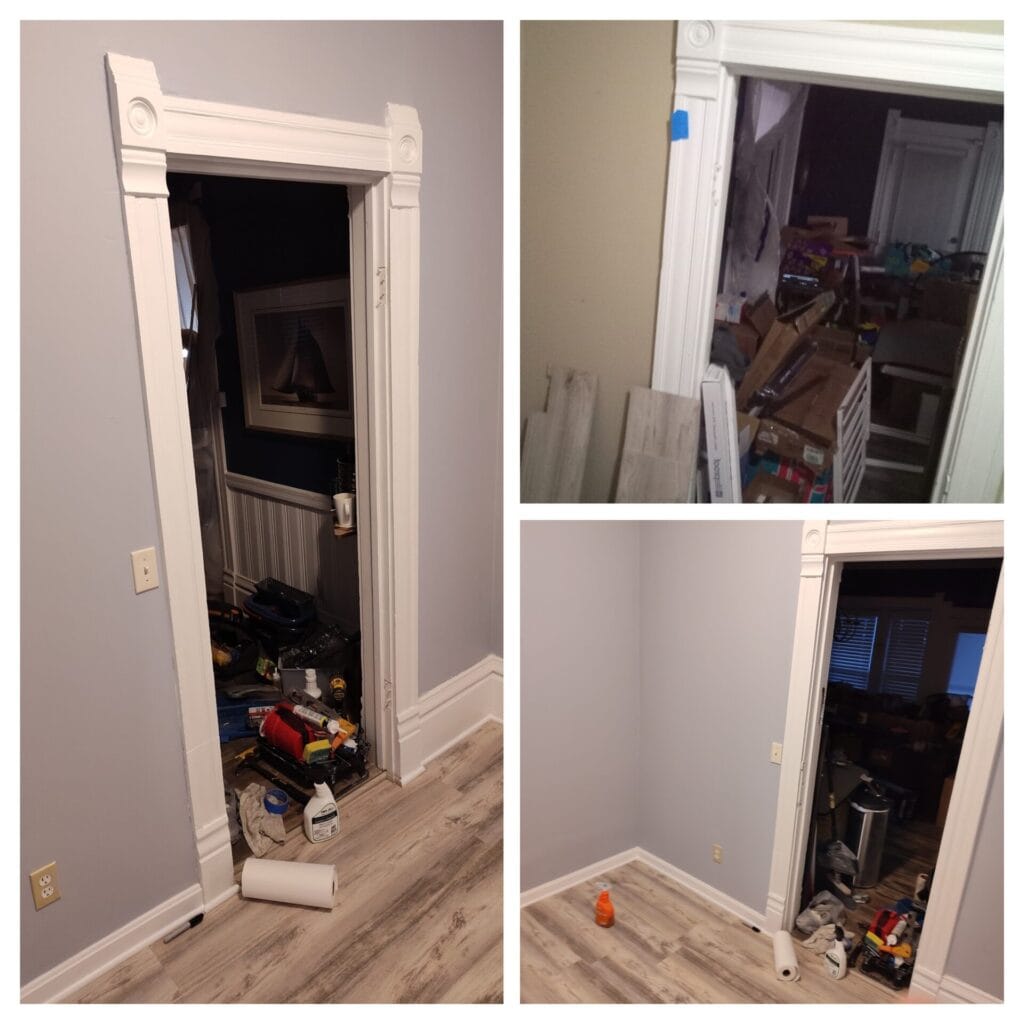
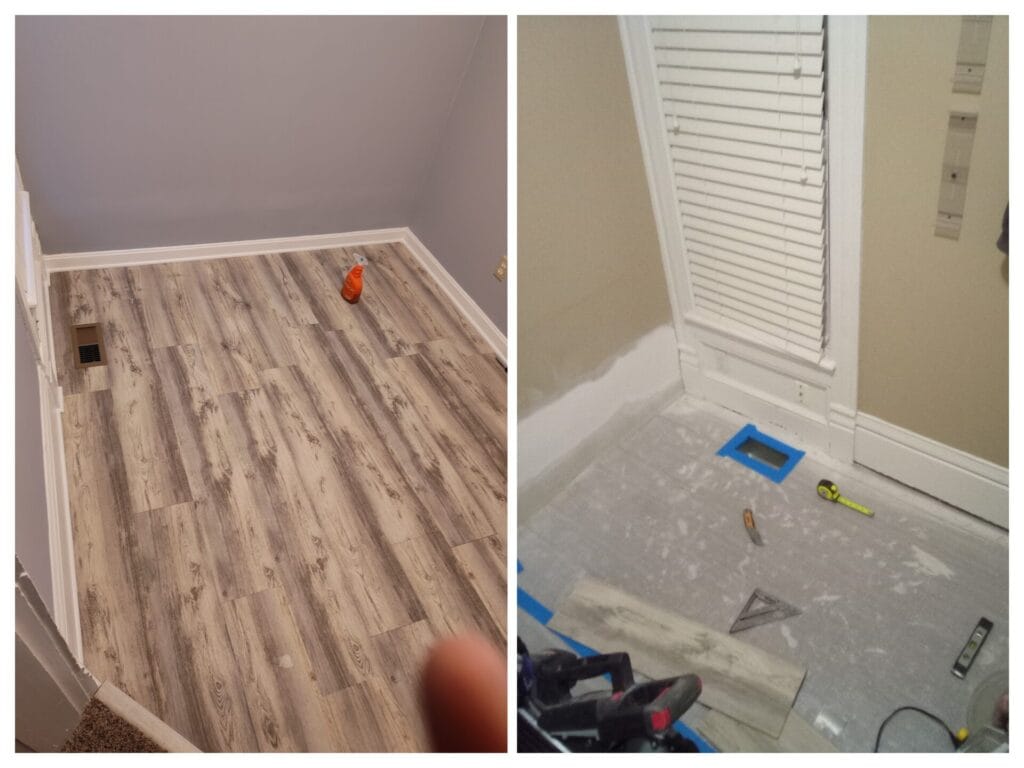
The Customer needed their home office repaired due to water damage from the second-floor bathroom leaking. They had another contractor come in before us, the new flooring was not done correctly as they didn’t remove the quarter round base trim, they just butted the new flooring up to it. So, we removed all the flooring and quarter round trim. We went and made sure the sub-floor was ready for the new flooring to be re-installed by making sure all staples and nails were removed so they wouldn’t poke through the new flooring. WE then laid new moisture barrier underlayment on the sub-floor and reinstalled the wood laminate flooring and made sure it had 1/8″ gap for expansion/retraction all the way around the outside edges. We installed new elegant colonial base trim all the way around the office followed by new quarter round trim. The one doorway trim had a whole in it from something or some small animal eating at it, this style trim waws old hand crafted that no store could match its design, so we had to repair it and that’s what we did and looked brand new. We then patched holes in the wall with drywall mud and fixed spots that someone didn’t finish. Once all the patch work was done, we sanded everything to nice and smooth finish we painted the ceiling, walls and trim with fresh coats of paint.
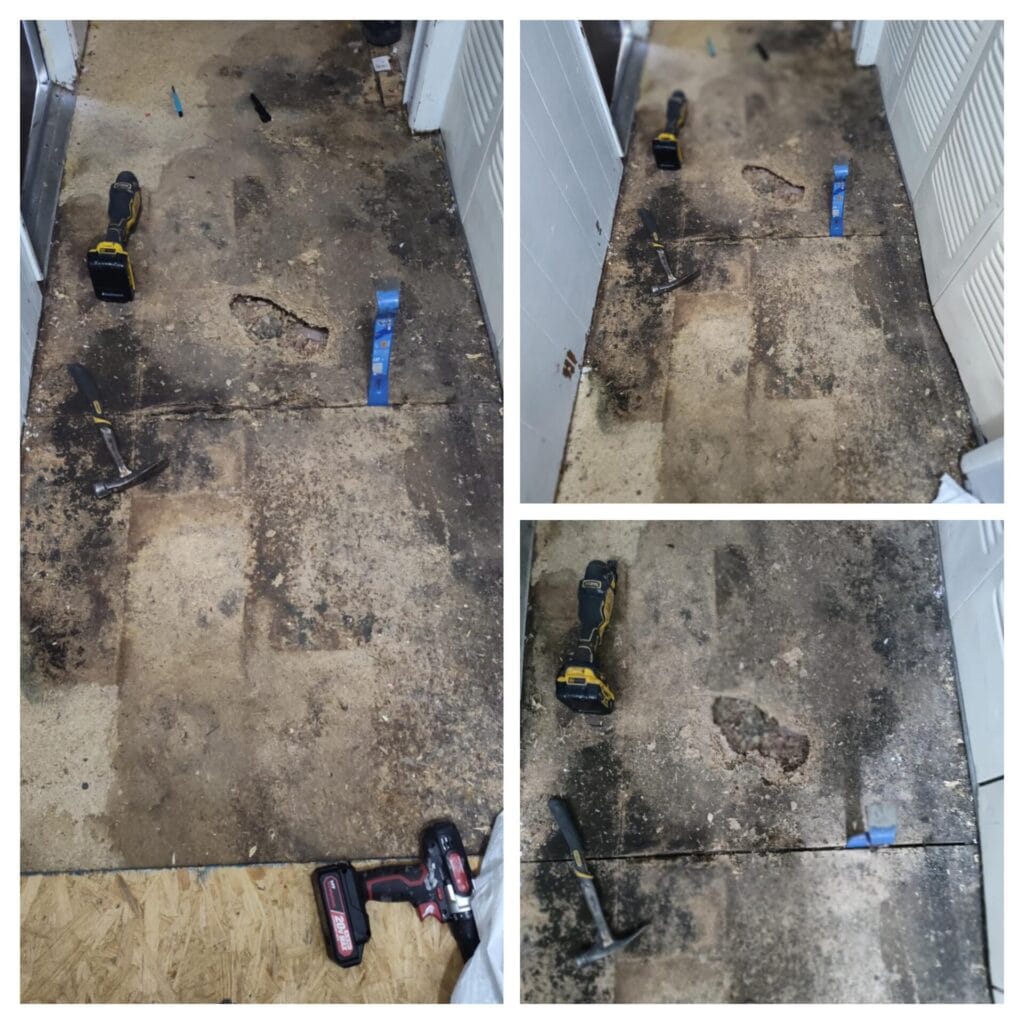
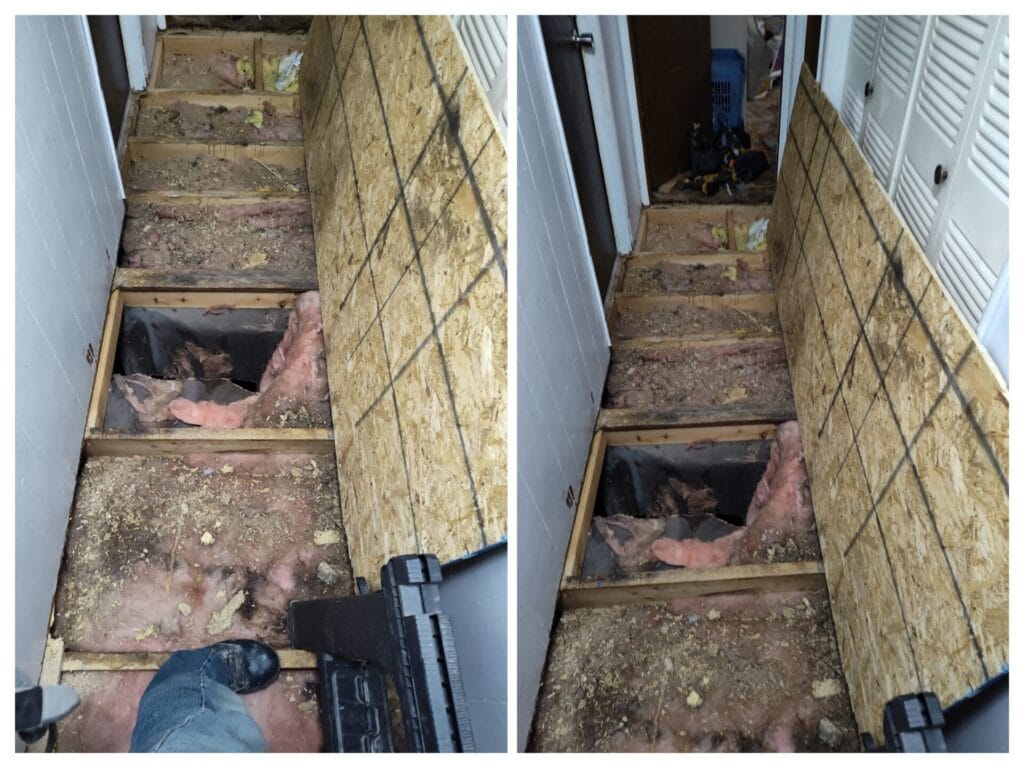
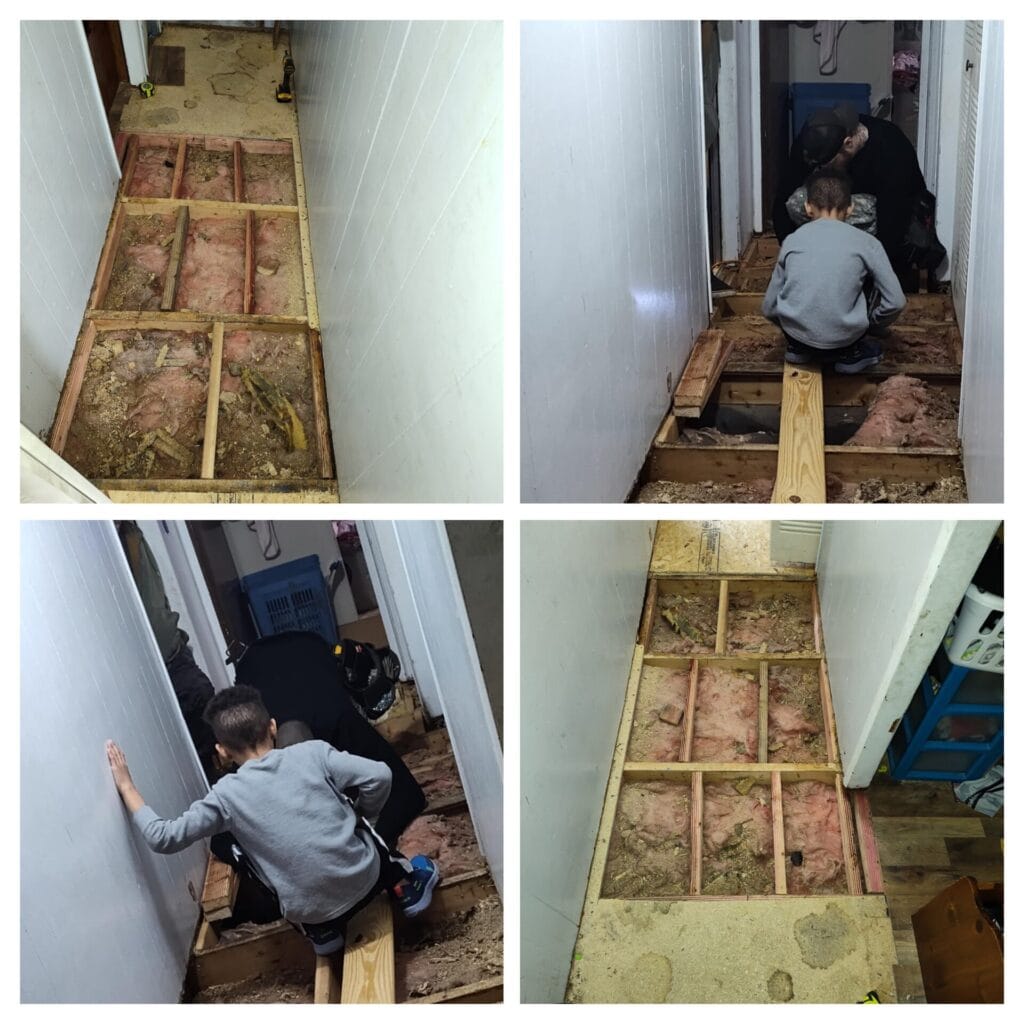
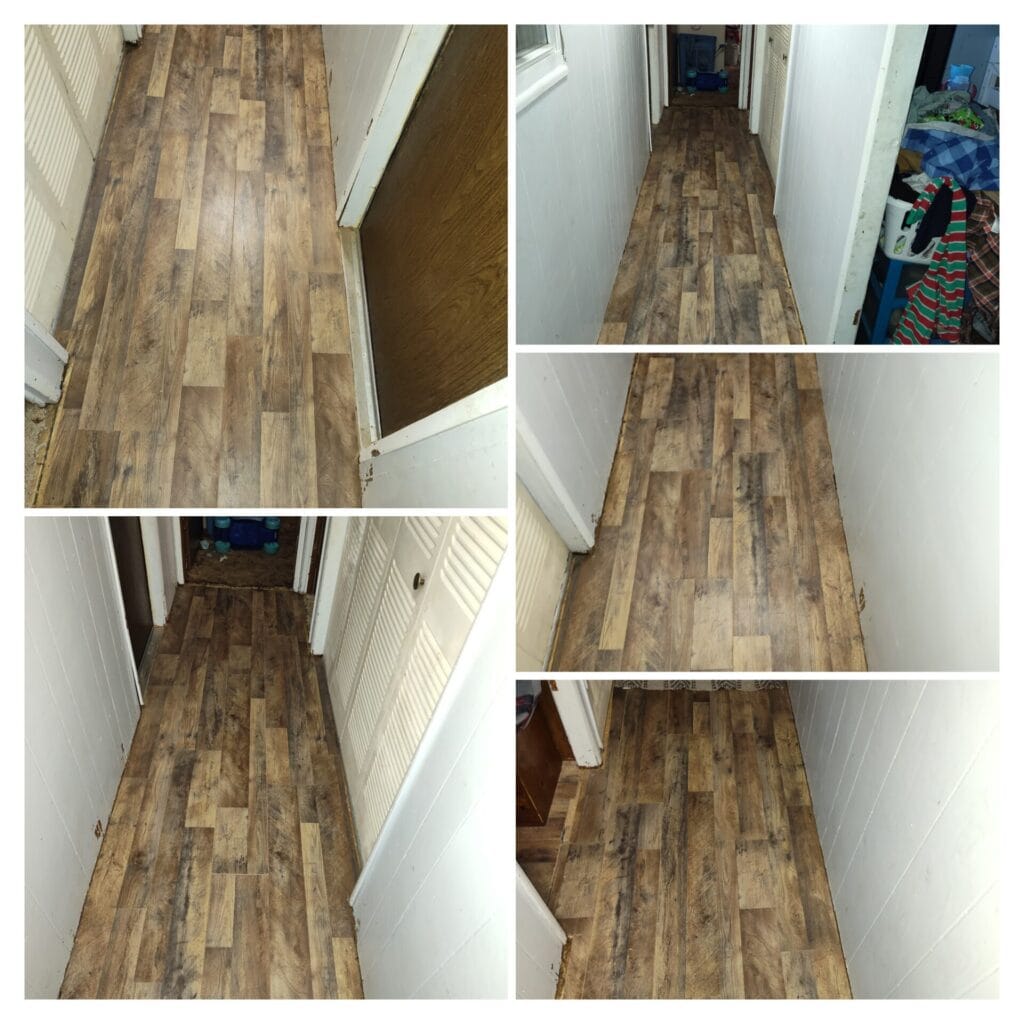
132 Bellwood Dr.
Hallway floor was in serious need of replacement due to water damage. We removed the laminate flooring and the temporary plywood sub-floor, when we got to removing the damaged sub-floor we came across black mold on a section of the old sub-flooring so we treated the floor joist for black mold with mold killer. Once, all the mold was treated and appeared to be dried out we removed as much as we could so it wouldn’t grow on the new sub-flooring. We began adding new 2×4 bracing in-between the floor joist in a H pattern the whole length of the hallway, once the bracing was done we laid new sub-flooring down and made sure it was level with the existing sub-flooring it butted up to, we began re-laying the laminate flooring.